

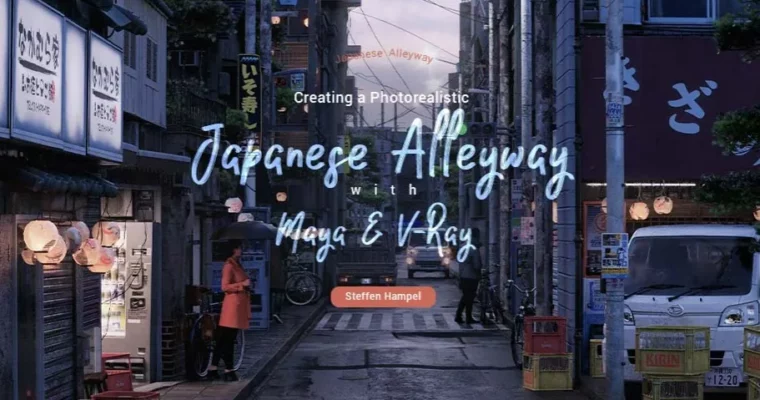
Creating a Photorealistic Japanese Alleyway by Maya & V-Ray by Steffen Hampel

Actual Duration:6h 24m
Release date:2021, April
Publisher:Wingfox
Skill level:Intermediate
Language:English
Exercise files:Yes
Software:Maya, V-Ray
Course URL:https://www.wingfox.com/c/8342
Want a 3D environment that doesn’t scream CG? This course walks you through a full Maya and V-Ray workflow to build a photoreal Japanese alleyway, from reference and blockout to shading, lighting, and final polish.
🎯 What you’ll learn
- Fundamentals of procedural shading for environments
- How to spot and fix the details that make renders look CG
- Fast, production-ready asset creation workflows
- How to build and reuse smart shaders efficiently
- Integrating Megascans assets with custom textures
- ACES color management setup for predictable renders
- Lighting, rendering, and post-production for a polished final image
✅ Requirements
- Skills: Basic familiarity with Maya UI and modeling, understanding of UVs and PBR textures
- Tools: Maya, V-Ray for Maya
- Hardware: Mid-range CPU / NVIDIA GPU for V-Ray rendering, minimum 16GB RAM, 3-button mouse
📝 Description
This isn’t theory for the sake of theory. You start with real photos of Japanese backstreets and break them down: what materials are actually there, where dirt builds up, how light bounces in a tight space. Then you block out the alley in Maya with correct scale first, so everything after that just sits right.
Color gets handled early, which saves a lot of pain later. You’ll set up ACES properly and learn which settings shift your look without you noticing. Same with photorealism – it’s usually small stuff: too-perfect edges, too-clean roughness, flat reflections. You’ll get straight fixes you can reuse on any environment.
From there it’s all production. You’ll mix Megascans assets with your own procedural shading to avoid that stock-asset look, prep UVs just enough for environments, and build reusable V-Ray shaders instead of one-off materials. The last stretch covers lighting, CPU vs GPU choices, rendering, and simple post-production that pushes the image from clean render to believable photo.
🧑🎓 Who this course is for
- Environment and lighting artists who want cleaner, more believable photoreal renders
- Maya users who know the basics and want a repeatable shading and lighting workflow for personal projects or portfolio pieces
🧑🏫 About the Author
Steffen Hampel is a 3D artist working with Maya and V-Ray on photorealistic environments. His teaching style is direct and production-focused, with an emphasis on efficient workflows and shader setups you can actually reuse. This course distills his approach to references, shading, and lighting into short, practical lessons.
🏁 Final Result
- A finished, portfolio-ready photorealistic Japanese alleyway render built in Maya and V-Ray – fully shaded, lit, rendered, and post-processed.
📢 Guys, this is a Group Buy campaign, check the GBC forum thread to get access
You can find the course preview in the download section below.
 Channel