


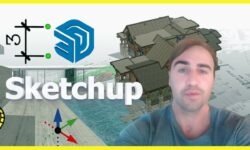
Blender 3D Model a Ghibli Art Stylized Scene

Release date:2021, May 12
Skill level:Beginner
Language:English
Exercise files:Yes
Course URL:https://www.udemy.com/course/blender-ghibli-beginners-3d-model-guide-oriental-stylized-scene/
Would you like to learn how to model a stylized oriental island scene reminiscent of anime films or series?
Now, what if I told you I have a course to do just that on Udemy?This course will see you learn all the techniques pros use and how they use them.
Through reading this course description you will find out:
– What you want to learn about 3D modelling;
– What you are going to get through ‘Blender 3D Model a Stylized Oriental Scene’, and;
– What are you going to lose if you don’t enrol in this course.
Modeling
‘Blender 3D Model a Stylized Oriental Scene’ will see you take a deep dive into the power of curves and great techniques for using them.
Learn how to use multiple modifiers to create amazing 3D models. This will include Blender’s simple deform, skin, displace and decimation modifier.
A lot of my students have fed back that they would like to learn to sculpt in Blender. We will be doing exactly that!
Following the success of my latest courses, we will be modelling, texturing, and finalising every individual asset before moving onto the next. Students have said that this has helped them in staying excited throughout the creation process, being able to see how their scene comes closer to the course preview step-by-step.
Of course, you could set yourself a challenge and diversify aspects of the scene, such as including different buildings, changing their architectural design or colours, or modelling and animating more animals.
Be creative! Make your islands bigger and lusher. Add different types of flowers and trees and build up the stylized character of the scene with new assets you have thought of.
Texturing and Materials
‘Blender 3D Model a Stylized Oriental Island’ will teach you all about advanced Blender node techniques and the course will act as an in-depth guide to the entire process.
This course will also teach you the basics of shaders and how to create your own water shader which you will be able to use in any other builds. But that is not the only unique feature of this course.
‘Blender 3D Model a Stylized Oriental Island’ will help you make your own procedural materials and shaders which we will take full advantage of in the course. The procedural materials we will be making include the rocks, the earth material, the paths, the water, the koi fish, the gong, and the foliage.
Particle System
Take your 3D modelling skills to a new level by creating stylized trees using the Blender particle system.
We will be using a technique that is meant for hair strands to create the grass through procedural systems.
Through completing ‘Blender 3D Model a Stylized Oriental Island’, you will learn how to use particle systems to create grass in the influential style of Ghibli art. As part of that, you will find out how useful a Blender emission shader is to help you resonate that art style.
Animation
Enrol to ‘Blender 3D Model a Stylized Oriental Scene’ to learn how to bring your scene alive with procedural rocks, foliage, and wildlife.
We will not just model them. We will also animate them!
Learn how to create stylized animated water, including waterfalls, rapids, and turbulence.
You will also be going through a fully comprehensive guide about animating fish and butterflies that move realistically, following a set path.
Lighting
By enrolling in ‘Blender 3D Model a Stylized Oriental Scene’, you will also learn how to take control of your scene’s lighting as we take a close look at HDRI stylized lighting, more so than in any of my other courses.
For a full introduction into lighting 3D scenes, we will also cover all in-built Blender lighting functionalities.
‘Blender 3D Model a Stylized Oriental Island’ is a complete guide into using Eevee for lighting, rendering, shadows, exposure, and colour management.
You will also how to create great rendered animations of the scene using various camera techniques.
The course resource pack will include 16 course references for all the individual stylized oriental island scene assets we will be creating. It also includes 5 colour maps.
The best course navigation tool for ‘Blender 3D Model a Stylized Oriental Island’ will be available, yet again. The course handbook will give the control back to you and you will be able to fully streamline your learning process to your needs and wants seamlessly.
Something like this is essential to courses as long as this one, and 3D Tudor is the first to consistently include this with all the newest courses.
Enrol in this course and come be part of a 3D modeling journey of over 24 hours of learning.
Check out the free introduction and I am sure you won’t be able to put this course down!
– animating water and creating massive waterfalls;
– animating rapids and turbulence in stylized water;
– animating koi fish;
– seeing butterflies move realistically along a set path;
– creating grass using the Japanese Ghibli art style;
– learning how to use HDRI stylized lighting;
– animations & key commands throughout the learning process;
– – accessing 3 courses within a course, including full lessons on (a) Blender basics, (b) materials and textures, and (c) seams, sharps, and UVs.
01 Introduction 02 Section 2 – The Basics of Blender 03 Section 3 – Creating The Oriental Street Lantern – Part 1 04 Section 3 – Creating The Oriental Street Lantern – Part 2 05 Section 4 – Creating The Small Bridge 06 Section 5 – Creating The Oriental Wall Entrance 07 Section 6 – Creating The Fruit Basket & Fruit 08 Section 7 – Creating The Large Arch 09 Section 8 – Creating The Rock Pool 10 Section 9 – Creating The Lilly Pads & Reeds 11 Section 10 – Creating The Roof Template 12 Section 11 – Creating The Food Silo – Part 1 13 Section 12 – Creating The Food Silo – Part 2 14 Section 13 – Creating The Trees 15 Section 14 – Creating The Gong Tower – Part 1 16 Section 15 – Creating The Gong Tower – Part 2 17 Section 16 – Rock Creation 18 Section 17 – Creating The Water Wheel 19 Section 18 – Creating The Large Bridge – Part 1 20 Section 19 – Creating The Large Bridge – Part 2 21 Section 20 – Foliage Creation 22 Section 21 – Creating The Fish Model 22 Section 21 – Creating The Fish Model 23 Section 22 – Creating The Islands – Part 1 24 Section 23 – Creating Backgrounds & HDRI’s 25 Section 24 – Creating The Islands – Part 2 26 Section 25 – Creating The Stone Stairs 27 Section 26 – Populating The Islands – Part 1 28 Section 27 – Populating The Islands – Part 2 29 Section 28 – Water Features – Part 1 30 Section 29 – Water Features – Part 2 31 Section 30 – Creating Paths 32 Section 31 – Main Building Creation – Part 1 33 Section 32 – Main Building Creation – Part 2 34 Section 33 – Creating The Spiral Staircase 35 Section 34 – Tidying Up Our Scene 36 Section 35 – Working With Animations 37 Section 36 – Lighting Our Scene 38 Section 37 – Working With Cameras 39 Section 38 – Rendering Images & Movies [Udemy] Blender 3D Model a Ghibli Art Stylized Scene.7z
001 Section 1 – Introduction
001 Udemy – Lesson 1 – Blender Basics & Course Layout
001 Lesson 2 – Starting our Street Lamp with Edge Loops
002 Lesson 3 – Different Ways to Create Meshes
003 Lesson 4 – How Seams & Sharps Work
004 Lesson 5 – Learning About Nodes & Materials
005 Lesson 6 – Working with Material Nodes
006 Lesson 7 – Basics of Lighting
001 Lesson 8 – Converting and Working with Curves
002 Lesson 9 – Using Seams Effectively
003 Lesson 10 – Creating Ornamental Swirls
004 Lesson 11 – Proportional Editing Workflow
005 Lesson 12 – Finishing the Lamp Materials
006 Lesson 13 – Parents & Children in 3D
001 Lesson 14 – Working with SVGs
002 Lesson 15 – Working with Multiple Modifiers
003 Lesson 16 – Learning how to Speed up Workflows
004 Lesson 17 – Completing our Small Bridge
001 Lesson 18 – Working with Deform Modifier
002 Lesson 19 – Flipping our Normals
003 Lesson 20 – Fixing Boolean Meshes
001 Lesson 21 – Starting the Fruit Basket
002 Lesson 22 – Creating the Basket Material
003 Lesson 23 – Creating Procedural Materials
001 Lesson 24 – Creating the Large Arch
001 Lesson 25 – Introduction to Sculpting
002 Lesson 26 – Creating the Rock Material
003 Lesson 27 – Creating a Water Shader
004 Lesson 28 – Finishing the Rockpool
001 Lesson 29 – Creating Reeds the Easy Way
002 Lesson 30 – Working with Colour Ramps
001 Lesson 31 – Creating the Roof Tile Template
001 Lesson 32 – Creating our First Building Grey box
002 Lesson 33 – Working with Bisect Tool
003 Lesson 34 – Laying out the Food Storage Foundation
004 Lesson 35 – Transformation Orientation Tips
005 Lesson 36 – Resetting Bevels
001 Lesson 37 – Creating our First Roof
002 Lesson 38 – Creating the Lanterns
003 Lesson 39 – Adding Materials to our First Building
004 Lesson 40 – Fixing Problems with Sharps
001 Lesson 41 – Creating Low Poly Tree Branches
002 Lesson 42 – Branch Manipulation Guide
003 Lesson 43 – Creating our Leaves Template
004 Lesson 44 – Creating our First Particle System
005 Lesson 45 – Creating the Tree Trunk Material
001 Lesson 46 – Creating the Roof of our Gong Tower
002 Lesson 47 – Fixing Meshes that Dont Work
003 Lesson 48 – Creating the Gong Roof
004 Lesson 49 – Completing our Gong Roof
005 Lesson 50 – Preparing Mesh for Simple Deform
001 Lesson 51 – Creating the Gong Supports
002 Lesson 52 – Cracking the Gong
003 Lesson 53 – Creating Procedural Rope
004 Lesson 54 – How to Create Gold Material
001 Lesson 55 – Making Stylized Rocks
001 Lesson 56 – Creating the Water Wheel
002 Lesson 57 – Calculating Around Circles
001 Lesson 58 – Testing our 3D Skills
002 Lesson 59 – Working with Complex Booleans
003 Lesson 60 – Creating the Bridge Stone Blocks
004 Lesson 61 – Rebuilding the Bridge
005 Lesson 62 – Viewport Options Visability
001 Udemy – lesson 63 – Creating Oriental Roof Swirls
002 Lesson 64 – Starting the Complex Roof
003 Lesson 65 – Large Roof Preperation
004 Lesson 66 – Completing the Large Bridge Build
005 Lesson 67 – The Importance of Edge Loops
001 Lesson 68 – Creating Foliage the Easy Way
002 Lesson 69 – Procedural Foliage Materials
001 Lesson 70 – Starting our Low Poly Fish
002 Lesson 71 – Mirroring the Fish
003 Lesson 72 – Fixing Problem Meshes
004 Lesson 73 – Using Voxel Remesh
005 Lesson 74 – Procedural Fish Material
001 Lesson 70 – Starting our Low Poly Fish
002 Lesson 71 – Mirroring the Fish
003 Lesson 72 – Fixing Problem Meshes
004 Lesson 73 – Using Voxel Remesh
005 Lesson 74 – Procedural Fish Material
001 Lesson 75 – Creating the Island Templates
002 Lesson 76 – Learning about Topology Flow
003 Lesson 77 – Finishing the Last Island
004 Lesson 78 – Creating the World
005 Lesson 79 – Creating the Land
001 Lesson 80 – Setting up our HDRI & Lighting
001 Lesson 81 – Grass Particle System Guide
002 Lesson 82 – how to stylize grass
003 Lesson 83 – Earth Creation
004 Lesson 84 – Sculpting the Islands
001 Lesson 85 – Creating the Spiral Stairs
002 Lesson 86 – Blending Structures & Environments
001 Lesson 91 – Sculpting the Large mountain
002 Lesson 92 – Finalizing our Rough Model Layout
003 Lesson 93 – Fixing the Earth & Shadow Issues
001 Lesson 91 – Sculpting the Large mountain
002 Lesson 92 – Finalizing our Rough Model Layout
003 Lesson 93 – Fixing the Earth & Shadow Issues
001 Lesson 94 – Creating our First Water Procedural Material
002 Lesson 95 – Starting our First River
003 Lesson 96 – Animating our Rivers
004 Lesson 97 – Creating the rock Waterfall
005 Lesson 98 – Finishing our Waterfalls
001 Lesson 99 – Creating the Illusion of Pooling
002 Lesson 100 – Stylized Turbulence with Empties
003 Lesson 101 – Animating our Turbulence
004 Lesson 102 – Creating the Rapids
005 Lesson 103 – Animating our Rapids
001 Lesson 104 – Creating Paths
001 Lesson 105 – Starting the Main Building
002 Lesson 106 – Creating the Floors of the Main Building
003 Lesson 107 – Fans & Normals
004 Lesson 108 – Creating the Wooden Planks
005 Lesson 109 – Creating a Balcony
001 Lesson 110 – Starting the Dragon Ornaments
002 Lesson 111 – Cleaning up our Scene
003 Lesson 112 – Finishing the Dragons
004 Lesson 113 – Main Building Roof Creation
005 Lesson 114 – Adding Materials to the Main Building
001 Lesson 115 – Working with Complex Arrays
002 Lesson 116 – Fixing Simple Deform & Stairs Completion
001 Lesson 117 – Finishing the Final Island Sculpt
002 Lesson 118 – Finalising the Grass
001 Lesson 119 – Wheel & the Basics of Animation Guide
002 Lesson 120 – Creating our Fish Tracking Animation
003 Lesson 121 – Starting Butterfly Creation
004 Lesson 122 – How to Create Butterfly Movement
005 Lesson 123 – Using Noise to Animate the Butterfly
001 Lesson 124 – Working with Point Lights
002 Lesson 125 – Final Lighting Tips
001 Lesson 126 – Working with Cameras
001 Lesson 127 – Rendering Single Images
002 Lesson 128 – Rendering Out our Final Animation
[Udemy] Blender 3D Model a Ghibli Art Stylized Scene_Subtitles.7z


Hey!
Please upload to 27 Section 26 – Populating The Islands – Part 1
missing lessons 87, 88, 89 and 90.
I’ll be very thankful!
There are no lessons 87-90. 22 Section 21 – Creating The Fish Model – repeats. 27 Section 26 – Populating The Islands – Part 1 and 28 Section 27 – Populating The Islands – Part 2 -same. refill the course please.
Hy Bro Please Upload Reference Image