


The Complete Unity Game Development Course

Release date:2020, September 10
Skill level:Beginner
Language:English
Exercise files:Yes
Course URL:https://www.udemy.com/course/unity-complete/?utm_source=adwords&utm_medium=udemyads&utm_campaign=GameDevelopment_v.PROF_la.EN_cc.ROW_ti.5904&utm_content=deal4584&utm_term=_._ag_79708702694_._ad_437497334340_._kw__._de_c_._dm__._pl__._ti_dsa-774930033769_._li_1012841_._pd__._&matchtype=b&gclid=EAIaIQobChMIma-ttf_P7AIVgvuyCh0ZXAqCEAAYASAAEgJzffD_BwE
Getting started in game development doesn’t have to be scary. All you need is the passion to learn and an inquisitive, experimental nature for combining code, animation, graphics, artificial intelligence, art and audio. Sounds like a lot? It is, but when you see how you as a solo developer can bring it all together there’s a touch of magic in the air.
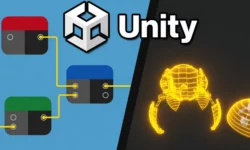
Unity is the number one game development engine due to its ease of use and yet powerful abilities. It works on all platforms and can export to desktop, console and mobile devices. It’s a great way for the beginner to jump straight into the world of game development and get their hands on the tools used by AAA game studios to produce games such as Hearthstone (Blizzard Entertainment), Cities: Skylines (Colossal Order) and Monument Valley 2 (ustwo Games) and best of all, for the beginner and hobbyist it is free!
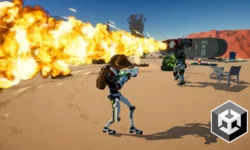
In this course, Penny demystifies Unity’s interface and plethora of tools to bring art, code, design, and more together to produce a fully-fledged First Person Shooter game completely from scratch. Using her internationally acclaimed teaching style and knowledge from over 25 years working with games, graphics, and having written two award-winning books on games A.I., Penny will take you from complete noob to a confident user of Unity. Throughout, you will follow along with hands-on workshops designed to take you through every step of becoming familiar with all the functionality of the game engine. Throughout, you will work towards the creation of a First Person Shooter set in a post-apocalyptic world complete with zombies out for the player’s brains!
This course was created with Unity 2019.3.11f however is compatible with Unity 2019.4.2f1 (LTS) on either Mac or PC.
Learn how to code, animate, and work with:
The Unity Development Environment.
Unity’s C# interface.
Terrain Sculpting Tools for creating game maps.
First Person Characters and Animations for Walking, Shooting, and Reloading.
Pickup Items for Medical Kits and Ammunition.
3D Models of Zombies to add Animations for Walking, Chasing and Attacking.
An inventory system to keep track of player health and ammunition supplies.
Navigation Meshes for programming the movement of zombies and path planning on a terrain.
Finite State Machines for defining enemy A.I. behaviours.
Constructing Ragdoll models for dynamic death animations.
A Heads Up Display to inform the player of their health level and ammunition level, complete with a radar for locating zombies and a compass to guide the player home.
Special Effects such as fire, blood splatter, and lighting techniques.
Building the game to a standalone product.
All assets and incremental project files are included.
Contents and Overview
The course begins with a section to introduce you to the Unity interface. If you are already familiar with Unity, you can skip to Section 3. In this introductory session, we will cover Unity’s window system, how to add models and textures, the creation of code to manipulate the properties of models, and the physics system.
Following this, we will start work on the First Person Character (FPC). You will learn how to add physics and code to move the character around, as well as add animated arms and a weapon that you can see in the game view. You will also work to add animations for firing and reloading the weapon. Audio effects for the player’s footsteps and jumping will also be included here.
Next, you will create pickup items for medical kits and ammunition that can be scattered around the game environment to provide extra resources to the player when their health or bullet levels get low. Here you will learn about how colliders and triggers can be used to fire off code to update values on the player that store an inventory.
We will then jump into the Unity Terrain Sculpting tool and work through the creation of a large game map on which to place the FPC and enemies. You will work with textures to colour the terrain and models, to add extra details such as trees and grass. High-quality models of houses, rocks, fences, and other props will be included for you to be as creative as you like in developing the game environment.
By this point, you’ll be ready to start adding the zombies. You will first begin with the zombie models and learn how to add animations to them and then move them about on the game environment using navigation meshes. Then we will cover one of the most popular artificial intelligence techniques used in games for creating simple behaviours in non-player characters; the Finite State Machine. You will develop enemies capable of wandering, chasing, attacking, dying, and standing idle. These actions will be linked to the location of the player such that the zombies will ignore the player when they are far away and only attack when in range.
Once these mechanics are in place, you will learn how to use raycasts to link the player’s shooting animations with a hit to the zombie. When hit, the zombie death animation will play and you will also be able to add in a ragdoll instead at this point. We will work with spotlights to create a crosshair aiming system and program dead zombies to sink into the ground, to remove them from the game.
Last but not least, we tie everything together with a Heads Up Display complete with health meter, an ammunition count, a radar for detecting nearby zombies, and a compass to point the player toward their goal location.
Once you have put all the game mechanics in place, you’ll learn several techniques for taking your game to a more professional level with special effects, extra audio & feedback, and a main menu switching system.
01. Introduction
01. Introduction
02. Join the H3D Student Community
02. Getting Started with Unity
01. Installation
02. Navigating the Interface Part 1
03. Navigating the Interface Part 2
04. Models and Meshes
05. Textures
06. Textures and UV Values
07. More About Materials
08. Shaders
09. Physics
10. Physics Materials
11. An Overview of Programming with Events
12. An Overview of Programming with Properties
03. Creating a First Person Character with Controller
01. Programming FPC Movement
02. Character Physics
03. A First Person Camera
04. Orientating and Restricting Movement
05. Cursor Locking
06. Adding Character Model
07. Transitioning Between Animations
08. Animation Triggers
09. Adding a Weapon
10. Completing the Player Animation
11. Sound Events in Animation
12. Randomising Sounds
13. Jumping and Landing Sounds
04. Picking Up Items
01. Creating Pickups
02. Detecting Collisions with Pickups
03. Keeping an Inventory
04. Firing a Weapon To Deplete Ammunition
04.1 trigger
05. Depleting and Topping Up Health
06. Ammunition Clip Management
07. Fixing Footstep and Jump Sounds
05. The Game Environment
01. Sculpting a Terrain
02. Texturing a Terrain
03. Trees
04. Adding Terrain Details
05. Skyboxes Part 1
06. Skyboxes Part 2
07. Fog
08. Adding Buildings and Props
09. Design Principles for Terrain Aesthetics
10. Game Map Layouts
11. Constructing the Game Level with FPC
06. Zombies!!
01. Creating Animated Zombies
02. Importing Zombies To Terrain
03. Navigation Meshes
04. Programming NavMesh Agents
05. Finite State Machines Part 1
06. Finite State Machines Part 2
07. Finite State Machines Part 3
08. Spawning Part 1
09. Spawning Part 2
07. Doing Combat
01. Ragdolls Part 1
02. Ragdolls Part 2
03. Shooting at Zombies Part 1
04. Shooting at Zombies Part 2
05. Creating a Targeting Site for a Weapon
06. Burying the Undead
07. Sinking Ragdolls
08. Damaging The Player Part 1
09. Damaging The Player Part 2
10. Game Over Part 1
11. Game Over Part 2
12. Victory Dance
08. Heads Up Display
01. Getting Started with Unitys UI
02. Creating a Health Bar
03. Ammunition Counts
04. Displaying Bullets Left in Gun
05. Building a Zombie Radar Part 1
06. Building a Zombie Radar Part 2
07. Adding Medkits and Ammo Boxes to the Radar
08. Building a Goal Pointing Compass
09. Final Touches
01. Lighting
02. Reflection Probes
03. Particle Systems Part 1
04. Particle Systems Part 2
05. Complex Fire Particle System
06. Zombie Blood Spatter
07. Screen Blood Spatter
08. Sound Effects
09. Zombie Sounds
10. Randomly Playing Sound Loops
11. Post Processing
13. Main Menu and Scene Switching
14. Continuous Background Music
15. Volume Controls
10. Extra Challenges
01. Zombie Game Title
02. Game Over
03. Victory Music
04. Three Strikes and Youre Out
05. Random Blood Splatter Sizing
06. Zombies More than One Shot Wonders
07. Checkpoint Compass
11. Last But Not Least
01. Building The Game
02. Some Final Words from Penny
03. Where to now
[Unity] The Complete Unity Game Development Course.7z.001
[Unity] The Complete Unity Game Development Course.7z.002
[Unity] The Complete Unity Game Development Course.7z.003
[Unity] The Complete Unity Game Development Course.7z.004
[Unity] The Complete Unity Game Development Course.7z.005
[Unity] The Complete Unity Game Development Course.7z.006
[Unity] The Complete Unity Game Development Course.7z.007
[Unity] The Complete Unity Game Development Course.7z.008
[Unity] The Complete Unity Game Development Course.7z.009
[Unity] The Complete Unity Game Development Course_Subtitles.7z


EXERCISE FILES ARE CORRUPTED PLZPLZ REPAIR ASAP
You mean the content inside the 7z file is corrupted ? That’s bad 🙁
Admin, could you please fix it ?
Thanks a lot for your work 🙂
Good day, would i be able to request this one?
https://www.wingfox.com/c/8299_8072_1132