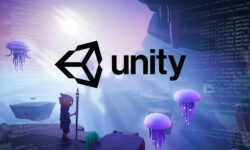
Unity 2D Game – Kawaii Survivor – The Coolest Roguelike Ever by Tabsil Makes Games

Duration:32.5 hours
Actual Duration:17h 3m
Release date:2025, September
Publisher:Udemy
Skill level:Intermediate
Language:English
Exercise files:Yes
Software:Unity
Course URL:https://www.udemy.com/course/unity-2d-game-kawaii-survivor-the-coolest-roguelike-ever
Build a full 2D roguelike like Vampire Survivors or Brotato from scratch in Unity. This course walks you through everything: player movement, enemy AI, a modular inventory, wave systems, and a polished UI. You’ll also learn solid C# architecture with interfaces, scriptable objects, and clean code practices.
🎯 What you’ll learn
- Create a complete 2D roguelike arena shooter in Unity
- Implement a modular inventory and weapon merging system
- Design complex user interfaces with sliding panels and scroll views
- Apply SOLID principles and clean code architecture
- Build a customizable wave system and enemy state machine
- Polish the game with shaders, particles, camera shake, and haptics
✅ Requirements
- Skills: Basic Unity and C# knowledge
- Tools: Unity 2023.2 or higher, a code editor
- Hardware: A computer capable of running Unity
📝 Description
This course is a full walkthrough for building a 2D roguelike arena shooter, similar to Vampire Survivors or Brotato. You’ll start by setting up source control with GitHub Desktop, then jump straight into creating the player character, Dave. From there, you’ll build enemies, weapons, and a loot system.
The real focus here is on clean code architecture. You’ll learn to use interfaces, scriptable objects, and SOLID principles to keep your project manageable. No more public variables everywhere. Instead, you’ll master private, protected, static, override, virtual, and abstract keywords. The course also covers a modular inventory system with weapon merging, a customizable wave system, and a complex UI with double sliding panels.
Polishing is a big part of the deal. You’ll add camera shake, haptic feedback, sound effects, particle systems, and even shader graphs for scrolling textures. There’s also a section on controller support and UI navigation, making the game playable on multiple platforms. By the end, you’ll have a complete, publishable game and a solid understanding of how to structure your next project.
🧑🎓 Who this course is for
- Developers who want to build a complete roguelike game in Unity
- Programmers looking to improve their C# architecture and coding practices
- Anyone interested in creating complex user interfaces for games
- Hobbyists who want to learn by building a real, polished project
🧑🏫 About the Author
Tabsil Makes Games is a game developer with over 8 years of experience in mobile game development. After earning a degree in Automotive Engineering and working at BMW, he switched to making games full-time. He has created over 25 courses on Udemy, teaching everything from Unity and C# to Blender and game optimization. His teaching style focuses on practical, hands-on projects with a strong emphasis on clean code and solid architecture.
🏁 Final Result
- A fully playable 2D roguelike arena shooter with multiple weapons, enemies, and a boss
- A modular inventory system with weapon merging and stat upgrades
- A polished UI with menus, character selection, and settings
- Source code and project files ready for reskinning and publishing