


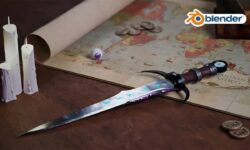
Realistic 3D Prop for Films in Blender

Duration:17:44:00
Actual Duration:17h 44m
Release date:2023, July
Skill level:Beginner
Language:English
Exercise files:Yes
Course URL:https://www.udemy.com/course/realistic-prop-for-films-in-blender/
Welcome, I am an aspiring 3D artist and creatives! I’m Hamidreza, and I’m excited to guide you on this journey to master the art of creating jaw-dropping, realistic 3D assets for films using cutting-edge techniques.
This comprehensive course’ll cover everything you need to know to take your 3D modeling skills to the next level. Whether you’re a beginner or an experienced artist looking to enhance your craft, this course provides valuable insights and practical knowledge to create professional-grade 3D assets.
Let’s take a look at what we’ll cover:
- Project Setup and Reference Gathering: We’ll start by setting up our project like the pros and gathering top-notch reference pictures for our handheld console.
- Modeling Process: Dive into the 3D modeling process as we create the front part of our asset. We’ll explore boolean methods to make the action buttons and D-Pad’s hole and then craft the back cover using vertex and face extrusion.
- Unwrapping and Texturing: Learn how to unwrap the model inside Blender using the UDIM approach for the best possible texture quality. We’ll then export the model to Substance 3D Painter to start the texturing process.
- Texturing Techniques: Discover how to create different materials for each part using the new Baker to Bake Mesh Maps. We’ll also add detailed dirt and dust to make our final product appear incredibly realistic.
- Shading and Rendering: Export the textures to Blender for shading and go through the process of setting up lights and camera. Finally, create the final render shot after adjusting the render parameters.
Throughout the course, you’ll gain hands-on experience, working on real-world projects to solidify your learning. By the end of the period, you’ll have created a clean, professional 3D art piece that you can proudly add to your portfolio.
I’m committed to providing you with the best learning experience possible, so you can confidently take your 3D hard surface creation skills to new heights. Join me at Victory3D, and let’s create something unique together!
1. Introduction
01. Introduction
02. Project Setup
2. Modeling the Prop
01. Making the Grip
02. Finishing up the Grip
03. Making the Front Speakers
04. Making the Steam Button
05. Finishing up the Front Details
06. Making the Top Frame
07. Finishing Up the Front Panel
08. Front Panel Final Touch
09. Making the Action Buttons
10. Making the D-Pad
11. Adding the Button Holes
12. Adding the Fan Grill
13. Making the Back Grip
14. Making the Back Plate
15. Topology Review
16. Making the Screw Holes
17. Making the Rear Button Holes
18. Rear Fan Grill
19. Honeycomb Mesh and the Display
20. Adding the Front Buttons
21. Making the Thumbsticks
22. Top and Action Buttons
23. D-Pad Cross
24. Touchscreen
25. Rear Buttons
26. Making the Trigger Button
27. Making the Bumper Button
28. Adding Final Details
3. Unwrapping & Texturing
01. Unwrapping Part 1
02. Unwrapping Part 2
03. Unwrapping Part 3
04. Unwrapping Part 4
05. Substance Painter Project Setup
06. Texturing Part 1
07. Texturing Part 2
08. Texturing Part 3
09. Exporting Textures
10. Shading and Rendering
11. Conclusion
[Udemy] Realistic 3D Prop for Films in Blender_Subtitles (2).7z
[Udemy] Realistic 3D Prop for Films in Blender_Subtitles.7z


Does anyone have the reference?