


Realistic Fantasy Game Environment Creation

Release date:2021
Skill level:Beginner
Language:English
Exercise files:Yes
Course URL:https://victory3d.com/p/realistic-fantasy-game-environment-creation
Hello everyone! And welcome to this very exciting tutorial course on how to create a game environment from start to finish.My name is Emiel Sleegers, I am a senior 3d environment artist who have years of experience working for AAA game studios and I will be your tutor for this course. In this course we will go over on how to create a Realtime game environment completely from scratch.That means that we will make it 100% from start to finish and we will have 95% of this tutorial in real time.
For this course we will be using Maya, Zbrush, Substance painter and designer, a tiny little bit of photoshop, marmoset toolbag, Speedtree and unreal engine 4.
Now, this tutorial is targeted towards intermediate artists, these are artists who are already familiar with the tools I just mentioned but just want to learn the workflows and techniques to creating a video game environment.
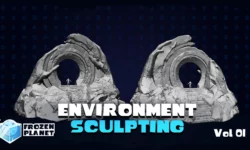
As a quick little overview. We will start this course off with going over our reference and discussing on how we are going to create this environment We will then start by making a nice blockout of the environment so that we have accuracy in the scaling and composition.We will first focus on the rocks since those are one of the main components in this tutorial.This means we will first complete all the rock sculpts in Zbrush. Setup the low poly in maya and bake the rocks in marmoset toolbag.Then we will create a rock material inside of substance designer and a special material inside of unreal engine to make the rocks look amazing. For this we also need to quickly create a special mask in substance painter which will give us control over the dirt amount and highlights of the rocks.
After we have done all that we will move on to our moss system, since this is probably the second most important thing in this environment.
I will start by creating a moss material inside of substance designer.
Then I will show you how to use this material to create both procedural moss and hand made fuzzy moss for all your rocks.
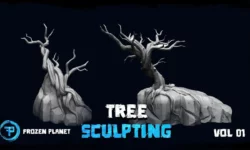
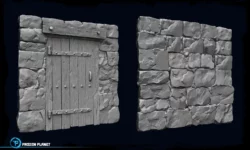
Finally, we will start by setting up our environment, doing lighting and composition passes. We will create some foliage inside of speedtree and placing it in our scene. We will create our temple building along with special tileable edge damages. And once we are happy with the entire environment, I will show you how to create some final portfolio screenshots and flythroughs.
If you follow this course you will have a very solid foundation and skillset to tackle almost any kind of game environment, no matter if it is organic or urban.
1.Intro
01-Going over our reference
2.Blockout and Sculpting
02-Modeling our blockouts Part1.7z
02-Modeling our blockouts Part1
03-Modeling our blockouts Part2
04-Modeling our blockouts Part3
05-Modeling our blockouts Part4
06-Modeling our blockouts Part5
07-Setting up out blockout in Unreal Engine Part1
08-Setting up out blockout in Unreal Engine Part2
09-Setting up out blockout in Unreal Engine Part3
10-Sculping our round cliff in Zbrush Part1
11-Sculping our round cliff in Zbrush Part2
12-Sculping our round cliff in Zbrush Part3
13-Sculping our round cliff in Zbrush Part4
14-Sculping our Cliff Edge A in Zbrush Part1
15-Sculping our Cliff Edge B in Zbrush Part1
3.Materials, Unwrapping, and Baking
16-Creating our rock material Part1
17-Creating our rock material Part2
18-Creating our rock material Part3
19-Creating our rock material Part4
20-Creating our rock material Part5
21-Creating our rock material Part6
22-Creating our rock material Part7
23-Creating our moss material Part1
24-Creating our moss material Part2
25-Optimizing our rocks
26-UV Unwrapping our rocks Part1
27-UV Unwrapping our rocks Part2
28-Baking our rocks
29-Creating our rock master shader in unreal engine Part1
30-Creating our rock master shader in unreal engine Part2
31-Creating our rock master shader in unreal engine Part3
32-Creating our rock master shader in unreal engine Part4
33-Doing our first lighting pass
4.Moss, Floors, and Stones
34-Creating our fuzzy moss system Part1
35-Creating our fuzzy moss system Part2
36-Creating our fuzzy moss system Part3
37-Creating our floors Part1
38-Creating our floors Part2
39-Creating our floors Part3
40-Creating our floors Part4
41-Creating our floors Part5
42-Improving our rocks
43-Creating our stone pile Part1
44-Creating our stone pile Part2
45-Creating our stone pile Part3
46-Creating our stone pile Part4
47-Creating our stone pile Part5
48-Improving our moss
49-Working on composition Part1
50-Working on composition Part2
5.Temple, Foliage and Bridge
51-Creating our temple Part1
52-Creating our temple Part2
53-Creating our temple Part3
54-Creating our temple Part4
55-Creating our temple Part5
56-Creating our temple Part6
57-Creating our temple Part7
58-Creating our temple Part8
59-Creating our foliage Part 1
60-Creating our foliage Part 2
61-Creating our foliage Part 3
62-Creating our foliage Part4
63-Creating our foliage Part5
64-Creating our foliage Part6
65-Creating our bridge Part1
66-Creating our bridge Part2
67-Creating our bridge Part3
68-Creating our bridge Part4
69-Creating our bridge Part5
70-Creating our bridge Part6
71-Creating our bridge Part7
72-Creating our bridge Part8
73-Creating our bridge Part9
6.Tweaks and Polishes
74-Working more on our composition
75-Doing our final lighting pass Part1
76-Doing our final lighting pass Part2
77-Creating our corner damage Part1
78-Creating our corner damage Part2
79-Creating our corner damage Part3
80-Doing our final polish Part1
81-Doing our final polish Part2
82-Doing our final polish Part3


hi, can you upload this one? https://flippednormals.com/downloads/dynamic-male-anatomy-for-artists-in-zbrush/
thanks!