


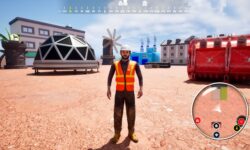
Game Environment – Creation Apocalyptic Scene

Release date:2021
Author:Manuel Rondon
Skill level:Beginner
Language:English
Exercise files:Yes
In this course, we will build a professional apocalyptic game environment from scratch using 3ds Max, Substance Painter and Unreal. We will start everything from scratch, from looking at references, looking at some concept art, and start applying it onto our environment. First, we will start by making small blockout of our scene and create the assets that we are going to need, how we are going to lay them out in the environment, then we are going to move into modeling. The modeling will be done all in 3ds Max, after that we will proceed to unwrapping the assets, and we will learn how to make the assets look smooth while keeping them low poly by using a very neat technique. From that, we are going inside Substance Painter to texture all of the assets and we will be creating materials that are going to be reusable across different assets for more efficient workflow. To finalize our tutorial, we will go through the process of rendering the whole environment in Unreal Engine.
1.Intro
01-Planning Phase
02-Planning Phase -Wall thickness-
Apocaliptic Game Environment Promo4
2.Modelling
03-Blockout Part I
04-Blockout Part II
05-Modelind the Student Desk Part I
06-Modeling the Student Desk PartII
07-Modeling the Teacher Desk
08-Modeling Bookshelf and White Board Part I
09-Modeling Bookshelf and White Board Part II
10-Modeling the Windows and Roof
11-Small Assets Part I
12-Small Assets Part II
13-Roof Changes
14-Modeling the Low Poly Assets Part I
15-Modeling the Low Poly Assets Part II
16-Modeling the Low Poly Assets Part III
17-Modeling the Low Poly Assets Part IV -Blinders-
18-Modeling the Low Poly Assets Part V -Roof Elements-
3.Unwrapping
19-Unwrapping the assets Part I
20-Unwrapping the Assets Part II
21-Unwrapping the Assets Part III
22-Unwrapping the Assets Part IV
23-Unwrapping the assets Part V
24-Unwrapping the assets Part VI
4.Texturing
25-Setting up External Substances for Texturing
26-Texturing the Wall
27-Texturing the Book Shelf
28-Texturing other wooden structures
29-Texturing the Student-s Chair and Desk
30-Texturing the Floor and Door Wall
31-Texturing the Window Wall and Blackboard
32-Texturing the Smaller Assets Part I
33-Texturing the Smaller Assets Part II
34-Texturing the Roof
5.Rendering
35-Initial Setup
36-Adding the materials
37-Adding material corrections
38-Adding small assets
39-Baking the Lights
40-Adding Post FX
41-Adding the Decals
42-Creating Extra Decals
43-Adding New Book Colors
44-Final Fixes
[Victory3D] Game Environment – Creation Apocalyptic Scene.7z.001
[Victory3D] Game Environment – Creation Apocalyptic Scene.7z.002


please please add https://www.rebelway.net/advanced-arnold-shading-course?utm_medium=description&utm_source=youtube
https://www.rebelway.net/water-fx-in-houdini?utm_source=YouTube
https://www.rebelway.net/explosion-fx-houdini-course
https://www.rebelway.net/nuke-for-fx
https://www.rebelway.net/solaris-houdini-course
https://www.cgcircuit.com/course/mastering-ziva-dynamics?utm_source=youtube&utm_medium=video&utm_campaign=mastering-ziva-dynamics
https://www.appliedhoudini.com/blog/rigids-iii-vehicle-destruction
Shanasheel of Baghdad – 3D Game Environment Creation please