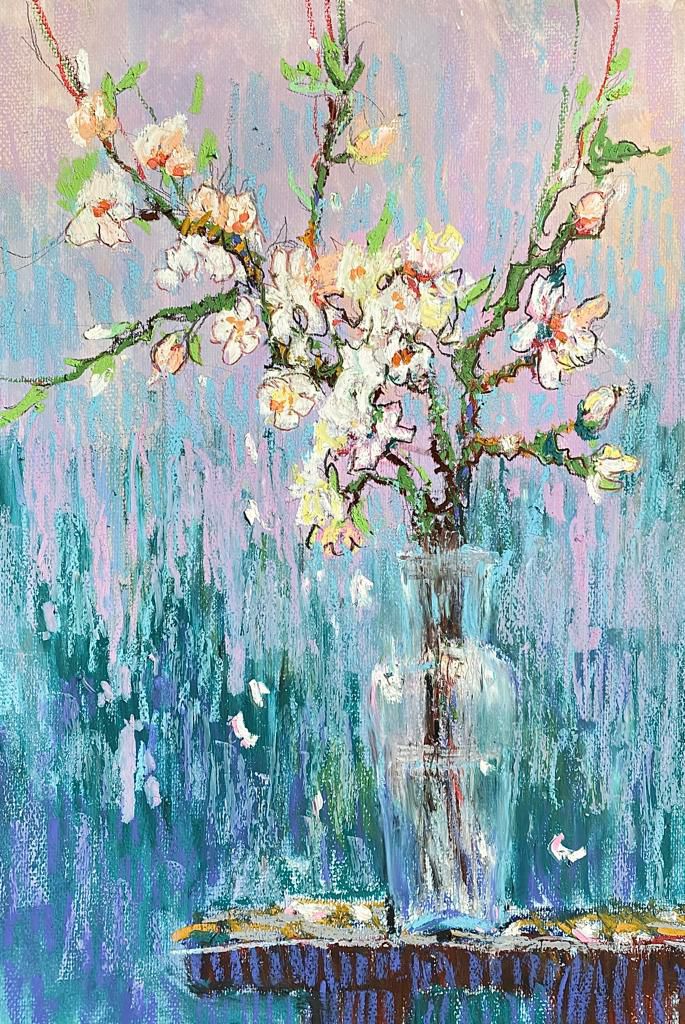
Spring by Olga Guseva (Весна – Russian, Eng sub)
Release date:2023, May
Author:Olga Guseva
Skill level:Beginner
Language:Russian
Exercise files:Yes
Working with oil pastels can indeed be a delightful experience, offering vibrant colors and a lively texture. It’s true that oil pastels are sometimes underestimated by artists, but they hold immense potential for creating colorful and bright artworks. Let’s embark on the lesson and explore the tricks and techniques involved in using oil pastels.
Part 1: Exercises To begin, we’ll delve into the physical and optical mixing properties of oil pastels. Through these exercises, you’ll learn how colors blend and interact when applied to the surface.
Exercise 1: Physical Mixing Experiment with blending different colors directly on the paper using various techniques such as layering, cross-hatching, and blending with your fingers or a blending tool. Observe how the colors mix and create new hues and textures. This exercise will help you understand the behavior of the pastels and gain confidence in using them.
Exercise 2: Optical Mixing Explore the concept of optical mixing, where colors placed side by side create a blended effect when viewed from a distance. Create a small composition using short, overlapping strokes of different colors. Step back and observe how the colors visually blend together, creating new shades and adding vibrancy to your artwork.
Part 2: Drawing a Flower in Different Ways Now, let’s apply the techniques we’ve learned to draw a flower using oil pastels. Choose a flower reference image or a real flower for observation. Draw the flower multiple times, experimenting with different approaches:
- Realistic Rendering: Begin by closely observing the flower and capturing its form, colors, and details as accurately as possible. Pay attention to the light and shadow areas, and use layering and blending techniques to achieve a realistic representation.
- Expressive Colors: In this approach, let your imagination and creativity guide you. Use bold, vibrant colors to depict the flower, focusing on capturing its essence rather than precise realism. Experiment with blending colors directly on the surface or layering contrasting hues to create visual impact and a sense of liveliness.
Part 3: Drawing a Flowering Cherry Branch In the main part of the master class, we will create a full-fledged artwork featuring a flowering cherry branch. Follow these steps:
- Select a reference image or a real flowering cherry branch as your subject. Study the composition, the shapes of the blossoms, and the overall structure.
- Begin by sketching the basic shapes lightly on your paper. Pay attention to the placement and proportions of the branch and blossoms.
- Start adding colors and details, layering the oil pastels to achieve the desired effect. Experiment with blending, hatching, and cross-hatching techniques to create depth and texture.
- Consider the color palette you want to work with. You can choose a limited palette to create harmony and balance within the artwork.
- Pay attention to the composition, balancing the elements and considering the focal points. Use the principles of design, such as the rule of thirds or leading lines, to guide the viewer’s eye through the artwork.
- As you work, step back from time to time to assess the overall effect and make adjustments as needed.
By the end of the master class, you will have explored various techniques and gained a deeper understanding of working with oil pastels. You’ll have created a still life of a flowering cherry branch, capturing the essence of spring and imbuing your artwork with an airy and vibrant mood. Enjoy the process, embrace the unique qualities of oil pastels, and let your creativity bloom!


 Channel


they have been talking for 25 minutes