")
Introduction to Procreate (Spanish, Multisub)

Release date:2022
Skill level:Beginner
Language:Spanish
Exercise files:Not Provided
Course URL:https://www.domestika.org/en/courses/636-introduction-to-procreate
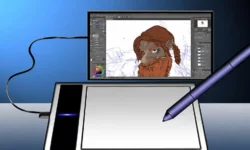
Take your illustration studio with you wherever you go with the leading drawing app for iPad
Throughout the history of digital illustration there have been a succession of leading programs, from FreeHand to Adobe Illustrator, through CorelDRAW and many more. Today, Procreate has taken their place as the top illustration app for iPad. In this seven-course Domestika Basics, master Procreate from scratch with Román García, illustrator and biologist who has collaborated with renowned magazines such as National Geographic and the Real Jardín Botánico of Madrid.
The first course is all about laying the groundwork, analyzing the synergy between Procreate, the iPad Pro, and the Apple Pencil, and why this is the perfect combination for tackling illustration projects. Start by installing the application and beginning to explore its interface.
In the second course, draw your first lines in Procreate before taking a tour of the program’s different brushes and basic drawing tools for creating your own digital sketches.
In the third course, get familiar with the Actions menu, which allows you to add images and text, edit the canvas, share images, record your drawing process, and much more.
Focus on the Adjustments menu in the fourth course and explore filters and features such as Blur, Noise, Liquify, Recolor, as well as basic image editing functions.
In the fifth course, discover the importance of layers in the Procreate workflow. See how they are organized, how to create new layers and merge them, and how to organize them into groups. Then, learn about blending modes, masks, and reference layers.
Next, delve into the selection and transformation options and explore how to transform, deform, and select parts of your illustrations.
The seventh and final course of this Procreate Basics is dedicated exclusively to Brushes. Learn how to work with each type and adjust their settings to create different kinds as well as organize them into groups depending on their style.
Technical requirements
⦁ An iPad that’s compatible with the Apple Pencil. For more information on compatible models follow this link.
⦁ An Apple Pencil is recommended in order to get the most out of Procreate.
01 – Introduction
02 – Team
03 – Procreate and Apple pencil installation
04 – Presentation of the Procreate work environment
05 – Creating documents and how to open external images in Procreate
06 – Actions and organization of documents
07 – Preparation of a digital sketchbook
08 – Introduction to drawing tools in Procreate
09 – Brush Library
10 – Quick Shape tool
11 – Color drop
12 – Colour selection
13 – Color Palette Creation
14 – Creation of digital sketches
15 – Introduction
16 – Add tab Images and text
17 – Canvas Tab Basic Options
18 – Canvas Tab Drawing Guides
19 – Share tab image and layers
20 – Video tab Accelerated time recording
21 – Options and Help tab
22 – Access to brushes with the Quick Menu
23 – Create a character using the Symmetry drawing guide
24 – Animation help
25 – Reference viewer
26 – Introduction
27 – Blur, Focus and Noise
28 – Liquefy
29 – Image editing
30 – Modifying a sketch with the Liquify tool
31 – Clone fit
32 – Gradient map
33 – New filters
34 – Introduction
35 – Actions
36 – Introduction to Opacity and Layer Fusion Modes
37 – Application of layer fusion modes
38 – The masks
39 – Reference layers
40 – Development and finishing from a sketch 1
41 – Development and finishing from a sketch 2
42 – Private layer
43 – Introduction
44 – Transform tool
45 – Warp tool
46 – Selection Modes
47 – Transformation of a sketch
48 – Introduction
49 – The parameters of the brushes 1
50 – The parameters of the Brushes 2
51 – Creation of a SUV Brush
52 – Creating a brush with shapes
53 – Creating a textured brush
54 – Basic actions with brushes
55 – Creating a collection of Dotting brushes
Introduction to Procreate_Subtitles.7z