Complete 3D product modeling course Blender 2.8 from A to Z

Release date:2020, August 20
Skill level:Beginner
Language:English
Exercise files:Yes
Course URL:https://www.udemy.com/course/modelling-realistic-headset-in-blender/
You will learn about useful free addons in blender , and modelling techniques that will allow you to model a realistic headset , then texture it .
we will then have a look at lighting and rendering . and add some post production effect to add that final touch that makes the final image stand out and take it to a better level. and the best part is that we will do all of the stated above , going from nothing to the final image ready to use only using the free software Blender 2.8 so all you need to follow the course is your computer.
what you will learn :
High poly subd modelling techniques
sculpting deatails on the model
creating materials from scratch
masking materials to add logos and bump details
lighting techniques
rendering the model
post processing in Blender 2.8
02 Setting up the workspace
001 Setting up the keymaps
03 Setting up addons
001 Looptools
002 F2
003 Bolt Factory
004 Bool tool
005 Node wrangler
006 UV Squares
04 Pure ref
001 Installing pure ref and setting up a reference image in blender
05 Modelling the Headset
001 Part 1 – Modelling the ears
002 Part 2 – Modelling the grid pattern
003 Part 3 – The shear tool
004 Part 4 – Continuing the ears
005 Part 5 – Finishing the ears
006 Part 6 – Instancing the models
007 Part 7 – Mirroring the models
008 Part 8 – Modeling with curves
009 Part 9 – Modelling the top bands holder
010 Part 10 – Finishing the top bands holder
011 Part 11 – Modelling the headband
012 Part 12 – Adding details to the headband
013 Part 13 – Modelling the ear cushions
014 Part 14 – Modelling the ear cushion pattern
015 Part 15 – Modelling the stitches
016 Part 16 – Modelling the microphone
017 Part 17 – Finishing the microphone
018 Part 18 – Adding bolts
019 Part 19 – Sculpting the ear cushions
06 Texturing the headset
001 Part 1 – Texturing the ear cushion pattern
002 Part 2 – Making the main plastic material
003 Part 3 – Bolts material
004 Part 4 – Emissive material
005 Part 5 – Making the microphone materials
006 Part 6 – Making the ear cushion leather material
007 Part 7 – Making the headband leather material
008 Part 8 – Adding the headband logo
009 Part 9 – Adding the side logos
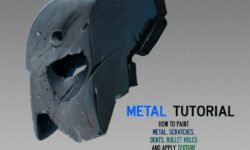
010 Part 10 – Adding bump holes on earcups
07 Lighting and rendering
001 Part 1 – Setting up camera and environment
002 Part 2 – Lighting techniques
003 Part 3 – scene lights , rendering and final compositing
[Udemy] Complete 3D product modeling course Blender 2.8 from A to Z_Subtitles.7z
[Udemy] Complete 3D product modeling course Blender 2.8 from A to Z.7z