Ad Clicks : Ad Views : Ad Clicks : Ad Views : Ad Clicks : Ad Views : Ad Clicks : Ad Views :
Oh Snap!

It looks like you're using an adblocker. Adblockers make us sad. We use ads to keep our content happy and free. If you like what we are doing please consider supporting us by whitelisting our website. You can report badly-behaved ads by clicking/tapping the nearby 'Advertisement' X text.

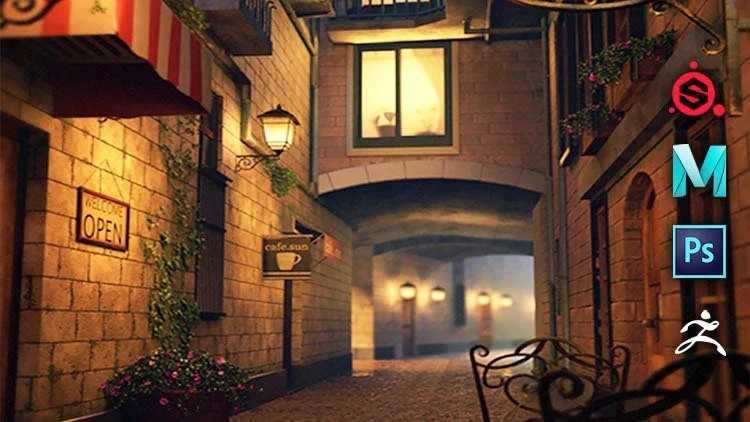
Maya Environment Creation for Film by Nexttut

/

Release date:2021, September

Duration:23 h 40 m

Author:Nexttut Education Pvt.Ltd.

Skill level:Beginner

Language:English

Exercise files:Yes

Hi Guys, do you want to create a realistic 3D scene for a commercial or a film but don’t know how to start? If that is the case, I welcome you to Nexttut Education´s Environment Creation for Film. My name is Abraham Leal; I am a 3D Artist and producer with eight years of industry experience. Currently, I lead my studio, Critical Hit, where we design and produce projects for the entertainment Industry.

Why you should enroll: At the end of this course, you can recreate a 3D environment from a concept. You will understand all the necessary steps to create the different props, sections, lights, and textures needed to get the best possible result for your portfolio.

In this course, you will be learning

  • Camera Matching
  • Prop Modelling
  • Sculpting
  • UV Mapping
  • Texturing
  • Rendering with Arnold
  • Cinematic Lighting
  • Post Production

I will start the course by blocking the scene and correcting the proportions. After that, we will begin modeling and preparing the different props for textures. Once all the props are ready, we will UV map them and start building the lights of our scene. Finally, we will texture the whole set and make sure it looks the best before we jump into Photoshop for the final touches of our image.

Who should enroll: I designed this course for intermediate-level students and artists who want to improve their skills as environment artists to create scenes from scratch. In this course, I will be using Maya, Zbrush, Substance Painter, Photoshop, and Arnold Renderer, so be sure to have all of them installed to follow correctly.

Enroll now and take your 3D environment skills to the next level!

Watch online or Download for Free

001. Introduction
002. about project files
003. Maya and Project Setup
004. Camera Matching
005. Organizing the Areas
006. Block in of the Scene Part.1
007. Block in of the Scene Part 2
008. Block in of the Scene Part 3
009. Modeling of the Cafe SIgn Part.1
010. Modeling the Cafe Sign Part. 2
011. Modeling the Cafe table
012. Modeling the Chair Part 1
013. Modelingthe Chair Part 2
014. Modeling the Table Props
015. Importing the clean model into the scene
016. Modeling the Cafe WIndows
017. Modeling the Right Door
018. Modeling the Flower Buskets
019. Modeling the Pipes
020. Modeling the Balcony
021. Cleaning our Scene
022. Fixing the Wall
023. Modeling the Lamps
024. Setting up the Lamps anf the Scene
025. Modeling the Left cafe entrance
026. Modeling the left door
027. Modeling the Left Window
028. Modeling the Air Ducts
029. Model Render Test
030. Modeling the Air Unit Part 1
031. Modeling the Air Unit Part 2
032. Modeling the Balcony Wall
033. Modeling the Left Cafe Door Part 1
034. Modeling the Left Cafe Door Part 2
035. Reviewing our Progress
036. Sculpting and Baking Overview Part 1
037. Sculpting and Baking Overview Part 2
038. Sculpting the Concrete Portion
039. Sculpting the Wood Table
040. UVs overview
041. Texel Resolution & UV Theory
042. UVing the Cafe sign
043. UVing the Cafe Table
044. UVing the Chairs
045. UVing the Right Wall
046. UVing the Pipes Part 1
047. UVing the Pipes Part 2
048. UVing the Lamps
049. UVing the Left Cafe Entrance
050. UVing the Window Protections
051. UVing the Window frames
052. UVing the Balcony
053. UVing the Air units
054. UVing the right door nad Props
055. UVing the Balcony Wall
056. UVing the Final Props
057. Initial Light Set Up part 1
058. Initial Light Set up Part 2
059. Texturing the Chairs
060. Shaders and Connection
061. Texturing the Floor
062. Displacement of the Floor
063. Texturing the Left Wall
064. Displacement of the left Wall
065. Texturing the Right Wall
066. Texturing the Balcony Wall
067. Texturing the Cafe Sign
068. Texturing the Cafe Roof
069. Windows Frames UDIM Texturing
070. UDIM Maya Set up
071. UDIM instancing in Substance Painter
072. Texturing the Table
073. Texturing the Air Ducts
074. Texturing and Shading the Lamps
075. Shading Windows and Glass Part 1
076. Shading Windows and Glass Part 2
077. Texturing left Door
078. Texturing the Pipes
079. Reviewing and Adusting the Scene
080. Texturing Concrete Elements
081. Texturing the Table Props
082. Texturing the Concrete Slabs
083. Texturing the Flower Pots
084. Texturing the Right Door
085. Texturing the Air Unit
086. Plant Setup
087. Importing the Plants
088. Placing the Ivy Plants
089. Reutilizing the Plants
090. Texturing the Back Cafe Sign
091. Texturing the Wecome Sign
092. Organizing the Back Alley Part 1
093. Organizing the Back Alley Part 2
094. Setting up the Extra Lights
095. Adjusting Render Settings
096. Material Correction
097. Advanced Wall Texturing Part 1
098. Advanced Wall Texturing Part 2
099. Preparing for the Final Render
100. Post Production Part 1
101. Post Production Part 2
102. End of the Project
[Udemy] Maya Environment Creation for Film by Nexttut.7z.rar

[Udemy] Maya Environment Creation for Film by Nexttut_Subtitles.7z


Join us on
  Channel    and      Group

  • Facebook
  • Twitter
  • Google+
  • Linkedin
  • Pinterest

Leave a Comment

Your email address will not be published. Required fields are marked *