")
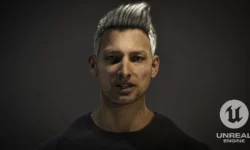
Project Titan VAT Characters (+Russian)

Release date:2022, April
Skill level:Beginner
Language:English
Exercise files:Yes
Course URL:https://www.sidefx.com/tutorials/project-titan-vat-characters/
Here’s a step-by-step guide on how to generate VAT (Vertex Animation Texture) characters in Houdini without using bones or skeleton meshes, and how to add variation to them when placed in a level using Unreal Engine:
- Create the character model in Houdini: Use Houdini’s modeling tools to create the base character model as a 3D mesh. You don’t need to worry about rigging or bones at this point, as the animation will come from textures.
- Define character motion using vertex animation textures: Use Houdini’s procedural techniques to generate vertex animation textures that encode the character motion. Manipulate the vertices of the character mesh over time to create animations, such as walking or running.
- Export character as a vertex animation texture: Export the character animation as a sequence of frames in a texture format, such as PNG or EXR, using Houdini’s export tools.
- Import vertex animation texture into Unreal Engine: Import the vertex animation texture as a texture sequence in Unreal Engine using the “Vertex Animation Textures” feature.
- Set up materials and shaders in Unreal Engine: Create materials and shaders in Unreal Engine to apply the vertex animation texture to the character mesh. Use the texture as input to drive the vertex positions of the mesh, creating the animation effect.
- Add variation to characters in the level: Use Unreal Engine’s procedural techniques, such as instancing and randomization, to add variation to the characters when placed in the level. Create multiple instances of the character mesh with different vertex animation textures, and use randomization techniques to vary their animations, colors, or other properties.
- Test and iterate: Test the VAT characters in Unreal Engine and iterate as needed to achieve the desired visual results. Adjust the materials, shaders, or procedural techniques to add more variation or fine-tune the character animations.
That’s it! With these steps, you can generate VAT characters in Houdini without using bones or skeleton meshes, and add variation to them when placed in a level using Unreal Engine’s procedural techniques. This approach allows for efficient and flexible character animation workflows that leverage the power of Houdini’s procedural workflows and Unreal Engine’s real-time rendering capabilities. Project Titan is an in-house tech demo designed to production test these workflows while creating a 3D environment that leverages the latest technologies in Unreal Engine.
Project Titan VAT Characters _ Overview
Project Titan VAT Characters _ Part 1 _ Setup Characters in Houdini
Project Titan VAT Characters _ Part 2 _ Assemble Data in Unreal
Project Titan VAT Characters _ Part 3 _ Add Variation
Russian audio.7z.rar
[SideFX] Project Titan VAT Characters (+Russian).7z
[SideFX] Project Titan VAT Characters (+Russian)_Subtitles.7z