Project Titan Train Destruction FX (+Russian)
Release date:2022, May
Skill level:Beginner
Language:English
Exercise files:Yes
Course URL:https://www.sidefx.com/tutorials/project-titan-train-destruction-fx/
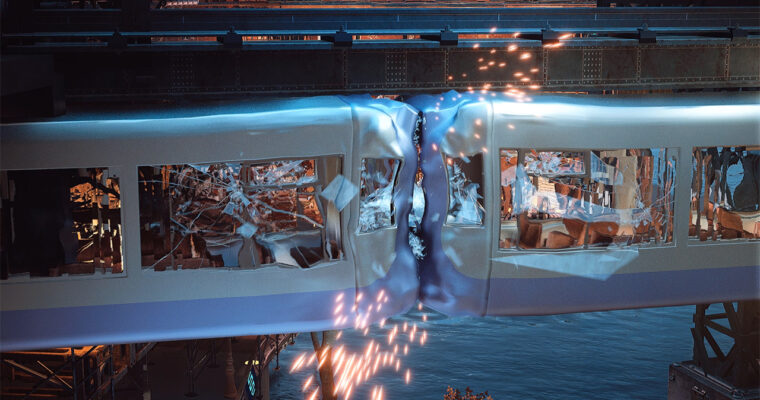
In this lesson, you will learn how to create a train crash simulation using Houdini’s simulation tools, and then export the simulation to Unreal using vertex animation textures. You will start by preparing the train mesh for fracturing and simulation, setting up collision and constraints for realistic physics-based interactions. Then, you will run the simulation in Houdini, allowing the train to crash and deform based on the physics simulation.
Once the simulation is complete, you will learn how to use vertex animation textures to save out the simulation as a mesh and textures. Vertex animation textures are a way to capture and store the deformations of a dynamic mesh animation in a texture format, which can then be used in Unreal Engine as shaders to playback the animations in real-time. You will set up the vertex animation textures in Unreal Engine, applying them to the train mesh and setting up the shaders to render the deformations of the crashed train.
This lesson will provide you with an understanding of how to create complex simulations in Houdini and export them to Unreal Engine for real-time rendering, opening up possibilities for creating dynamic and interactive visual effects in your projects.
1 | Setup Metal Rigids
In this lesson, you will learn how to prepare the train model for metal deformation using rigid bodies in Houdini. Before the train model is subjected to the deformation process, it needs some tweaks to ensure accurate results. This involves adding thickness to the planes and shapes of the train model to create a solid geometry that can undergo deformation realistically. Next, you will learn how to fracture the model and break it into smaller pieces, which will be used later in the simulation. This step is crucial for creating realistic and visually appealing metal deformation effects in the subsequent stages of the process.
2 | Setup Metal Constraints
In this lesson, you will learn how to add constraints to the fractured train model in Houdini to define how the broken pieces are connected to each other. Constraints are crucial in creating realistic metal deformation effects as they control the interactions between the fractured pieces during the simulation. You will explore different types of constraints, such as hinge, glue, and slide constraints, and learn how to apply them to the fractured train model. Additionally, you will also learn how to define a metal material for the fractured pieces, which will help in achieving realistic visual results in the subsequent stages of the simulation.
3 | Setup Simulation
In this lesson, you will learn how to animate the train model in Houdini to set up the simulation for the collision between two trains. You will create a copy of the train model and adjust its movement parameters, such as speed and impact, to create a realistic collision scenario. Then, you will use the bullet solver in Houdini, which is a physics-based solver, to simulate the collision between the two moving trains. The bullet solver will take care of calculating the resulting dynamics and deformations of the train models based on their collisions, providing a realistic simulation outcome.
4 | Deform Render Metal
In this lesson, you will learn how to create a metal deformation effect using the results from the simulation. After simulating the collision between the two trains using the bullet solver in Houdini, you will have the deformed geometry of the trains as a result. You will then use this deformed geometry as a source for deforming the original train mesh, creating metal bending and dents on the mesh to achieve a realistic metal deformation effect.
To achieve this, you can use various deformation techniques in Houdini, such as point deform, lattice deform, or VDB deform, depending on the desired effect. These techniques allow you to transfer the deformation information from the simulated geometry to the original train mesh, bending and denting the metal surfaces based on the simulated collision results.
You will also have the option to further refine and tweak the metal deformation effect by adjusting parameters, such as strength, falloff, and direction, to achieve the desired level of realism and visual impact in the final result. This process will help you create a convincing metal deformation effect that adds realism and visual interest to your train collision simulation.
5 | Setup Glass Rigids
Learn how to create a shattering glass effect on impact for the train with windows. This involves preparing the glass geometry for fracturing and setting up constraints to simulate glass behavior.
6 | Export VAT From Houdini
Learn how to export the simulation as vertex animations textures. In this case, there will be two types of vertex animations with the metal frame and the glass of the train. Other than that you will need to tweak a few things for the vertex animations to work.
7 | Import VAT Into Unreal
Learn how to import and set up the vertex animations in Unreal Engine 5. The video will briefly show you how to get the shader for VAT. If you are not familiar with this process of using VAT, then you will see that meshes and textures need to be imported in a specific way to work correctly. As a final touch, an animation sequence is created to make and control the simulation in Unreal Engine 5.


 Channel


