Ad Clicks : Ad Views : Ad Clicks : Ad Views : Ad Clicks : Ad Views : Ad Clicks : Ad Views :
Oh Snap!

It looks like you're using an adblocker. Adblockers make us sad. We use ads to keep our content happy and free. If you like what we are doing please consider supporting us by whitelisting our website. You can report badly-behaved ads by clicking/tapping the nearby 'Advertisement' X text.

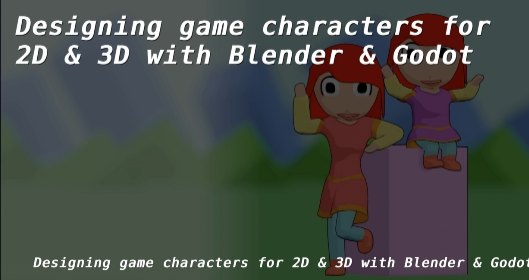
Designing game characters for 2D & 3D with Blender & Godot

/

Release date:2022

Author:Oscar Villarreal

Skill level:Beginner

Language:English

Exercise files:Yes

What you’ll learn:

  • Designing 3D characters with Blender
  • Create a cel shading effect
  • Render images to be used as animated sprite
  • Export model as glTF
  • Use shader editor to create cel shading effect
  • Use the action editor to create non linear animations

Requirements:

  • Blender 3.x installed
  • Godot 3.x installed
  • Mouse and Keyboard (preferable with numeric keypad)
  • Basic knowledge of Blender and Godot

Description:
Hello and welcome.

If you are a game designer or developer who is interested in creating your own animated sprites for 2D games or models for 3D games, this course is for you.
This course focuses on the creation of 3D models with their own animations that you can use in both 2D and 3D environments.
For this, we will use Blender as a 3D editor and Godot as a game engine where we will test the resources.
In Blender, we will create two models. Both models will have a cel shading effect that will make them look like a 2D image.
Both models will have an animation that will be rendered to be used as sprites. In addition, we will export the 3D model so that it can be used in external applications.
In GODOT, we will import the resources we have created and configure them in a 2D and 3D environment.

In this course you will learn:

  • Designing 3D characters with Blender
  • Create a cel shading effect
  • Render images to be used as animated sprite
  • Export model as glTF
  • Use shader editor to create cel shading effect
  • Use the action editor to create non linear animations

This course may be attractive to you because it can help you to create some basic character models that can be used in a 2D or 3D video game that you can then customize in more detail in your personal projects.

In addition, you will have access to the content created during the course.
I hope you find the content useful and that you can apply it to your personal projects.
Have fun and happy learning.

Who this course is for:
Designers and Game developers that want to create their how 2D and 3D resources with Blender

Watch online or Download for Free
01. Introduction

01. Introduction

02. Creating the head

01. Creating the base. Pt 1
02. Creating the base. Pt 2
03. Creating the eyes
04. Creating the mouth
05. Adjusting the base. Pt 1
06. Using seams
07. Assigning the materials
08. Adjusting the base. Pt 2
09. Adjusting the base. Pt 3
10. Using Smooth Vertices
11. Adjusting the base. Pt 4
12. Creating the hair area
13. Adjusting the hair
14. Creating the long hair. Pt 1
15. Creating the long hair. Pt 2
16. Adjusting the long hair. Pt 1
17. Adjusting the long hair. Pt 2
18. Black outline preview

03. Creating the body

01. Creating the neck. Pt 1
02. Creating the neck. Pt 2
03. Separating the neck. Pt 1
04. Separating the neck. Pt 2
05. Creating the torso
06. Creating the extremities
07. Adjusting the body. Pt 1
08. Adjusting the body. Pt 2
09. Creating the hands and feet
10. Creating the skirt
11. Assigning the materials
12. Create the knees and elbows
13. Creating the second model
14. Adjusting the second model. Pt 1
15. Adjusting the second model. Pt 2
16. Black outline preview

04. Joining head and body

01. Adjusting the folding areas. Pt 1
02. Adjusting the folding areas. Pt 2
03. Creating a second head
04. Preparing the neck area
05. Joining the body with the head
06. Applying changes in the second model

05. Rigging. Pt 1

01. Adjusting the mouth
02. Adjusting the origin
03. Creating the armature. Pt 1
04. Creating the armature. Pt 2
05. Joining the model with the armature
06. Adding Inverse kinematic
07. Adjusting weights in edit mode. Pt 1
08. Adjusting weights in edit mode. Pt 2
09. Adding poles to inverse kinematics

06. Rigging. Pt 2

01. Creating the armature
02. Adding Inverse kinematic

07. Mouth details

01. Fixing the mouth. Pt 1
02. Fixing the mouth. Pt 2

08. Cel shading. Pt 1

01. Adding the nodes
02. Adding the color and tones
03. Copying nodes into another material
04. Adjusting the materials
05. Black outline

09. Cel shading. Pt 2

01. Adjusting the second model

10. Creating the animation

01. TPose
02. Idle
03. Run. Pt 1
04. Run. Pt 2
05. Run. Pt 3
06. Working with the second model

11. Rendering the animation. Pt 1

01. Adding the camera
02. Adding environment texture
03. Orthographic camera
04. Transparent background
05. Rendering the animation
06. Result in a image viewer

12. Testing in Godot. Pt 1

01. Importing the images

13. Rendering the animation. Pt 2

01. Working with the second model
02. Result in a image viewer

14. Testing in Godot. Pt 2

01. Importing the images
02. Ideas for more uses

15. Exporting the model as glTF. Pt 1

01. Reconnecting the original material nodes
02. Exporting

16. Importing the model into Godot

01. Vertices errors

17. Fixing the weights

01. Weight paint
02. Export

18. Working with the fixed model

01. Verifying the vertices changes
02. Configuring the materials

19. Exporting the model as glTF. Pt 2

01. Weight paint and material nodes
02. Configuring the materials
03. Result

20. End

01. Final message

[Udemy] Designing game characters for 2D & 3D with Blender & Godot.7z
[Udemy] Designing game characters for 2D & 3D with Blender & Godot_Subtitles.7z


Join us on
  Channel    and      Group

  • Facebook
  • Twitter
  • Google+
  • Linkedin
  • Pinterest

Leave a Comment

Your email address will not be published. Required fields are marked *