Ad Clicks : Ad Views : Ad Clicks : Ad Views : Ad Clicks : Ad Views : Ad Clicks : Ad Views :
Oh Snap!

It looks like you're using an adblocker. Adblockers make us sad. We use ads to keep our content happy and free. If you like what we are doing please consider supporting us by whitelisting our website. You can report badly-behaved ads by clicking/tapping the nearby 'Advertisement' X text.

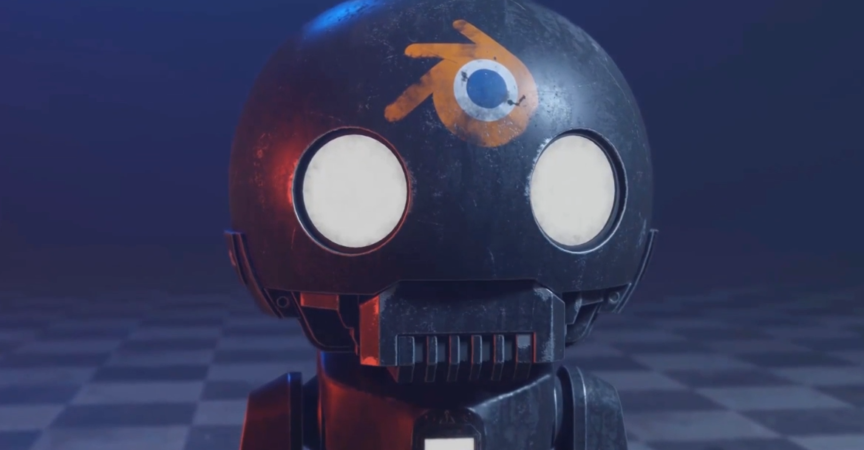
Blender – Create the Tiny K-2SO Star Wars Robot

/

Release date:2020, September 3

Author:Mrawan Hussain

Skill level:Beginner

Language:English

Exercise files:Yes

Hi, I’m Marwan, I always like to create start to finish courses, because I want to teach the student a lot of things with one course, and that’s what I did in this training.

Welcome to the k-2SO STAR WAR Robot Blender course, in this course, you will learn how to model and unwrap and add realistic material to your project, we will begin our journey with the most important part ( modeling ) we will start modeling the hole Robot from start to finish and we will use special tools comes default with Blender to accomplish that.

After the modeling section, we will jump to the most important stage, it’s Unwrapping, It’s a very important stage because if you don’t unwrap your model you can’t add the texture above it properly, so because of that I unwrapped all the Robot from start to finish so you can understand the tech neck that I’m using to achieve that quickly and perfectly.

after the Unwrapping section, we need to prepare the project to send it to Substance Painter, so in this stage, we will learn how to send the project correctly to Substance Painter without any problem to prepare it for texturing, and at Substance Painter, we will learn how to create realistic PBR material and how to make it old and dirty to give the project more realism.

After adding material to the Robot now we need to take the Robot back to Blender, so there we will learn how to import the texture from Substance Painter to Blender, and how to add them correctly on the Robot to prepare it for rendering.

then we will render the Robot with the Cycles render engine and make realistic results there, after that I will use the compositor to add some adjustment to the final render.

This course will be full of information, so I hope you benefit from it. and happy learning.

Watch online or Download for Free

1. Introduction
00.Introduction
01.Setting up the scene and adding the blueprints
02.How to change the dimension and prepare the scene for modeling
03.How to use bool tool inside Blender
04.How to use carver tool inside Blender
05.Start modeling the head
06.Modeling the head part2
07.Modeling the head part3
08.Modeling the head part4
09.Create the back details of the head
10.finish the head modeling
11.adding the bevel to the head
12.Adding the bevel and fix the weird shading
13.working with the chest
14.Create a hole for the arm
15.Create a hole to the neck
16.Start Creating The Arm
17.create the arm details
18.Apply the bevel to the arm
19.Create the shoulder shield
20. Crete The palm of the hand
21.How To Create The Fingers
22.Compelet creating the fingers
23.Crete The waist
24.Crete the Abdomen
25.Design the thigh
26.Creating the legs
27.create the feet
28.Create the neck
29.Adding details to the chest
30.Adding details to the chest_2
31.Adding details to the hips
32.Creating the back details
33.Creating the back details2
34.Adding more details to the Robot

2. Unwrapping
35.Unwrapping the head part 1
36.Unwrapping the head part 2
37.Complete unwrapping the head
38.Unwrapping the Chest details
39.Coplete unwrapping the chest and hips
40.Unwrapping the Arm
41.Unwrapping the hand
42.Unwrapping the legs
43.Complete Unwrapping section
44. How to use vertex paint

3. Texturing section
45.prepare the robot for substance painter
46.Start with Substance Painter
47.Texturing the Head with Substance painter
48.Create Plastic material and add dust to the head
49.Adding material to the Chest
50.Adding the materials to the rest of the Robot parts
51.Adding decals to the robot
52.Adding details to the chest
53.Adding the final touch with Substance Painter
54.Exporting the textures

4. Rendering with Blender
55.Render the scene

1.1,2.1 Project Folders.7z


Join us on
  Channel    and      Group

  • Facebook
  • Twitter
  • Google+
  • Linkedin
  • Pinterest

Leave a Comment

Your email address will not be published. Required fields are marked *