Creating Skin Contrast With High_Low Key Techniques
Release date:2015, February 11
Duration:00 h 11 m
Author:Robbie Carman
Skill level:Intermediate
Language:English
Exercise files:Yes
They call it color correction or color grading, but I’m convinced that the most important part of our job as colorists has nothing to do with color, but everything to do with (drum roll please)…
Contrast
Contrast governs a lot of what you do as a colorist – from overall scene contrast and exposure, to localized contrast including skin tone.
In this Insight, it’s localized contrast and in particular skin contrast that I want to discuss.
Like a lot of colorists, I sometimes struggle with skin tone – the color, the exposure, imperfections, and correcting imperfections.
By skin tone I don’t just mean of course the color of that skin, but the exposure of the skin and how direct light and shadow all impact the perception of does someone look ‘good’
Recently I’ve been working on a lot of shows where the contrast of skin has become really important, that got me to thinking a lot about some of my discoveries and in this Insight I’d like share one of those with you.
High Key or Low Key?
When it comes to the skin tone contrast of an actor, interview subject or even an extra, there is often a big stylistic choice that needs to be made in terms of lighting the scene while out the field.
Is a shot going to be high key, low key or a hybrid (mid key)?
No doubt you’ve heard the terms high/low key before and as a colorist, it’s important that you know them well as often you’re called to create or enhance these lighting choices.
High Key – high key lighting is what a lot of people associate with the TV look. Think of a sitcom, your favorite late night show or even the nightly news – all of these employ high key lighting. Put simply, high key lighting uses lighting to minimize skin contrast or more broadly minimize or eliminate shadow in a shot. This is often done with basic 3-point lighting techniques, soft boxes or even complex lighting arrays (in the case of a studio).
Low Key – the opposite of high key, low key lighting of course accentuates shadows, often for dramatic effect. Considered by many casual observers to be more ‘filmic’ compared to a high key approach, low key setups mimic they’re namesake often using only a single light source shaped in some way. In many ways, low key lighting is a more naturalistic approach, but care must be taken on-set and in grading.
Hybrid Key – the traditional approaches of high or low key lighting may be too much for a particular scene or project. There are thousands of ways to light a scene and many DPs and gaffers employ a hybrid approach (mid key) when it comes to dealing with light directionality, shadows and how they setup a scene.
In my own grading, it’s usually the hybrid approach that I see the most.
A DP or a lighting team will love the look of low key but in a practical sense, a true low key look is just too much.
Many directors and DPs will fall into the camp that a true high key look is too TV or even too expensive to pull off based on the amount of lighting instruments that may be needed for a particular room or location.
Therefore, the hybrid approach is what most of us see.
Adding A Little Drama
One thing that adding a bit of skin contrast does to people in the context of emulating a low key (hybrid) look is to contribute a little bit of drama to a scene.
There is something more compelling to a shot (in my eyes) that has a nice play of direct light and shadow vs. the evenly lit high key look.
When it comes to adding a bit of skin contrast the technique is rather simple:
Add the Direct Light – If someone in a shot is naturally in shadow, using a shape, power window or vignette on one side of their face to add more of a direct light can help you create a low key type look. Just be careful that the framing of the shot and other potential light sources are in line with the side of the person’s face that you’re adding the light to.
Create The Shadow – The opposite approach, but often times a little easier to create and control. Adding shadow is all about natural fall off so position and shape softness are all important.
The Light & The Dark – Yep, sometimes you have to do both. Because people’s faces are so small in many shots, be careful about your overlapping corrections and the softness of windows.
When it comes to positioning of these skin contrast corrections, tracking also becomes really important.
Unless a shot is totally static, then you’ll need to track a window on the high or low (both) side of someones face.
After tracking, you may need to go back and adjust the shape or window especially if you’re adding shadow.
What can happen is that your darkening correction is visible on the area just outside of a subjects face and as we all know – seeing a window or a correction is a bad thing!
An Unintended Benefit
I’ve placed the concept of skin contrast correction in the context of a high or low key decision.
While that is often what you’ll be thinking of when making a skin contrast correction, the techniques of adding more direct light or adding more shadow can actually have an added benefit.
Making someone who has bad skin tone look better!
As you’ll see in the video below, the subject in the shot skin tone that is difficult to correct.
Even though the rest of the shot is graded pretty well, the subject still has flat, desaturated, kind of gray skin tone.
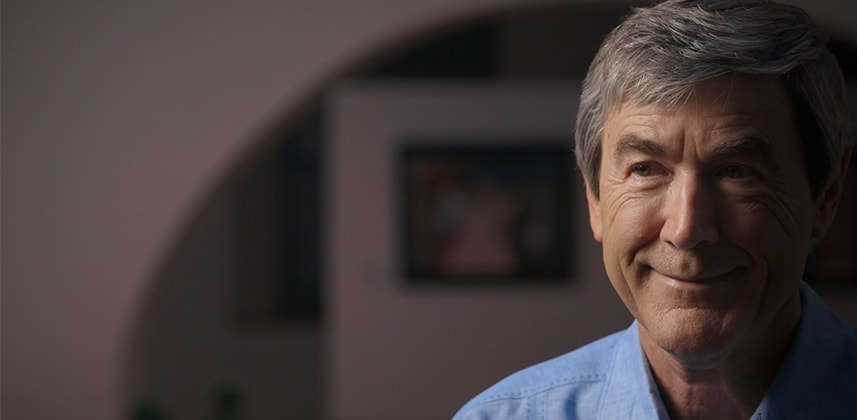
In the first few seasons of the series Closer To Truth that this shot comes from, I found the host’s (shown in the video) skin tone to be the biggest sticking point with the client in terms of getting the shows approved.
I discovered that by adding some localized skin contrast and emulating a low key look on his face it just made him look better!
If you’re struggling with skin tone the low key approach to adding skin contrast is a valuable one to have in your tool kit.
As always, comments, questions or anything to add please use the comments below.



 Channel
