Blender 2.8 UV Mapping by Darrin Lile (1080p Update)
Release date:2019, April
Duration:09 h 03 m
Author:Darrin Lile
Skill level:Beginner
Language:English
Exercise files:Yes
What Will I Learn?
3D Modeling in Blender 2.8
UV Mapping
Texturing and Sculpting
Baking a Normal Map
Rigging a Character in Blender 2.8
Animating a 2D Face with Grease Pencil
Creating Animation Cycles for a Video Game
Exporting a Character and Animations from Blender 2.8 to Unity
Creating a C# Script in Unity to Control a Game Character
Requirements
You should have at least a little experience with Blender and Unity
We use all free software in this course: Blender 2.8, the free version of Texture Packer, and the Personal Edition of Unity
The instructor uses a graphics tablet in the texture painting and sculpting sections of the course
Description
In this course we’ll create a game character using Blender 2.8, and we’ll export it to Unity and configure it so we can control it in the game engine.
Throughout the course, you will learn:
3D Modeling in Blender 2.8
UV Mapping
Texturing and Sculpting
Baking a Normal Map
Rigging a Character in Blender 2.8
Animating a 2D Face with Grease Pencil
Creating Animation Cycles for a Video Game
Exporting a Character and Animations from Blender 2.8 to Unity
Creating a C# Script in Unity to Control a Game Character
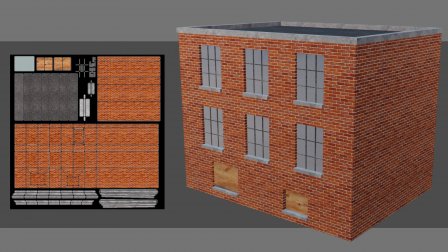
Beginning with the modeling, we’ll use Blender 2.8 to build all the individual pieces of a Lego character. And then you’ll learn how to UV map each of the parts, and then create an efficient, unified UV map of the entire character. We will use Blender’s texture painting tools to create the clothes of the character, and we’ll use the sculpt tools to create the high res details of the hair. You’ll then learn how to bake a normal map in Blender and apply the textures to the character model.
Next, we’ll work on rigging the character. We will begin with a single bone, and create the rig manually, so you can see how a character rig is built from the ground up. You’ll learn how to create a Foot Roll Rig and how to use Blender 2.8’s new process for creating Custom Shapes to control the character.
Once the rig is done, I’ll show you a cool technique, using Blender 2.8’s new Grease Pencil tools, to animate both a 2D drawn face and a 3D body at the same time. With this technique, we will create the character’s Idle, Run, and Jump animations, ready to be used in a game engine.
You will then learn how to export the character, animations, and textures out of Blender and bring them into the Unity game engine. And here you will learn how to set-up the character in the game and even how to retarget third-party animations onto our character, using Unity’s Humanoid Rig system.
Finally, we will write a simple C# script to incorporate our 2D and 3D animations, and get the character running around the level.
If you’ve ever wanted to create a game character, and are interested in getting up to speed in Blender 2.8, then this course is for you. So join me as we create a game character in Blender 2.8.
Who is the target audience?
Anyone who would like to create a game character using Blender 2.8 and Unity



 Channel

Can we have this course in future https://www.artstation.com/tsmith3d/store/VwgK/intro-to-ue4-vfx-waterfall
we don’t have this one, sorry
thx man can you add this course
https://academy.cgboost.com/p/blender-2-8-launch-pad
for the impatient here is the link ))
CGBoost – Blender 2.8 – Launchpad
Just give it a chance to be transcoded first
Hy Sir, i am very happy i so excited to see this website. I am visit to daily this site for learning. Thanks for creating this website.
So, please add this course:: Unity Android 2020 : Build 7 Games with Unity & C#