Ad Clicks : Ad Views : Ad Clicks : Ad Views : Ad Clicks : Ad Views : Ad Clicks : Ad Views :
Oh Snap!

It looks like you're using an adblocker. Adblockers make us sad. We use ads to keep our content happy and free. If you like what we are doing please consider supporting us by whitelisting our website. You can report badly-behaved ads by clicking/tapping the nearby 'Advertisement' X text.

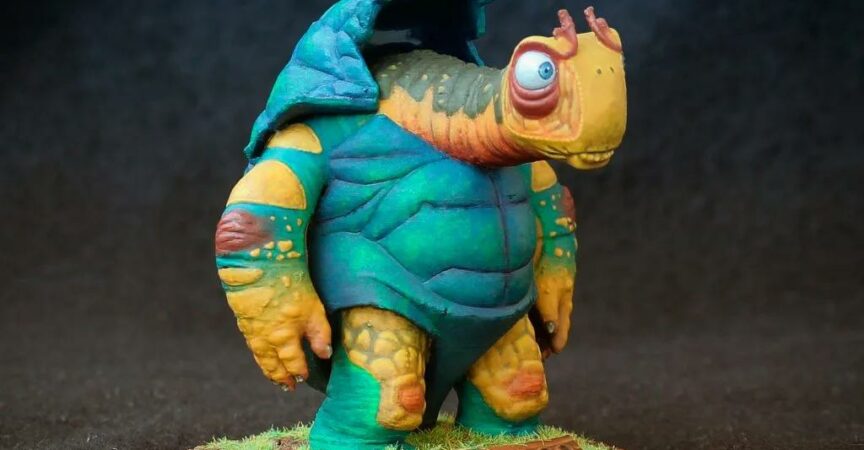
Sculpting in Zbrush Advanced by Milivoj Popovic

/

Release date:2023, March

Author:Milivoj Popovic

Skill level:Beginner

Language:English

Exercise files:Yes

Description

This course, led by an award-winning digital sculptor, Art Academy professor, and studio head with over 15 years of industry experience, offers a comprehensive approach to digital sculpting. Throughout the course, you’ll learn how to sculpt a variety of materials, including stone, wood, metal, and fabric. You’ll also have the opportunity to participate in both quick and slow sculpting sessions, which will challenge your speed, focus, patience, and endurance as a sculptor. The course emphasizes elevating your sculpting skills without overwhelming you with new workflows or buttons to remember. Additionally, you’ll learn how to use Keyshot, a powerful rendering software that’s fully integrated with Zbrush. By the end of the course, you’ll have the skills and knowledge necessary to create stunning digital sculptures.

What will you learn

Learn Zbrush from an experienced instructor who is not only a professional sculptor but also a studio owner with over 15 years of industry experience. This course will teach you how to sculpt highly-detailed organic forms and how to approach sculpting various materials such as wood, stone, metal, and soft fabrics. You will also have the opportunity to participate in speed sculpting sessions to strengthen your primary shapes and have fun while doing it. Additionally, you will learn how to render your sculpts in Keyshot, a powerful software that is completely integrated with Zbrush.

Who is this course for:

Mid level Zbrush users who are looking to take their sculpting to the next level!
Students of my Sculpting in Zbrush course!

Watch online or Download for Free
1 – WELLCOME INSIDE

1 – Welcome

2 – SPEED SCULPTING

2 – Intro to speed sculpting
3 – Getting our ducks in order
4 – Monster
5 – Mutant Flytrap Plant
6 – Pepper Warrior
7 – Creature Bust
8 – Baby Yoda

3 – STONE

10 – Stone cube part 01 lets start
11 – Stone cube part 02 building stone layer by layer
12 – Stone cube part 03 trim dynamic time
13 – Stone cube part 04 adding details
14 – Stone cube part 05 more details
15 – Stone cube part 06 wrapping it up
16 – Stone cube part 07 Polypainting time
17 – Stone cube part 08 Rendering in Keyshot
18 – Stone Apple part 01 modeling
19 – Stone Apple part 02 Polypainting
20 – Stone Apple part 03 Rendering in Keyshot

4 – FOLDS AND FABRIC

22 – Folds
23 – Stylized Folds
24 – Pillow part 01 lets get it on
25 – Pillow part 02 modeling
26 – Pillow part 03 more modeling
27 – Pillow part 04 IMM brush for stitching
28 – Pillow part 05 Rendering in Keyshot
29 – Pillow part 06 CC in Photoshop

5 – BANANA PROJECT

32 – Banana part 01 Zspheres time
33 – Banana part 02 from Zspheres to polygons
34 – Banana part 03 working on our base mesh
35 – Banana part 04 retopo of base mesh parts
36 – Banana part 05 adding subdivisions sculpting time
37 – Banana part 06 already started adding some details
38 – Banana part 07 Polypainting time with one really cool trick
39 – Banana part 08 finishing up transferring polypaint data from ref images
40 – Banana part 09 painting by hand time
41 – Banana part 10 so it starts detail sculpting
42 – Banana part 11 major small details
43 – Banana part 12 peel by peel stroke by stroke details
44 – Banana part 13 getting into even smaller details Its all coming together
45 – Banana part 14 adding accessories
46 – Banana part 15 doing the work on other peels as well
47 – Banana part 16 more accessories Things are looking freaking awesome
48 – Banana part 17 you can never have enough of cool accessories
49 – Banana part 18 finishing the peel OMG
50 – Banana part 19 center of the banana time
51 – Banana part 20 finishing up the sculpting WOW
52 – Banana Part 21 preparing the banana for export to an outside renderer
53 – Banana part 22 exporting time
54 – Banana part 23 Keyshot Start of the rendering part
55 – Banana part 24 Banana peel Keyshot material Its organic lets do it
56 – Banana part 25 Banana inner part Keyshot material time
57 – Banana part 26 tweaking so much tweaking And one crazy idea in the end
58 – Banana part 27 back into Zbrush I know but trust me
59 – Banana part 28 still working on the duck tape
60 – Banana part 29 finishing up the duck tape
61 – Banana part 30 taking our duck tape into Keyshot
62 – Banana part 31 back into Zbrush wait what again
63 – Banana part 32 Photoshop time
64 – Banana part 33 last minute tweaks for that perfect shot

6 – DAVIDS EYE

67 – Davids eye part 01 lets get it on
68 – Davids eye part 02 step by step
69 – Davids eye part 03 getting there
70 – Davids eye part 04 refining sections
71 – Davids eye part 05 adding some cool details
72 – Davids eye part 06 doing the iris and polypainting

7 – WOOD

74 – Anvil Block part 01 primary shapes time
75 – Anvil Block part 02 lets tighten it
76 – Anvil Block part 03 Zremesher time
77 – Anvil Block part 04 sharpening those corners
78 – Anvil Block part 05 getting into details
79 – Anvil Block part 06 getting into details a lot of details
80 – Anvil Block part 07 finishing the sides
81 – Anvil Block part 08 lets do the top part
82 – Anvil Block part 09 finishing the wood part of the sculpt
83 – Anvil Block part 10 metal time
84 – Anvil Block part 11 finishing the metal band
85 – Anvil Block part 12 nails time
86 – Anvil Block part 13 exporting our sculpt for external softwares
87 – Anvil Block part 14 Substance Painter time
88 – Anvil Block part 15 lets do a Clay render of our sculpt
89 – Anvil Block part 16 CC in Photoshop to get that beautiful final Clay image
90 – Anvil Block part 17Keyshot time Using those textures to get an amazing render
91 – Anvil Block part 18 wood surface done time to do the metal parts
92 – Anvil Block part 19 final adjustments and rendering
93 – Anvil Block part 20 CC in Photoshop to get our Hero Shot

8 – KEYSHOT

100 – Keyshot part 05 rendering
96 – Keyshot part 01 intro to Keyshot and getting to know the UI
97 – Keyshot part 02 importing sculpts and setting up the scene
98 – Keyshot part 03 developing the materials using nodes
99 – Keyshot part 04 developing the materials using nodes

[Udemy] Sculpting in Zbrush Advanced by Milivoj Popovic.7z.001.rar
[Udemy] Sculpting in Zbrush Advanced by Milivoj Popovic.7z.002.rar
[Udemy] Sculpting in Zbrush Advanced by Milivoj Popovic.7z.003.rar
[Udemy] Sculpting in Zbrush Advanced by Milivoj Popovic_Subtitles.7z


Join us on
  Channel    and      Group

  • Facebook
  • Twitter
  • Google+
  • Linkedin
  • Pinterest

Leave a Comment

Your email address will not be published. Required fields are marked *