Project Titan Stacking Tool (+Russian)
Release date:2022, February 22
Author:THOMAS TOBIN
Skill level:Beginner
Language:English
Exercise files:Yes
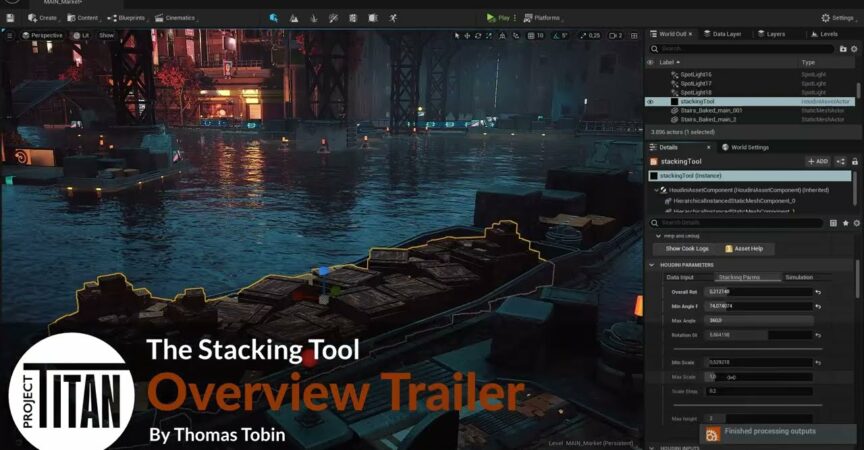
The Stacking tool enables you to efficiently populate your environment with stacked objects. In this lesson, you will learn how to create an asset stacker that can scan your scene and pack selected assets into a predefined volume. You will learn how to work with Unreal’s data tables, utilize Houdini’s UV packer for geometry, set up vertical stacking with feedback loops, and add in simulations to settle the assets.
Project Titan is an in-house tech demo designed to test Houdini’s procedural workflows for production, while creating a 3D environment that leverages the latest technologies in Unreal. Click Here to learn more.
1 | Unreal Engine Setup
In this lesson, you will learn how to set up Data Tables in Unreal Engine using Blueprint. These Data Tables will reference Megascan assets that you plan to use with the stacking tool later on. You will also need to set up a Box brush in Unreal Engine, which will serve as the bounding area for the stacked assets. Additionally, you will import an empty Houdini Digital Asset (HDA) to enable Session Sync between Houdini and Unreal Engine, allowing for seamless data transfer between the two software.
2 | Setting up the HDA
In this lesson, you will learn how to create the tool in Houdini for asset packing. You will start with an object merge node in Houdini and connect it to the data table that was created in the previous lesson in Unreal Engine. You will then manage the data inside Houdini, and set up a copy to point node to assign a box to the points created by the data table. This will allow you to create the first level of asset packing in Houdini, where the boxes are assigned to the points based on the data from the data table in Unreal Engine.
3 | Packing Assets
In this lesson, you will learn how to set up a volume in Houdini that will contain the stacked assets. You will also set up the rotation and scale of each instance within the volume using various techniques and tools. Additionally, you will use a UV Layout tool to organize the geometry of the assets, ensuring proper UV mapping for texturing purposes. You will also explore a variety of settings that allow you to control the size and shape of the assets within the volume, giving you more control over the final look of the stacked assets in the scene.
4 | Stacking Assets
In this lesson, you will learn how to add vertical stacking into your tool in Houdini. This involves isolating the tops of the first layer of assets and clustering them together to generate points for a new layer of stacked assets. You will set up a for-each loop that allows for more than 2 stacking layers, giving you flexibility in the number of layers you can create. Steps will be taken to ensure that each layer works properly, including managing the rotation, scale, and positioning of the assets in each layer. Additionally, you will add finishing touches to ensure that the original geometry is being instanced properly, ensuring a realistic and visually appealing stacked asset result in the scene.
5 | Simulation
In this lesson, you will learn how to add RBD (Rigid Body Dynamics) simulation tools to your digital asset in Houdini in order to create a more realistic settling of the upper stack layers. This involves using simulation as a modeling tool to achieve a natural and dynamic stacking effect. You will explore the use of RBD simulation tools within Houdini to add physics-based behavior to the stacked assets, allowing them to settle and interact with each other in a realistic manner. Additionally, you will explore how this stacking tool can be repurposed for different situations, allowing for versatility and adaptability in your workflow. This can include using the same tool for different types of assets or scenarios, and modifying the parameters and settings to achieve different stacking effects as needed.


 Channel


