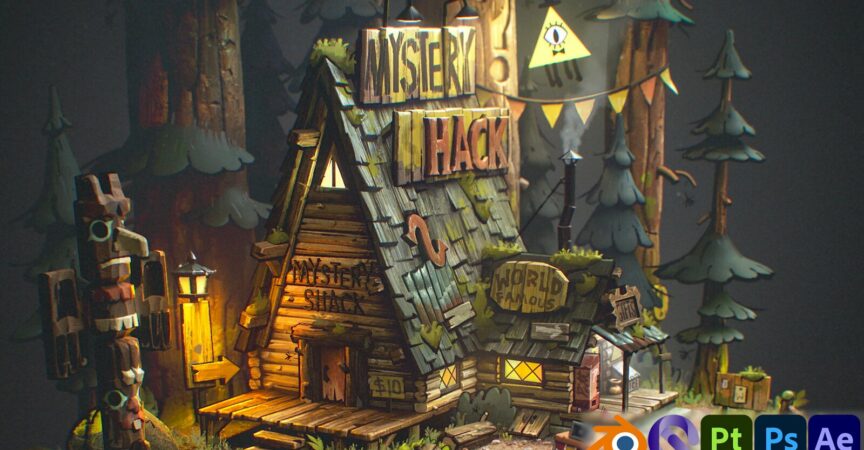
Mystery Shack – Stylized 3D Diorama – Tutorial
Release date:2022, September
Author:Ian Worrel
Skill level:Beginner
Language:English
Exercise files:Yes
This is an 8 part video series demonstrating the creation of this 3D diorama from scratch. This was originally fan art made for the 10 year anniversary of the series, Gravity Falls. After many requests about how this was created, I decided to make a tutorial covering the step by step process. Here’s the original post: Mystery Shack Diorama
This tutorial series primarily demonstrates the process of hand-painting textures in Photoshop that are then applied to 3D mesh using the projection mapping technique in Blender. I have been a professional 2D artist for most of my career and my 3D skills are enthusiast level at best. As a 2D artist I primarily know how to evaluate the success and failure of my work as a flat image in a frame. While this diorama is 3D, it mostly operates as a 2D image with limited camera motion. I like projection painting because I can lean on my 2D skillset with a little 3D dimensionality for added effect – I suppose one definition of 2.5D.
DISCLAIMER: this is not an exhaustive ‘how to use this program’ type tutorial. I don’t cover which button to push, point to every menu to find the tool, define all the terms, etc. At times it will be step by step process demo and in other moments it will be narration over time-lapse screen recording. This is a fast demonstration that is densely packed with material, I prefer tutorials that get straight to the point.
This diorama was created using several tools including:
- Blender
- Gravity Sketch
- Substance Painter
- Photoshop
- After Effects
Technically, using all of these programs is NOT required to create this. As I explain in the video, the other reason I made this was to stress-test several new techniques and workflows, so I tried a bunch of different tools. Staying in blender and skipping some of these programs is entirely possible for this technique.
For intermediate users of these programs it should be easy enough to follow along. For beginners, there is plenty to glean from these videos but it may be overwhelming and possibly frustrating if you’re trying to copy each step. For those users, additional tutorials will likely be required to fully understand what I’m covering but this series will give a very thorough overview of all that is involved.



 Channel






Hi, could you share this course with us? Thank you so much!
https://wenbozhaocgi.gumroad.com/l/rzdya