Foundation Patreon – 3D Concept Vehicle – Part 1 by Norris Lin
Release date:2024, February
Author:Norris Lin
Skill level:Beginner
Language:English
Exercise files:Yes
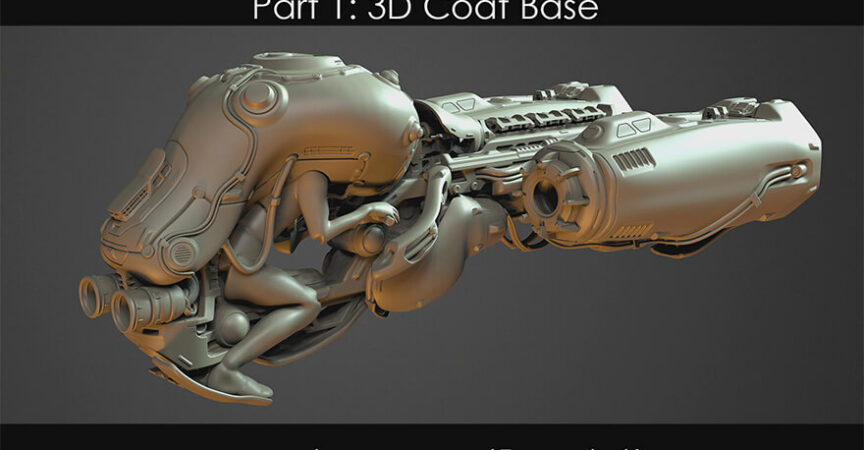
Hello everyone, Norris Lin here again. Today, we’re diving into another exciting tutorial series, this time focusing on designing a sci-fi vehicle. It’s a fascinating subject, especially since we’re aiming to create a vehicle with a specific function: transportation, whether it’s for people or cargo. What sets this project apart is the visual direction I’m aiming for — a retro sci-fi aesthetic.
To kick things off, I like to gather some reference images to inspire the visual aesthetic I’m aiming for. One of my main inspirations comes from the model kits created by the talented Japanese model maker, Kao Yokoyama. His designs often draw inspiration from World War II military elements, resulting in a unique blend of futuristic and historical influences.
What draws me to Yokoyama’s work is the organic feel of his designs. They feature soft, organic shapes contrasted with hard, industrial details, giving them a sense of history and character. While Yokoyama’s designs serve as inspiration, I’m aiming for a vehicle layout similar to the Star Wars-inspired speeders, with large, front-heavy components juxtaposed with smaller cockpit areas.
As we delve into the design process using 3DGUN, a versatile software, I’ll be exploring different forms and shapes to bring our sci-fi vehicle to life. Along the way, I’ll be referencing various design elements for the cockpit, including interactive displays and control panels, inspired by real-world vehicle interiors.
Once we’ve finalized the model, we’ll move on to the exciting part: materials and texturing. I’ll be adding color and texture to give our vehicle that grungy, used look, complete with rust, stains, and wear and tear.
This tutorial will be split into two parts: designing the vehicle using 3DGUN and texturing using Substance Painter. By the end of the series, you’ll have learned how to design and texture a sci-fi vehicle from start to finish. I’m thrilled to embark on this journey with you, so let’s get started!



 Channel




Admin the capcha isn’t showing pls fix
should be ok now