


Full Environment Creation in UE5 & Blender – In-Depth Course

Release date:2021, October 11
Skill level:Intermediate
Language:English
Exercise files:Not Provided
Course URL:https://www.udemy.com/course/western-game-environment-creation-in-depth-tutorial-course/
You will need a basic understanding of Blender3d and Unreal Engine to follow this course.
Full Environment Creation in UE5 & Blender – In-Depth Course
Learn how a professional environment artist works when creating environments for games. You’ll learn techniques like Modular Modeling, Procedural Texturing, Unique Texturing, Level Art & Composition, shader Creation, Lighting, Character Animations and so much more.
BLENDER, SUBSTANCE, AND UNREAL ENGINE 5
All the modeling will be done in Blender3d, However, the techniques used are universal and can be replicated in any other 3d modeling package. The materials will be created using Substance Designer and previewed in marmoset toolbag 4. The environment will be built in the brand-new Unreal Engine 5 and the lighting will use the new Lumen system. We will also use the new modeling tools within Unreal. Next to this, we will also use Substance Painter to create unique textures and generate masks.
In this course, you will learn everything you need to know to create the final results that you see in the images and trailers. Next to this, the same techniques can be applied to almost any type of environment.
31+ HOURS!
This course contains over 31+ hours of content – You can follow along with every single step – The course does enclose a few small-time lapses, this is just to speed up very repetitive tasks, the rest is done in real-time. However, we have also included the time lapsed footage in real-time.
We will start by going over our reference and then we dive right in and create a blockout of our level and set it up in UE5. Then we will first create all of our procedural materials and we will turn our blockout models into final models and also UV unwrap/texture them right away.
Once that is done we will export all the artwork to Unreal engine 5 and setup our level.
We will create advanced shaders to give us control over everything from vertex painting to dirt masks to parallax and next to this we will also create a basic landscape material.
We will be using the new modeling tools within UE5 to speed up our workflow and minimize the modular pieces we need to make.
Finally we will do our scene lighting using the new Lumen system and we will do the color grading in Davinci Resolve.
Then to bring our scene to life I will show you how you can quickly generate character animations using Mixamo and I will even show you how to manually animate a horse in blender.
SKILL LEVEL
This game art tutorial is perfect for students who have some familiarity with a 3d Modeling tool like Blender, Substance Designer/Painter, and Unreal Engine – Everything in this tutorial will be explained in detail. However, if you have never touched any modeling or texturing tools before we recommend that you first watch an introduction tutorial of those programs (you can find many of these for free on YouTube or paid on this very website)
TOOLS USED
Blender3D
Substance 3D Designer and Substance 3D Painter
Unreal Engine 5
Marmoset Toolbag 4
Davinci Resolve
Mixamo
YOUR INSTRUCTOR
Emiel Sleegers is a senior environment artist currently working in the AAA Game Industry. He’s worked on games like The Division 2 + DLC at Ubisoft, Forza Horizon 3 at Playground Games, and as a Freelancer on multiple projects as an Environment Artist and Material Artist.
CHAPTER SORTING
There’s a total of 80 videos split into easy-to-digest chapters.
All the videos will have logical naming and are numbered to make it easy to find exactly the ones you want to follow.
01-Going Over Our Reference And Creating An Asset List
02-Setting Up Our Project And Metrics
03-Creating Our Blockout Pieces Part1
04-Creating Our Blockout Pieces Part2
05-Creating Our Blockout Pieces Part3
06-Creating Our Blockout Pieces Part4
07-Creating Our Blockout Pieces Part5
08-Setting Up Our Level Part1
09-Setting Up Our Level Part2 – Narrated Timelapse
10-Setting Up Our Level Part3 -Timelapse
11-Preparing Our Scenes For Material Creation
12-Creating Our Plain Wood Material Part1
13-Creating Our Plain Wood Material Part2
14-Creating Our Plain Wood Material Part3
15-Creating Our Plain Wood Material Part4
16-Creating Our Plain Wood Material Part5
17-Creating Our Wood Planks Part1
18-Creating Our Wood Planks Part2
19-Creating Our Wood Planks Part3
20-Creating Our Wood Planks Part4
21-Creating Our Wood Planks Part5
22-Creating Our Wood Planks Part6
23-Creating Our Final Assets Part1
24-Creating Our Final Assets Part2
25-Creating Our Final Assets Part3
26-Creating Our Final Assets Part4
27-Creating Our Final Assets Part5
28-Creating Our Final Assets Part6
29-Creating Our Final Assets Part7
30-Creating Our Final Assets Part8
31-Creating Our Final Assets Part9
32-Creating Our Final Assets Part10 – Timelapse
33-Creating Our Final Assets Part11 – Timelapse
34-Importing All Our Final Assets In Ue5
35-Cleaning Up Object Placement And Shader Planning
36-Creating Our Master Material Part1
37-Creating Our Master Material Part2
38-Creating Our Master Material Part3
39-Importing Materials And Doing Our First Lighting Pass Part1
40-Doing Our First Lighting Pass Part2
41-Creating Our Roof Material Part1
42-Creating Our Roof Material Part2
43-Setting Up Our Final Models Part1
44-Setting Up Our Final Models Part2
45-Setting Up Our Final Models Part3
46-Setting Up Our Final Models Part4
47-Setting Up Our Final Models Part5
48-Setting Up Our Final Models Part6
49-Adding Variation To Our Environment Part1
50-Adding Variation To Our Environment Part2
51-Adding Variation To Our Environment Part3
52-Adding Vertex Painting Variation -Timelapse
53-Creating Our Window Glass Textures
54-Creating Our Saloon Corner – Timelapse
55-Creating Additional Assets – Timelapse
56-Doing Our Boolean Process
57-Doing Our Boolean Process Part2
58-Creating Our Decals And Placing Them
59-Creating Our Terrain Material Part1
60-Creating Our Terrain Material Part2
61-Creating Our Landscape Material
62-Adding Terrain Details Part1
63-Adding Terrain Details Part2
64-Adding Terrain Details Part3
65-Doing Our Second Lighting Pass
66-Creating Aditional Assets Part1
67-Creating Aditional Assets Part2
68-Creating Aditional Assets Part3
69-Creating Aditional Assets Part4
70-Creating Text Decals
71-Place Aditional Static Assets
72-Placing Our Characters
73-Creating Our Character Animations Part1
74-Creating Our Character Animations Part2
75-Creating Our Character Animations Part3
76-Animating Our Horse Part1
77-Animating Our Horse Part2 – Timelapse
78-Animating Our Horse Part3
79-Final Polishing Of Our Scene – Timelapse
80-Outro
[Udemy] Full Environment Creation in UE5 & Blender – In-Depth Course_Subtitles.7z
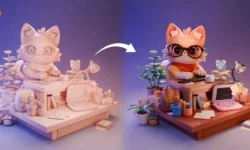


Wrong picture posted for the course. :/
thanks, fixed
please can you bring these courses:
-https://www.udemy.com/course/curso-online-de-pintura-digital/
-https://www.udemy.com/course/curso-online-de-ilustracao-digital/
-https://www.unhideschool.com/post/2626/5566/fundamentos-de-desenho-e-pintura/introduo-ao-curso
Thank you for all the courses you have already brought, if you can please bring these courses, it will help Brazilians
Hello, I just wanted to ask – a lot of courses were deleted from this site, is there any chance we could get them back?
what courses
Artstation – Creating a metro train interior in Unreal Engine 5
Thank you so much for this course
in order to take full advantage to this course you need the https://www.bigmediumsmall.com/wildwest pack
could you upload it if you ever find it pls ?
Bro please upload the course digital character design : draw protagonists with personality by Joel santana from domestika
please can you bring this course:
https://giuliamarchetti.gumroad.com/l/VSYLP
Thanks you
This course would be great to have https://courses.tomlooman.com/
thanks . but where is the project files
Thanks a lot. Huge!
thanks . but where is the project files