


From Sketch to 3D Print – Collectible Sculpting in ZBrush for 3D Printing

Release date:2021
Skill level:Beginner
Language:English
Exercise files:Yes
Course URL:https://www.artstation.com/marketplace/p/Y7Ma/from-sketch-to-3d-print-collectible-sculpting-in-zbrush-for-3d-printing
There is something deeply satisfying about holding a sculpture you created in your own hands…
If you have ever wanted to learn how to create sculptures in ZBrush for 3D Printing, but don’t know where to start, this course is for you!
Starting from the concept sketch, I walk you through a typical figurine project , from concept art to 3D printed test prototype. This is the course I wish I had 3 years ago when I started to teach myself how to do this, scouring the deep recesses of the internet to find tutorials on things like parts-fit, keying, sculpting to scale, part tolerance, and more!
This is a very beginner friendly course. We cover a number of cross-discipline techniques, that, even if you are fairly new to ZBrush, you should be able to follow along. That said, this should probably not be your first time opening the program. 🙂
I know how hard it is to learn things on your own. As a 100% self-taught, online learning junkie, I made it a point to explain everything I am doing — not just the what, but the WHY — at least once so you can make your own decisions with your own artwork.
This is a HUGE volume of nearly 40 patiently edited videos, all broken down by subject matter so you can skip around to what you need help with most.
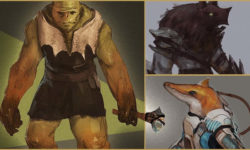
Chapter 01 – The Concept Sketch
Chapter 02 – Setting up the ZBrush UI
Chapter 03 – Blocking out the Head
Chapter 03b – Blocking out the Head pt 2
Chapter 04 – Fixing Head Proportions
Chapter 05 – Refining the Head
Chapter 06 – Blocking out the Body
Chapter 07 – Blocking out the Hair
Chapter 08 – Physics Test in Blender
Chapter 09 – Setting Scale
Chapter 10 – Blocking out the Base
Chapter 11 – Detailing the Trunk
Chapter 12 – Detailing the Horns
Chapter 13 – Facial Fixes Remeshing and Detailing
Chapter 14 – Hair Polishing
Chapter 15 – Even More Hair Polishing
Chapter 16 – Detailing the Horns – Timelapse
Chapter 17 – Detailing the Trunk Part 2 – Timelapse
Chapter 18 – Anatomy fixes and Eye Booleans
Chapter 19 – Flower IMM – Displacement Awesomeness
Chapter 20 – Using Textured IMMs on our Figure
Chapter 21 – Adding Flowers and Leaves
Chapter 22 – Adding Flowers and Leaves Timelapse
Chapter 23 – Loads of Detailing Timelapse
Chapter 24 – Detailing Timelapse part 2
Chapter 25 – SECTION 2 INTRO
Chapter 26 – Examining a Completed Figure for Reference
Chapter 27 – Starting Parts Breakdown – Making a Plan
Chapter 28 – Organizing by Final Parts
Chapter 29 – Preparing the Trunk and Base
Chapter 30 – Splitting The Trunk and Body
Chapter 31 – Merging the Body
Chapter 32 – Cleaning Hair Back and Removing Trunk Volume
Chapter 33 – Parts Split Timelapse
Chapter 34 – Horns Split Timelapse
Chapter 35 – Intro to Keying Demo
Chapter 36 – Keying and Creating Gaps
Chapter 37 – Last Look and Watertight Check
Chapter 38 – Parts Export and Preform Setup
Chapter 39 – Printing Cleanup and Assembly
[Artstation] From Sketch to 3D Print – Collectible Sculpting in ZBrush for 3D Printing.7z

https://gumroad.com/l/MakingAShortFilmTeaser
One of the blender course
missing 3a course
https://www.artstation.com/marketplace/p/BnqL6/zbrush-to-3d-printing-bring-your-3d-models-to-life
Is it possible to get this course?
ok