Create a Realistic Portrait in Daz Studio
Release date:2019
Duration:00 h 34 m
Author:Manu De Mey
Skill level:Beginner
Language:English
Exercise files:Yes
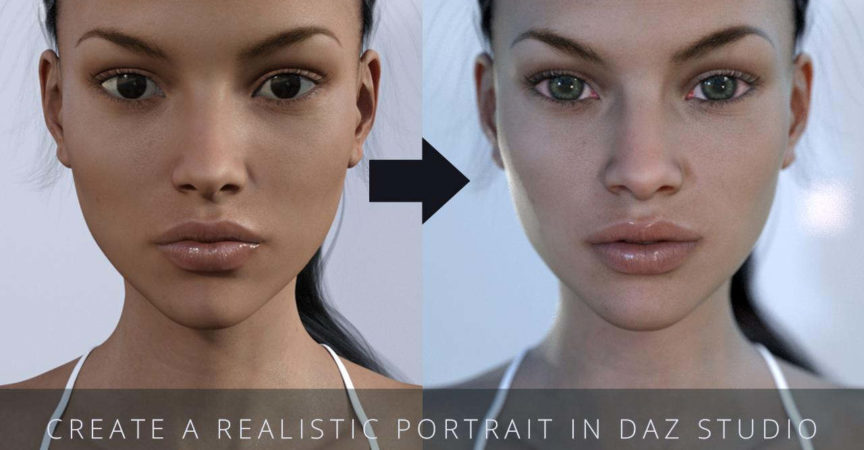
The class will show how to achieve more realistic 3D renders in Daz Studio by improving each of the following things:
Choosing the right elements in your scene
Tips and tricks on using skin- and eye textures
Using Environment Maps for real life lighting
Setting up lights to add more depth and realism
Camera settings like real photo cameras
Each of these steps will improve the realism of your render a little bit, but together they will make a hugedifference. Each of the steps are easy to achieve and don’t require any special knowledge and with this class anybody can transform their renders into amazing professional looking images (maybe even fool people into thinking it’s a photograph).
This class is particularly useful for people who have started using Daz Studio and want to take their renders to the next level. This class can also be useful for people who haven’t used Daz Studio before but want to get to know it (they will be able to skip beginner level and jump straight to pro level renders).
To follow this class you’ll need a basic knowledge of Daz Studio. But even if you have never used Daz Studio before you will be able to follow the class. PS: Daz Studio is free downloadable software!
Really anybody can achieve the realistic result you see in the preview image!
Usefull links:
Daz Studio (this is free software!)
Victoria7 (you can use any character but this is the one I use in the class)
NGS Anagenessis (for more realistic skin)
EJ Agata for Genesis 3 (for the eye textures)
Sporty Ponytail Hair (or any other hair you like)
HDRlabs (to download free HDR images to use as Environment Map)
If you don’t want to place all of the spotlights from my class manually, you can download and install them as follows:



 Channel
