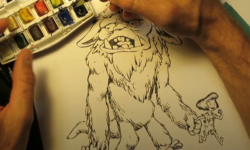
Character Creator – Zbrush – Substance Pipeline
Release date:2020
Author:Eddie Christian
Skill level:Beginner
Language:English
Exercise files:Yes
Follow the step-by-step tutorials by the industry-leading expert. Learn from the Basic CC3 GoZ Pipeline and Flexible Design Change to Advanced Design for Custom Eyes, Lashes, Teeth, and Build Head Morph. Get the Free ZBrush Character Models created in the tutorials to help you hands on practice.
Introduction
0:40
This video series will walk you through using CC3, ZBrush , Marmoset Toolbag and Substance Painter to create an original Ogre design. During the process our Ogre will go through design changes based on the client’s input and my own artistic decisions. Then we will quickly prototype a few accessories for our Ogre.
Gathering Reference
3:24
We will start by gathering reference. I always try to get images based on thing in the real world. Sometimes, In the case of monsters, you have to find something that is similar but not exact because they don’t actually exist. But the reference will help you get a realistic result.
Morph Sliders
11:44
Now that we have some idea of the Ogre concept, We block out the silhouette using the CC3 morph sliders. Having the proportions of our character saves a lot of time during the sculpting process. When we are ready, We finish this video with using GoZ to send our character to ZBrush.
Refining Our Primary Forms
19:32
Here I continue to refine the primary forms of the Ogre in ZBrush. By going from the largest forms to the smallest, In that order, you ensure being productive.
Sculpting Secondary Forms
15:27
We continue in ZBrush working our way to the smaller secondary forms. By the end of this video I should have the basic Block-In of what I wish the character’s forms to look like.
Rethinking the Forms
19:58
After my Block-In is completed. I take a break and then come back to the sculpture to refine the ideas with Fresh Eyes. Taking time away from your work can force you to look at the result differently. This is a good phase to try variations on a look.
Adjusting the Body
16:25
At this stage I start making adjustment to the body’s shape and marking where there will be muscle groups. Up to this point my idea was to have an Ogre that was Not typical. I wanted him strong and Physically fit. No Huge belly or massive feet and hands. But I wasn’t sure yet if it would still read as an Ogre.
Adjusting the Body Part 02
14:09
We continue marking muscle groups and adjusting the body’s main forms in ZBrush.
Adjusting Secondary Forms
16:56
Now that our primary forms have been adjusted, we move forward to our secondary forms.
Marmoset Toolbag
10:09
In this video we use Marmoset Toolbag to generate some normal maps to use in Substance Painter.
Exporting Maps
5:04
In this video we export the default skin maps from CC3 to use as a base for painting in Substance Painter.
Substance Painter
13:49
This video covers bringing in our character and our maps into Substance Painter. Was all is imported we set up our scene to paint our character.
Creating Variations in Substance
10:22
This video covers using Substance Painter’s color correction tools to adjust the hue of our character. This give us the ability to quickly do some Look Dev and decide on our Ogre’s appearance.
Clean Up
15:26
I start to do the final Clean Up of the smaller details. This includes tweaking the texture maps as well as the sculpture.
Clean Up Part 02
18:26
We continue with the clean up, tweaking the smaller details in ZBrush. Then we use an alpha map to create the details of the nipples.
Client Changes
17:13
After having an online meeting with the client, I’ve been asked to change my strong and sturdy Orc to a big and dumb Ogre. In this video I beginned to apply these changes, starting from the main body scale.
Client Changes Part 02
18:26
We continue sculpting the client changes in ZBrush. It’s import that we adjust the rest of the character as we do this, so that the changes don’t just look stuck on at the last minute.
Details
19:30
In this video we use some alpha maps I purchased from Texturing.xyz. After I spilt these maps into the details I wanted, I used them to create the tertiary detail on the Ogre.
Big and Stupid
20:41
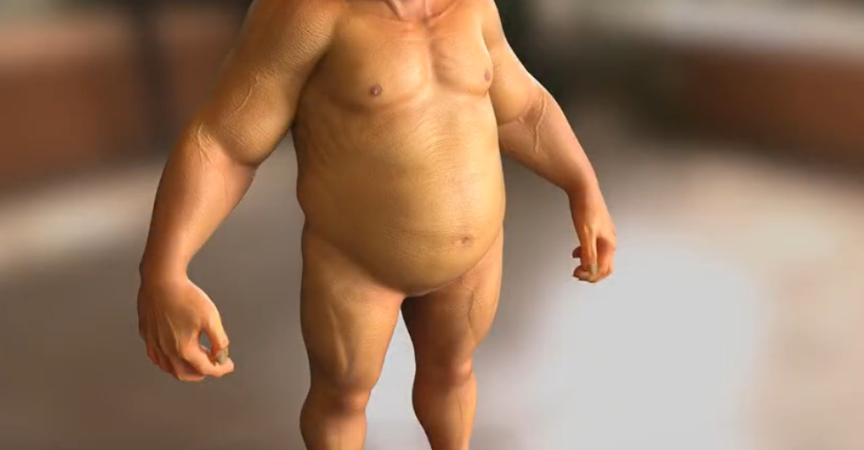
In my final client meeting, We used the morph sliders in CC3 to evolve the Final Character Design. During the meeting I decided the a Super slim fit ogre was reading visually as an orc or goblin. So we decide to keep the muscles, But add the Huge belly, feet and hands that traditionally ogres have always had.
Big and Stupid Part 02
17:54
Armed with the new proportions from the meeting, I decided to use that as a fresh base to start a new sculpt. With the final character design in mind, I once again establish the Primary and Secondary forms in ZBrush.
Big and Stupid Part 03
17:07
Armed with the final character design, I once again establish the Primary and Secondary forms in ZBrush.
Big and Stupid Part 04
13:42
In this video we continue to develop secondary forms and placing anatomical landmarks on the Ogre.
Making Test Normals
7:36
This video covers how to generate normal maps inside of ZBrush.
Continuing Paint
17:44
We revisit Substance painter to change the ogres skin color. The skin color green seemed to fit more in the realm of orcs and goblins, and only reinforced the idea that our ogre was actually an orc. This video show one method of dealing with the fact that painter can not paint across UV seams.
Continuing Paint Part 02
6:44
We wrap up painting by adding some small touches, suches as veins under the skin.
Torso Wrinkle Details
19:54
Now I begin to cut in some of the tertiary detail with very small brushes in ZBrush. This can be very time intensive. But the end result is very organic.
Torso Wrinkle Details Part 02
15:27
Continuing the tertiary detail across the entire torso, I make sure to follow the forms of the muscles. I think about gravity and how it would affect the different areas of the flesh as I do this. I finish the final torso detail with a skin pores alpha map.
Final Arms
16:41
Just as we did for the torso, This video shows how to cut in tertiary detail for the arms with smaller brushes. It is augmented with alpha maps for the elbows, fingers and palms.
Final Arms Part 02
15:27
Just as we did for the torso, This video shows how to cut in tertiary detail for the arms with smaller brushes. It is augmented with alpha maps for the elbows, fingers and palms.
Mesh Issues
3:26
We discuss some issue that may occur if your topology becomes too low.
Final Head
17:57
We go in to sculpt the final head details in ZBrush. This video covers establishing the final secondary details.
Final Head Part 02
15:34
Continuing with the secondary forms of the Head and neck, We establish the muscles and wrinkles that need to be in a face that is this heavy and bulky.
Final Head Part 03
15:10
To wrap thing up with the head, We use Alpha maps to place the skin pores in the head lips and neck.
Fixing Nails
9:11
This video covers how to alter fingernails and toenails from CC3 in ZBrush. We remove some pointy nails that were used in testing but decided against.
Fixing Nails Part 02
9:03
This video covers how you can replace the FBX file in Substance Painter to a more current version. Then we make some paint corrections to our new nails on the Ogre.
Finish
4:02
Now that we are close to completion, We load our new nail textures into CC3. After the fingernails are in place we go into zbrush one last time and send the final sculpt to CC3. This time we check the Auto-Rig Option in the Goz tool and CC3 adjusts our character’s skeleton to work properly with our final sculpture.
The Last Step
1:14
In this last step we check what Morphs our Ogre may currently be using. We bake those morphs into the character and save him as our final character.
Final Thoughts
2:13
In the world of sculpture the three main commandments are: Proportions, Silhouette, and Details. CC3 and GoZ allows you to accelerate achieving these three areas of sculpture. And it allows you to make adjustments with a client watching as you work.
Cloth
15:51
In this video we quickly prototype a loincloth and belt in zbrush. We create the sculpture and UV’s all inside of ZBrush.
Cloth Part 02
15:22
In Substance painter we quickly paint our belt and loincloth. Then we bring the objects into CC3 as a Clothing Item. Lastly we add the texture maps into CC3 and Weight the items of clothing so it will adjust as the Ogre moves.
Accessory
13:07
As a final touch, We create some arm guards for our Ogre complete with spikes. This covers the insert multi-mesh brushes inside of ZBrush. And it covers some of the practical methods that they can be used to create more complex objects.
Accessory Part 02
19:21
In Substance painter we quickly paint one of the arm guards. Then we bring the objects into CC3 as a Prop Item. Lastly we add the texture maps into CC3 and Attach the items as Children of the forearms so it will adjust as the Ogre moves.
01_Introduction
02_Gathering Reference
03_Morph Sliders
04_Refining Our Primary Forms
05_Sculpting Secondary Forms
06_Rethinking the Forms
07_Adjusting the Body
08_Adjusting the Body Part 02
09_Adjusting Secondary Forms
10_Marmoset Toolbag
11_Exporting Maps
12_Substance Painter
13_CREATING VARIATIONS IN SUBSTANCE
14_CLEAN UP
15_CLEAN UP PART 02
16_CLIENT CHANGES
17_CLIENT CHANGES PART 02
18_DETAILS
19_BIG AND STUPID
20_BIG AND STUPID PART 02
21_BIG AND STUPID PART 03
22_BIG AND STUPID PART 04
23_MAKING TEST NORMALS
24_CONTINUING PAINT
25_CONTINUING PAINT PART 02
26_TORSO WRINKLE DETAILS
27_TORSO WRINKLE DETAILS PART 02
28_FINAL ARMS
29_FINAL ARMS PART 02
30_MESH ISSUES
31_FINAL HEAD
32_FINAL HEAD PART 02
33_FINAL HEAD PART 03
34_FIXING NAILS
35_FIXING NAILS PART 02
36_FINISH
37_THE LAST STEP
38_FINAL THOUGHTS
39_CLOTH
40_CLOTH PART 02
41_ACCESSORY
42_ACCESSORY PART 02



 Channel