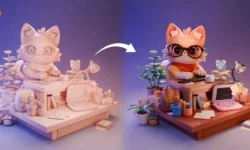
Blender from ground up

Release date:2022, March
Skill level:Beginner
Language:English
Exercise files:Yes
Course URL:https://www.udemy.com/course/blender-from-ground-up/
What Will I Learn?
- Understand User interface
- Learn Modeling, how to use Blender to create easy and complex objects
Learn how to prepare the object to receive the texture correctly by unwrapping the objects, we will take a lot of examples to understand that. - We will jump to the material section, there we will learn how to add the materials and how to edit them, a lot of stuff in this section.
- We will learn how lighting works in Blender for Cycles and Eevee, we will take a lot of examples to understand that.
- Camera, we will learn how to use camera correctly and how to control it in Blender.
Requirements
Just go a head to Blender official website and download Blender from there to start the journey
Description
Hello everyone, I’m Marwan Hussein and I would like to welcome you to this new course, Blender is one of the very powerful 3D software on the market and it’s free for everyone to use, when I started with Blender back in 2019 I didn’t know the possibility of this software and what it could do, and when I start to learn it was amazing and easy to understand and it’s so friendly for new users, especially the interface.
Now almost all my online courses focus on Blender and how to create a lot of complex designs with it.
In this new Blender course, I will go throw the most important things that every 3D artist should start with when it comes to using 3D software like Blender.
These things start with.
Understanding the software interface, that’s something very important to start with.
The good news though, Blender has a very friendly user interface, it’s easy to understand and flexible, I mean it’s very easy to manage and change after that we will start to learn how to add objects how to move things understand the navigation system of the software and a lot of things.
When we complete the principles we will start with the modeling.
I divided the modeling section into 4 sections, from easy to complex, in the first section
we will learn how to create easy geometry, after that, we will learn in section 2 how to create something a bit harder, and some scenarios for the third section and the fourth section of modeling.
Modeling means you should know your tools to do something inside Blender, for example, if you want to create a simple table, you can’t do that unless you know your tools better.
The modeling journey in this course is full of knowledge and I made a full section just focusing on modeling, we will model the easy geometries and as we go forward we will start with things a bit difficult, and we will go through this process step by step.
In the modeling section, I will use a new technic to explain any command, I will start creating things, and any command I use to achieve something I will give a special lecture
In this way, we can make the learning process more fun and interactive.
In the modeling section, we will discuss those things.
- * How to add objects and how to use the navigation system.
- * How to scale Rotate and move objects.
- * What are object properties.
- * Object mode and edit mode.
- * Learn how to use Bevel in edit mode.
- * Object shading.
- * Face normal and selection types.
- * Learn how to extrude inside edit mode.
- * How to fix the normal fo face in Blender.
- * Introduction to modifiers.
- * Solidify modifier.
- * Bevel modifier.
- * Inset face command.
- * Transformation orentation.
- * Transform pivot point.
- * Learning the snap system inside Blender.
- * How to use subdivision modifier.
- * Learn what’s Quads, Triangles, and N-Gons.
- * Delete and merge menu.
- * Mirror and lattice.
The modeling section is not stopped here, there are a lot of things inside this section you can check them I jest mentioned a little bit of what we waiting for there.
The modeling section is a long journey, when we finish it we will start with the unwrapping.
Unwrapping is a very important technic after modeling is done, unwrapping means you need to make what you create ready to receive the texture correctly because if we don’t we will get a problem and the texture will apply in a weird way.
Everything now is ready to go, now it’s the time to give what we created life by adding material to it.
Adding the materials is something very important if you want to give your geometry a life
and make them realistic.
Materials mean you will add color to a surface and make that surface rough or glossy or if you want that surface to be old or new, or make it lucks like glass or like a metal,
and a lot of stuff.
We will use the designs that we made in the modeling section to give them materials for most of them, and we will do that step by step.
After we complete the materials section and understand it we will start with the lighting.
Lighting means after you make t everything ready you need to add a source of light like
what’s happen in real life, because without adding lighting you can not make a render.
In the lighting section, we will discuss all sources of lighting inside Blender and the environment lighting like a skylight and HDRI Lighting.
Lighting section
- * Quick overview about the light source in Blender.
- * Learn how to use spotlight, area light, point light, and sunlight.
- * How to use Emission light.
- * How to use HDRI lighting ( High Dynamic Range Imaging )
- * How to use portal lights.
- * What’s an IES light and how to use it.
- * How to illuminate an interior scene with sunlight
- * How to illuminate an interior scene with spotlights
- * How to create volumetric lighting.
All of that for cycles and Eevee.
After all of that, we will learn how to use the camera, now everything is ready and the only thing we need is to set up a camera for our scene, inside Blender, we can’t make a render unless we add a camera so it’s very important to learn how to use the camera in Blender.
Now everything is finished for the course and it’s very important to say that what you just read is just a brief intro to the course.
The course videos reached 185 videos 48hr and 30 min of video content.
After we learn everything we will create together an interior scene from start to finish.
In this project we will go through everything from modeling to rendering, we will create all the elements of the 3D scene together and we will unwrap it and make it ready to add the materials, everything step by step.
After that, I can say we reached the end of this course.
I hope you find this course useful and thank you for reading.
Marwan Hussein.
Who is the target audience?
This course is for everyone who want to learn Blender from start up.
This course works even for student how already knows Blender because there is a lot of advanced stuff they may help.
001_Introduction
001-Intro-video
002-Where-to-find-the-resource-files
003-How-to-download-Blender-and-install-it
004-Blender-Interface
005-Blender-Interface-2
006-Learn-how-to-add-object-and-the-navigation-system
007-Learn-how-to-move-scale-and-rotate-objects
008-object-properties
009-Introduction-to-object-mode-and-Edit-mode
010-Modeling-simple-objects-learn-Bevel-and-object-shading
011-Learn-tips-about-Normal-and-selection
012-Modeling-simple-objects-Learn-how-to-extrude-faces
013-Extrude-command
014-Modeling-a-simple-table
015-Learn-how-to-duplicate-faces-and-fix-the-normal
016-Modeling-a-simple-table-2
017-Learn-how-to-use-Mirror-command-and-whats-orgin-point
018-Modeling-a-simple-table-3
019-Introduction-to-modifiers
020-Modeling-a-simple-table-4-using-Solidify-and-Bevel-modifier
021-Modeling-a-simple-stools
022-Generate-Solidify-Modifier
023-Generate-Bevel-Modifier
024-Inset-Face-command
025-transformation-orientation
026-transform-pivot-point
027-Snap-1
028-Snap-2
029-Modeling-Level-2-Subdivision-modifier
030-Modeling-Level-2-modeling-the-TV
031-Modling-Level-2-Quads-Triangles-and-N-Gons
032-Modeling-Level-2-face-vertex-and-edge-flow
033-Delete-and-merge-menu
034-Modeling-Level-2-modeling-simple-house-part-1
035-Modeling-Level-2-modeling-simple-house-part-2
036-Modeling-Level-2-modeling-simple-house-part-3
037-Modeling-Level-2-modeling-simple-house-part-4
038-Modeling-Level-2-modeling-simple-house-part-5
039-Modeling-Level-2-modeling-simple-house-part-6
040-Modeling-Level-2-modeling-small-mug
041-Modeling-Level-2-modeling-bottle-part-1
042-Modeling-Level-2-modeling-bottle-part-2
043-Modeling-Level-2-modeling-bottle-part-3
044-Modeling-Level-2-Mirror-and-lattice
045-Modeling-Level-2-modeling-bottle-part-4
046-Modeling-Level-2-modeling-teapot-part-1
047-Modeling-Level-2-modeling-teapot-part-2
048-Modeling-Level-2-modeling-teapot-part-3
049-Modeling-Level-2-modeling-kitchen-part-1
050-Modeling-Level-2-modeling-kitchen-part-2
051-Modeling-Level-2-modeling-kitchen-part3
052-Modeling-Level-2-modeling-kitchen-part-4
053-Modeling-Level-2-modeling-kitchen-part-5
054-Modeling-Level-2-modeling-kitchen-part-6
055-Modeling-Level-2-modeling-kitchen-part-7
056-Modeling-Level-2-modeling-kitchen-part-8
057-Modeling-Level-3-Bool-tool-and-carver-tool
058-Modeling-Level-3-modeling-Sony-device-part-1
059-Modeling-Level-3-modeling-Sony-device-part-2
060-Modeling-Level-3-modeling-Sony-device-part-3
061-Modeling-Level-3-modeling-Sony-device-part-4
062-Modeling-Level-3-modeling-Sony-device-part-5
063-Modeling-Level-3-modeling-Sony-device-part-6
064-Modeling-Level-3-modeling-Sony-device-part-7
065-Modeling-Level-3-modeling-Sony-device-part-8
066-Modeling-Level-3-modeling-Sony-device-part-9
067-Modeling-Level-3-modeling-Sony-device-part-10
068-Modeling-Level-3-modeling-Sony-device-part-11
069-Modeling-Level-3-modeling-Sony-device-part-12
070-Modeling-Level-3-modeling-Sony-device-part-13
071-Modeling-Level-3-modeling-Sony-device-part-14
072-Modeling-Level-3-modeling-Sony-device-part-15
073-Modeling-Level-3-modeling-Sony-device-part-16
074-Modeling-Level-3-modeling-sony-device-part-17
075-Modeling-Level-4-modeling-Carl-Jurischs-1957-Motoplan-part-1
076-Modeling-Level-4-modeling-Carl-Jurischs-1957-Motoplan-part-2
077-Modeling-Level-4-modeling-Carl-Jurischs-1957-Motoplan-part-3
078-Modeling-Level-4-modeling-Carl-Jurischs-1957-Motoplan-part-4
079-Modeling-Level-4-modeling-Carl-Jurischs-1957-Motoplan-part-5
080-Modeling-Level-4-modeling-Carl-Jurischs-1957-Motoplan-part-6
081-Modeling-Level-4-modeling-Carl-Jurischs-1957-Motoplan-part-7
082-Modeling-Level-4-modeling-Carl-Jurischs-1957-Motoplan-part-8
083-Modeling-Level-4-modeling-Carl-Jurischs-1957-Motoplan-part-9
084-Modeling-Level-4-modeling-Carl-Jurischs-1957-Motoplan-part-10
085-Modeling-Level-4-modeling-Carl-Jurischs-1957-Motoplan-part-11
086-Modeling-Level-4-modeling-Carl-Jurischs-1957-Motoplan-part-12
087-Modeling-Level-4-modeling-Carl-Jurischs-1957-Motoplan-part-13
088-Modeling-Level-4-modeling-Carl-Jurischs-1957-Motoplan-part-14
089-Modeling-Level-4-modeling-Carl-Jurischs-1957-Motoplan-part-15
090-Modeling-Level-4-modeling-Carl-Jurischs-1957-Motoplan-part-16
091-Modeling-Level-4-modeling-Carl-Jurischs-1957-Motoplan-part-17
092-Modeling-Level-4-modeling-Carl-Jurischs-1957-Motoplan-part-18
093-Modeling-Level-4-modeling-Carl-Jurischs-1957-Motoplan-part-19
094-Modeling-Level-4-modeling-Carl-Jurischs-1957-Motoplan-part-20
095-Modeling-Level-4-modeling-Carl-Jurischs-1957-Motoplan-part-21
096-Modeling-Level-4-modeling-Carl-Jurischs-1957-Motoplan-part-22
097-Modeling-Level-4-modeling-Carl-Jurischs-1957-Motoplan-part-23
098-Modeling-Level-4-modeling-Carl-Jurischs-1957-Motoplan-part-24
099-Modeling-Level-4-modeling-Carl-Jurischs-1957-Motoplan-part-25
002_Unwrapping section
100-Unwrapping-section-understanding-whats-unwrapping-part-1
101-Unwrapping-section-Learn-how-can-we-make-a-dice-part-2
102-Unwrapping-section-Learn-hwo-to-create-a-pepsi-can-part-3
103-Unwrapping-section-how-to-unwrap-a-table-part-4
104-Unwrapping-section-Learn-how-to-use-cube-projection-5
105-Unwrapping-section-How-to-fix-the-scale-of-the-UV-6
106-Unwrapping-section-How-to-copy-the-UV-7
107-Unwrapping-section-How-to-unwrap-a-house-part-8
108-Unwrapping-section-How-to-unwrap-a-house-part-9
109-Unwrapping-section-another-UV-unwrapping-ways-10
110-Unwrapping-section-Follow-active-quads-11
111-Unwrapping-section-Hwo-to-use-pin-12
112-Unwrapping-section-Hwo-to-use-pin-13
113-Unwrapping-section-Straighten-and-Align-14
114-Unwrapping-section-Display-stretch-15
115-Unwrapping-section-Pinch-Relax-grap-16
116-Unwrapping-section-Exporting-UVs-part-17
117-Unwrapping-section-Use-UV-to-model-a-building-part-18
003_Materials section
118-Material-section-intro
119-Material-section-Learn-how-to-add-material-and-change-HDRI-light-environment
120-Material-section-Node-Wrangler
121-Material-section-principled-BSDF
122-Material-section-adding-image-texture-to-the-Roughness-slot
123-Material-section-normal-map-and-bamp-map
124-Material-section-create-your-first-wood-mt-with-HDRI-lighting
125-Material-section-How-to-create-a-wood-material-to-the-table-model
126-Material-section-how-to-create-a-metal-material-for-the-table
127-Material-section-How-to-create-a-glass-material-to-the-table
128-Material-section-create-a-white-plastic-material-for-the-stool
129-Material-section-How-to-create-plastic-material-and-how-to-use-shadow-catcher-to-blender-the-ground-with-the-environment
130-Material-section-How-to-create-white-ceramic-and-dark-cacao-material
131-Material-section-create-a-material-to-the-Sony-device-part-1
132-Material-section-create-a-material-to-the-Sony-device-part-2
133-Material-section-create-a-material-to-the-Sony-device-part-3
134-Material-section-create-a-material-to-the-Sony-device-part-4
135-Material-section-create-a-material-to-the-Sony-device-part-5
136-Material-section-create-a-material-to-the-Sony-device-part-6
137-Material-section-create-a-material-to-the-Sony-device-part-7
138-Material-seciton-How-to-create-a-car-paint-mt-for-Carl-Jurischs-1957-Motopl
139-Material-seciton-How-to-create-a-chrome-mt-for-Carl-Jurischs-1957-Motoplan
140-Material-seciton-create-a-head-light-material-for-Carl-Jurischs-1957-Motop
141-Material-seciton-create-a-rubber-material-for-Carl-Jurischs-1957-Motoplan
142-Material-seciton-create-a-Windshield-material-for-Carl-Jurischs-1957-Motop
143-Material-seciton-create-a-BackLight-materials-for-Carl-Jurischs-1957-Motop
144-Material-section-create-wheel-material-for-Carl-Jurischs-1957-Motoplan-part
145-Material-section-create-Engine-material-for-Carl-Jurischs-1957-Motoplan-par
146-Material-section-create-Tire-material-for-Carl-Jurischs-1957-Motoplan-part
147-Material-section-How-setup-PBR-material-and-how-displasment-works
148-Material-section-finish-the-intorior-for-Carl-Jurischs-1957-Motoplan-part
004_Lighting Section
149-Lighting-secion-part-1-quick-overview-about-the-light-sources-in-Blender
150-Lighting-secion-part-2-Emission-light
151-Lighting-secion-part-3-HDRI-High-Dynamic-Range-Imaging
152-Lighting-sectoin-part-4-how-to-use-portal-light
153-Lighting-section-part-5-IES-Light
154-Lighting-sectoin-part-6-How-to-illuminate-interior-scene-with-sun-light
155-Lighting-section-part-6-How-to-illuminate-interior-scene-with-spot-lights-a
156-Lighting-section-part-7-How-to-create-volumatric-lighting
157-Lighting-section-part-8-start-with-Eevee
158-Lighting-section-part-9-rendering-Sony-device-with-Eevee
159-Lighting-secton-part-10-check-Carl-Jurishs-1957-Motoplan-with-Eevee
160-Quick-way-to-use-displasment-inside-Eevee
161-Lighting-section-part-11-Render-interior-scene-with-Eevee
162-Lighting-section-part-12-Hwo-to-use-reflection-plan-in-Eevee
163-Lighting-section-part-13-Hwo-to-use-reflection-cubemape-in-Eevee
005_Camera section
164-Camera-section-how-to-navegate-with-camera-part-1
165-Camera-section-camera-optoin-overview-part-2
006_Interior project
166-Interior-project-Create-the-walls-and-the-balcony
167-Interior-project-Create-the-window-frame
168-Interior-project-Create-the-TV-and-Library-books
169-Interior-project-Creating-the-sofa
170-Interior-project-creating-the-carpet
171-Interior-project-creating-the-air-condition
172-Interior-project-Creating-the-plant-part-1
173-Interior-project-Creating-plant-soil
174-Intrior-project-Creating-the-Books-vase-and-the-ceiling
175-Interior-project-Learning-how-to-create-a-cartain
176-Interior-project-finish-the-modeling-section
177-Interior-project-Adding-material-to-the-carpet-and-the-ground
178-Interior-project-Creating-a-material-to-the-Sofa-part-1
179-Interior-project-Creating-the-wrinkles-for-the-Sofa
180-Interior-project-create-material-for-the-table-library-TV-air-condition
181-Interior-project-creating-materials-part-2
182-Interior-project-creating-materials-part-3
183-Interior-project-Adding-hidden-lights
184-Interior-project-Filnal-Render
185-Intorior-project-Extra-camera-shots
007_Project folder.7z
[Udemy] Blender from ground up_Subtitles.7z