Ad Clicks : Ad Views : Ad Clicks : Ad Views : Ad Clicks : Ad Views : Ad Clicks : Ad Views :
Oh Snap!

It looks like you're using an adblocker. Adblockers make us sad. We use ads to keep our content happy and free. If you like what we are doing please consider supporting us by whitelisting our website. You can report badly-behaved ads by clicking/tapping the nearby 'Advertisement' X text.

AutoCAD Importing a 2D Project into 3ds Max

/

Release date:2019, September 30

Author:Shaun Bryant

Skill level:Intermediate

Language:English

Exercise files:Yes

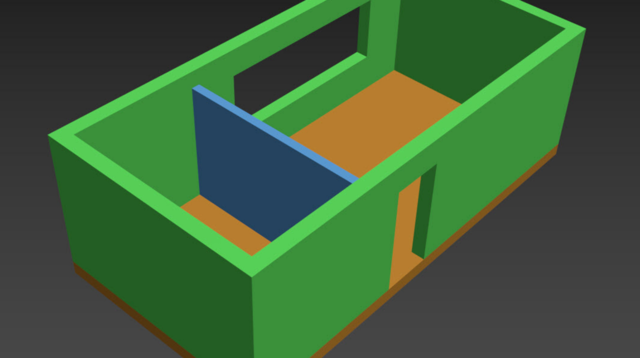
Discover how to take a flat, two-dimensional CAD drawing and use Autodesk 3ds Max to develop it into a three-dimensional model with walls and a floor. Instructor Shaun Bryant begins by demonstrating how to prepare an existing 2D CAD drawing for use in 3ds Max. Next, learn about choosing the right settings for saving the drawing in AutoCAD, then see how to import the resulting file in 3ds Max. Shaun covers which tools to use inside 3ds Max, shows how to extrude a floor and walls, talks about basic shapes which might be needed for further visualization, and demonstrates how to save a 3ds Max scene.
Topics include:
Preparing a 2D CAD drawing
Saving the correct file type
Creating new boundaries
Working with existing CAD drawing and layers
Setting up 3D layers
Working with the units of a new drawing
Setting display units in 3ds Max
Importing, linking, and locating
Extruding boundaries
Preventing clashes

Watch online or Download for Free

01 – Introduction
01 – AutoCAD 2D projects and 3ds Max
02 – What you should know before watching this course
03 – Using the exercise files
04 – The new AutoCAD 2020 interface

02 – Cleaning Up Your CAD Drawing
01 – Explaining the existing CAD drawing and its layers
02 – Explaining the standards used in the CAD drawing
03 – Why only the major CAD components are needed
04 – Turning off the layers that are not needed

03 – Setting Up New CAD Layers
01 – Setting up the new 3D CAD layers
02 – A new layer for 3D external walls
03 – A new layer for 3D internal walls
04 – A new layer for the 3D floor

04 – Creating New Polyline Boundaries
01 – Using the Boundary command (BPOLY) to create 3D boundaries
02 – Creating a new 3D boundary for the external walls
03 – Creating a new 3D boundary for the internal walls
04 – Creating a new 3D boundary for the floor
05 – Freezing all other nonessential layers

05 – Saving Out as a New CAD Drawing
01 – Making sure you save out as the appropriate DWG file type
02 – Save the file out as a new 3D DWG file with a new filename

06 – Setting Units for 3ds Max
01 – Explaining the units of the new 3D CAD drawing
02 – Setting your display units in 3ds Max

07 – Importing into 3ds Max
01 – Importing and linking a CAD drawing
02 – Locating your 3D CAD drawing
03 – Checking the file units import setting
04 – Deriving your AutoCAD primitives from the DWG file
05 – Choosing your CAD drawing layers
06 – Sanity checking and saving your 3ds Max scene
07 – Saving as a 3ds Max scene

08 – Extruding Wall Boundaries in 3ds Max
01 – Extruding your external wall boundaries
02 – Using Slice Plane to add door and window heights
03 – Using the Bridge tool for top sections of door and window openings
04 – Using Slice Plane to add window sill height
05 – Using the Bridge tool for wall sections below windows
06 – Extruding your internal wall boundaries
07 – Saving out as a 3ds Max scene

09 – Extruding the Floor in the 3ds Max Scene
01 – Extruding your floor boundary
02 – Checking the floor does not clash with the walls and openings
03 – Saving out as a 3ds Max scene

10 – Conclusion
01 – Next steps

[Lynda] AutoCAD Importing a 2D Project into 3ds Max_Subtitles.7z
Exercise Files.7z


Join us on
  Channel    and      Group

  • Facebook
  • Twitter
  • Google+
  • Linkedin
  • Pinterest

Leave a Comment

Your email address will not be published. Required fields are marked *