


Reverse Portrait Photography by Erik Almas and Renee Robyn

Release date:2021
Skill level:Beginner
Language:English
Exercise files:Yes
Course URL:https://proedu.com/products/reverse-portrait-compositing
LEARN HOW CGI CAN BE USED IN PORTRAITURE
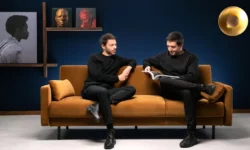
Introducing Jonny Edward, a Colorado based fashion photographer, storyteller, and wild man. Jonny is making his tutorial debut as a co-teacher and facilitator (in real time) of how CGI can play into portraiture.
In this tutorial you will see Jonny shoot images side by side Dustin and help create a virtual studio that we then build after the photoshoot.
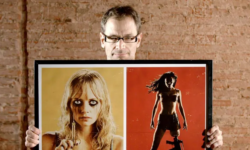
“My unique aesthetic is derived from a variety of eclectic sources including fashion, cinema, nature, literature, and the great masters of painting. I credit the latter’s influence with my notable and lauded use of light and shadow. Forever-fascinated by all things analog, I am impelled by the challenge and reward of integrating the emotion and mood of film with modern, digital tools.”
As an educator and mentor, I strive to embolden individuals in artistic and creative realms, with the knowledge, skills, and self-assuredness to realize their own respective creative projects and artistic vision(s).
In all that I do and create, I aspire to empower expression and impel individuality.” – Jonny Edward
AN IMPROVED WORKFLOW FOR COMPOSITE ARTISTS
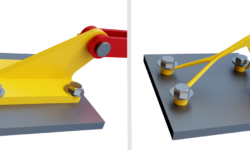
WHAT IS REVERSE COMPOSITING?
In many of our tutorials, our instructors like Erik Almas and Renee Robyn typically shoot backplates first and then subjects second due to the “fixed” lighting in the backplate. With Reverse Compositing, you are no longer constrained to what’s in the Backplate becuase we teach you to style, prop, and light your background in post-production
WHO IS THIS FOR?
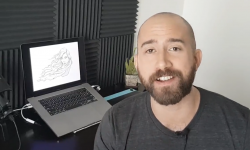
This tutorial is great for retouchers and photographers who would like to get a better understand of how to work with and retouch CGI renders. We’ve also included the Cinema 4D workflow to create and build out a virtual environment using your own materials and textures that can be manipulated in post production.
WHAT PROGRAMS DO I NEED?
This tutorial uses Capture One Pro, Adobe Lightroom Classic, Adobe Photoshop, and Cinema 4D as the main programs used to capture images, process RAW files, manipulate CGI models, and composite the two together to create a reverse composite. An introductory overview of modeling software Modo was covered but is not necessary.
01 of 06 Reverse Portrait Compositing Complete Build
01-01 Welcome To The Tutorial
01-02 Intro To Reverse Compositing
01-03 The Planning Of The Shoot
01-04 The Rough Model Build
02-05 Shoot 1
02-06 Shoot 2
02 of 06 Reverse Portrait Compositing Complete Build
02-05 Shoot 1
02-06 Shoot 2
02-07 Assignment 1
03-08 Culling Dawns Shoot For The Room
03-09 Preparing Our Subject Photos – Lightroom
03-10 Preparing Our Images – Subject Masking & Export
03-11 Preparing our scene file
03-12 Camera Composition Tools
03-13 Primary Set Lighting – Key Light & Direct Lighting
03-14 Reverse Cropping (1)
03-15 Fine Tuning Lighting
03 of 06 Reverse Portrait Compositing Complete Build
03-16 Tactical Pause_ Material, Lighting, Render Settings Check & Take Creation
04-17 Viewing Our Render Layers & File Organization
04-18 Creating Alpha Library In Channels
04-19 Retouching The Subject
04-20 Building The Base Composite (Macro Adjustments)
04-21 Matching The Subjects To The Background
04-22 Local Adjustments
04 of 06 Reverse Portrait Compositing Complete Build
04-17 Viewing Our Render Layers & File Organization
04-18 Creating Alpha Library In Channels
04-19 Retouching The Subject
04-20 Building The Base Composite (Macro Adjustments)
04-21 Matching The Subjects To The Background
04-22 Local Adjustments
04-23 Slap Grade & Effects
04-24 Tactical Pause In Post
04-25 Grading And Adjustments To The Shot
5-26 The Final Image and Assignment
[PRO EDU] Reverse Portrait Photography.7z.001
[PRO EDU] Reverse Portrait Photography.7z.002
[PRO EDU] Reverse Portrait Photography.7z.003
[PRO EDU] Reverse Portrait Photography_Subtitles.7z


what is the password for the compressed files please??
there is no password