


The Complete Unity Guide 3D – Beginner to RPG Game Dev in C#

Release date:2021, March
Skill level:Beginner
Language:English
Exercise files:Yes
Course URL:https://www.udemy.com/course/the-complete-unity-guide-3d-beginner-to-rpg-game-dev-in-c
What you’ll learn
- The practical approach by creating cool games
- Fundamentals and core concepts of game development
- Create a RPG game with tons of features
- Math explanations behind the code.
Requirements
Minimal C# or other OOP language knowledge
Discription
What is Unity?
Unity is a cross-platform engine. The Unity editor is supported on Windows, macOS, and the Linux platform, while the engine itself currently supports building games for more than 25 different platforms, including mobile, desktop, consoles, and virtual reality.
What we are going to build?
The course is covering the development of 3 games. Starting with basic concepts explained in a simple game and finishing with more advanced concepts by creating an RPG sandboxed game. The course is covering a full explanation of programming methods and related mathematics concepts.
The course is starting with easy concepts, targeting beginner developers or developers that are new to Unity, and then slowly progressing into more difficult topics.
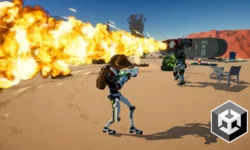
Project 1 (Evade the cubes)
The first part of the course is covering basic concepts. Students will get familiar with the Unity editor and environment.
- Base game mechanics
- Orientation in 3D space
- Positions of game objects + Vectors
- Simple movement system
- Score system
- Health system
- Materials & prefabs
- UI & Canvas
Project 2 (Platform Survival)
The second part of the course is focused on the physic system.
- RigidbodiesPhysic system
- Movement + rotations
- Follow camera
- Coroutines
- Adding forces
- Powerups
- Enemies
- Following targets
Project 3 (Rpg Adventure)
The last part of the course is covering more advanced concepts and the development of sandboxed RPG game.
- Character controllerCinemachine
- 3rd person camera and full movement
- Animations
- 3rd party packages & models
- Fight system + Combos
- Enemies + Detection systemQuest System
- Level System
- Health System
- Dialog system
- Respawns
- Inventory System
- Weapon equipping
- Terrain design
Who is Course for?
- People looking for the practical game development guide
- Beginner developers eager to start with game development
- Experienced developers discovering new development opportunities
01. Introduction
01. Introduction
02. How to Resolve Issues
02. Project 1 – Evade The Cube
01. Installing Unity
02. Getting More Familiar with Unity
03. Parenting Gameobjects
04. About the camera
05. Components
06. Project Preview
07. Create Player
08. Material and Light
09. Lighting
10. First Coding
11. Update & fps
12. Init lifecycle function
13. Update lifecycle functions
14. Stats and Enemy Object
15. Get reference to own component
16. Get Access To other component
17. Get component through editor
18. Problems with Awake
19. Get Horizontal and Vertical axis
20. Apply Movement
21. Fix movement speed
22. Scale plane
23. Add Walls
24. Restrict movement of the player
25. Fix Restrict Movement
26. Enemy Movement
27. Prefabs
28. Create Gameobject from the script
29. Random X Position
30. Destroy Game Object
31. Destroy enemy on collision
32. Receive damage on hit
33. Decrease health of the player
34. Create Canvas HUD
35. Provide value to health text
36. Catch Enemy
37. Create catch enemy from script
38. Methods Refactor
39. Change behaviour of catcher
40. Restart the game
41. First Project Assignment
42. First Project Solution
03. Project 2 – Platformer Chaser
01. Project Preview
02. Init Second Project
03. Change position of the player
04. Move with translate
05. Normalize Vector
06. AI – Normalize
07. Changing the camera
08. Adds rigid body component
09. Get RB in script
10. Rigidbody Explanations
11. Elevators
12. Elevators Movement
13. Wait coroutine
14. Coroutine in Start
15. Elevator Refactor
16. On Trigger Enter
17. Tags
18. Change parent of player
19. Elevator offset
20. Apply elevator offset
21. Add rigidbody to elevator
22. Camera Position
23. From To Rotation, Include Links For Math and Quaternions
24. Rotate Towards
25. Look Backward direction
26. AI Dot Product
27. Rotation Refactor
28. Add Enemy
29. Enemy follow target
30. Improve following of player
31. Spawn Manager
32. Destroy and Spawn new enemy
33. Spawn Enemy waves
34. Powerup
35. Get speed from powerup
36. Powerup Coroutines
37. Add more power to player
38. Create circle game object
39. Draw circle method
40. Draw complete circle
41. AI – Draw Circle
42. Add circle to enemy
43. Add Push range to enemy
44. Game Manager and Canvas
45. Spawn enemy on button click
46. Restart the game + Disable canvas
47. On Game Start
48. Finish Project
49. Project Assignment
50. Project Solution
04. Project 3 – RPG Game
01. Project Intro
02. Section Intro
03. Project Setup
04. Learn by inspecting other projects
05. Simple movement
06. Adds Rigidbody
07. Add rotation
08. Explain Rotate Towards
09. Follow Camera
10. Camera Rotation with Player
11. Rotate Camera Refactor
12. AI – Lerp
13. AI – Rest of rotation
14. AI – Lerp Additional
15. Move in direction of camera
16. AI – Move in direction of the camera
17. Revert to normal movement
05. Cinemachine and Character Model
01. Section Introduction
02. Cinemachine
03. Move camera while holding mouse
04. Input Manager
05. Rotate in direction of the camera
06. Move in direction of the camera
07. Add Character controller
08. Add Character model
09. Character controller properties
10. Add player input
11. Refactor Move Input
06. Animator
01. Section Introduction
02. Animator Start
03. New Anim Controller
04. Change Parameter from Script
05. Controlling forward speed
06. Control Acceleration
07. Applying rotation
08. AI Code Debugging
09. AI Rotations
10. Smooth Rotation
11. Oposite direction rotation
12. Change animator settings
13. Camera controller refactor
14. Animator Blend Tree
15. Small Animator Fix
16. Add gravity
07. Add Enemies
01. Section Introduction
02. Performance tips
03. Create bandit
04. Player Instance
05. Detection Range
06. Draw Solid Arc
07. AI Draw solid arc
08. Dot product to detect player
09. AI Dot Product to detect player
08. Navmesh and AI
01. Section Introduction
02. Get player position
03. Nav Mesh Agent
04. About the navmesh
05. About navmesh part 2
06. Stop the pursuit
09. Enemy Animations
01. Section Introduction
02. Go back to original position
03. In Pursuit Animation Parameter
04. Near base parameter
05. Fix Line Endings
06. Add Enemy animations
07. Enemy Controller
08. Move mesh agent into enemy controller
09. Player Scanner
10. Attack System
01. Section Introduction
02. Setup attacking distance
03. Attack parameter
04. Attack animation
05. Refactoring of enemy controller
06. Sword Stance
07. Fix Attack distance
08. Go back to origin rotation
09. Attack Input
10. Improving Attack Input
11. Melee Attack Animator
12. Damageable Script
13. Bandit Behaviour Refactor
14. Fixing initial walk animation
11. Weapons
01. Section Introduction
02. Weapon Prefabs
03. Add Melee Weapon script to swords
04. Adding melee weapon to player
05. Fixed Update Follow
06. Melee detection range
07. Rotate to target
08. Small refactor of bandit behaviour
09. Attack points on weapon
10. Drawing the ray
11. AI Spheres
12. Damage System
01. Section Introduction
02. Animation Attack Events
03. Animation Interface
04. Cast sphere colliders
05. Add Collider to enemy
06. Check for damage
07. Check for correct layer
08. AI – Layer Mask
09. AI – Int32 in C#
10. Damageable Partial class
11. Draw Hit Angle
12. Specify damage data
13. Check angle between
14. Damage message receivers
15. Message receiver interface
16. Invulnerability time
17. Set bandit animation trigger
18. Moving animator from bandit to enemy
13. Damage Animations
01. Hurt Animation
02. Dead animation
03. Replace with Ragdoll start
04. Ragdoll Prefab
05. Replace with Ragdoll Implementation
06. Particle System
07. Dissolve
14. Quest System
01. Section Introduction
02. Quest NPC
03. Quest & Quest manager
04. Designing quests
05. Opening JSON file
06. Json Wrapper
07. Explaining Using statement
08. Unique IDs
09. Assigning quest to quest giver
10. Quest Log
15. Raycast pointer clicks
01. Section Introduction
02. Mouse over collider
03. Clickable & Cursor image
04. Display Cursor
05. Raycast cursor hit
06. Check quest giver tag
07. Check Distance between NPC
08. Set talk in player input
16. Dialog UI
01. Section Introduction
02. Dialog Structure
03. Dialog Manager + UI
04. Adding more UI elements
05. Static player input
06. Activating Dialog UI
07. Adding option click target
17. Dialogs
01. Section Introduction
02. Get player and npc in dialog manager
03. Stop Dialog
04. Display welcome text
05. Dialog Option List UI
06. Create dialog Option
07. Button Option Indentation
08. Hide welcome text
09. Clear Dialog Options
10. Sync dialog options
11. Register click handler
12. Display NPC answer
13. Trigger Dialog Quit
14. Add Quest to quest log
15. Damage receiver in quest manager
16. On receive message improvement
17. On receive message more info
18. Check quest objective
19. Check for enemy UID
20. Changes in bandit prefabs
21. New quest giver and quest
18. Player Stats
01. Section Introduction
02. Player Stats
03. Message receiver in stats
04. Check for enemy layer and get exp
05. Gain experience functionality
06. Get exp from the quest
19. Inventory
01. Section Introduction
02. Item spawner
03. Trigger Item Spawner
04. Inventory Manager
05. On item pickup event
06. Add On Item pickup to manager
07. Inventory UI
08. Inventory Slot
09. Place item to slot
10. Add Item from spawner + UI slot names
11. Use Item + Slot click handler
12. Equip Weapon
13. Equip weapon fixes
14. Add melee weapon to enemy
15. Receive damage from enemy
16. Set target layer on the weapon
20. Hud manager
01. Creates HUD UI
02. Hud manager
21. Player Respawn
01. Section Introduction
02. Player death animation
03. Cache animation State
04. Stop input blocking
05. Block player input movement and attack
06. Start Respawn
07. Set respawning value
08. Reset the health
09. Delay respawn animation
10. Stop bandit pursuit
11. Check if clicking UI element
22. Audio System
01. Section Introduction
02. Random Audio Player
03. Sound assets
04. Swing Sound
05. Apply sounds to all weapon
06. Impact sound & ragdoll prefab fix
07. Footfall parameter curve
08. Add footfall sound to the player
09. Running sound finish
23. Environment
01. Section Introduction
02. Working on the terrain
03. Practicing terrain
04. Main World Terrain p1
05. Main world terrain p2
06. Working on textures
07. Placing the road
08. Trees and grass
09. Lighting settings
10. Adding buildings
11. Last testing
12. Create Build
13. Course Ending
[Udemy] The Complete Unity Guide 3D – Beginner to RPG Game Dev in C#.7z
[Udemy] The Complete Unity Guide 3D – Beginner to RPG Game Dev in C#_Subtitles.7z


Wow thanks alot bro