

")
Stylized Character Workflow (Part 3-4-Assets)

Release date:2019, August 15
Skill level:Beginner
Language:English
Exercise files:Yes
Course URL:https://cloud.blender.org/p/stylized-character-workflow/
In this course, 3D Artist Julien Kaspar from the Blender Animation Studio will give a detailed guide on how to create a stylized character for film production. This series of videos will encompass the entire 3D creation workflow from the early design process, modeling & UV unwrapping, texturing & shading, all the way to the final posing, presentation & lighting setup and getting the model ready for rigging.
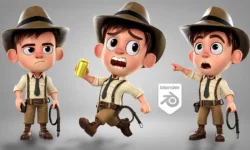
3 – Expression Testing
In this chapter we will cover how to do a fast & rough retopology to sculpt the expressions on. I will guide you through the workflow, how to sculpt the expressions and create a flexible shapekey setup to mix them. Afterwards we will animate the results to blend between them and go over Rains expressions. The chapter will end with some focused breakdown videos on the polished expressions of Rain with additional tips & tricks, the design & proportion changes due to the expression tests and lastly how to add some additional asymmetry and head rotation for extra appeal.
I can recommend to use Blender 2.80 or 2.90 (or above) for this chapter. between 2.81 and 2.83 the multiresolution modifier lost some features, which makes the workflow of this chapter slower to work with. If you don’t use the recommended versions you need to regularly disable the multires modifier if you want to sculpt on the base resolution of the mesh.
4 – Clean Retopology
In this chapter we will go over the nature and purpose of a clean retopology. I will explain the setup, workflow and general good practices to make the process easier. Afterwards I will go over the timelapses of Rains full retopology and end the chapter with an explaining some of the last polish on the topology.
3 – Expression Testing
01 – Chapter 3 Intro _ Fast & rough Retopology-1080p
02 – Modelling the inner Head & transferring Details-1080p
03 – Adding the teeth, gums & tongue-1080p
04 – Basic Expression Shapekeys-1080p
05 – Sculpting an Expression-1080p
06 – Breakdown_ Expression Guide Part 1-1080p
07 – Breakdown_ Expression Guide Part 2-1080p
08 – Breakdown_ Adding extra Appeal-1080p
09 – Breakdown_ Design Adjustments-1080p
4 – Clean Retopology
01 – Chapter 4 Introduction-1080p
02 – Creating & Guiding Topology-1080p
03 – Planning the Facial Retopology-1080p
04 – Retopology Setup-1080p
05 – Facial Retopology – Edge Flow & Articulation-1080p
06 – Update_ Strategic 2-Poles-1080p
07 – Facial Retopology – Patches & Poles-1080p
08 – Facial Retopology – Creases & Tweaking-1080p
09 – Timelapse_ Head Retopology-1080p
10 – Timelapse_ Body Retopology-1080p
11 – Timelapse_ Inner Body & Transfering Volume-1080p
12 – Timelapse_ Head Objects & Tweaking-1080p
13 – Timelapse_ Hair Retopology-1080p
14 – Timelapse_ Shirt & Pants Retopology Pt1-1080p
15 – Timelapse_ Shirt & Pants Retopology Pt2-1080p
16 – Timelapse_ Shoe modeling & additional Tweaking-1080p
17 – Timelapse_ Scarf Retopology & Finishing Touches-1080p


Can you guys please add this course Photoshop for Photographer by Julius Kankohnen (Visualofjulius)
thanks for upload bro!!
thank you very much man
appriciate your work
please enjoy
bro please add this complete part from part 1 pleaseeee
Hello,
Thank you for sharing this tutorial,
I wanted to report a problem for the download of video number 5 of part 4 namely 05 – Facial Retopology – Edge Flow & Articulation-1080p.mp4
the download link does not work
do you have another download link?
thank you in advance
Hello,
A video download link from part 4 does not work, my message is “Error loading media: file could not be played”
the video is 05 – Facial Retopology Edge Flow and Articulation
Do you have another download link?
thank you in advance
check again
No
Always the same result
thanks anyway
check