Ad Clicks : Ad Views : Ad Clicks : Ad Views : Ad Clicks : Ad Views : Ad Clicks : Ad Views :
Oh Snap!

It looks like you're using an adblocker. Adblockers make us sad. We use ads to keep our content happy and free. If you like what we are doing please consider supporting us by whitelisting our website. You can report badly-behaved ads by clicking/tapping the nearby 'Advertisement' X text.

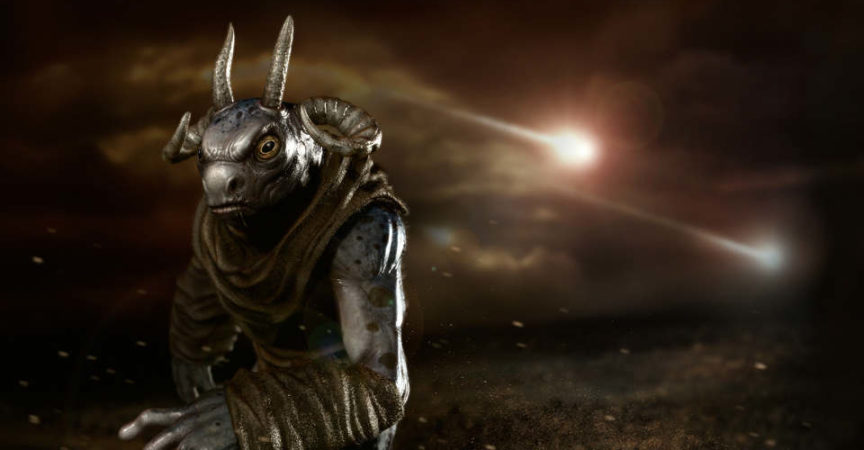
Sculpting a Creature with ZBrush and Photoshop

/

Release date:2015, May 11

Duration:02 h 36 m

Author:Rayce Bird

Skill level:Intermediate

Language:English

Exercise files:Yes

Want to develop character concepts for the film and game industries? In this course, concept artist Rayce Bird shows how to bring creatures from the depths of your imagination to life with ZBrush and Photoshop. He’ll cover sketching out ideas in Photoshop, generating the basic form with Dynamesh, and adding details to the sculpture with the rest of the tools in Zbrush. Then, once the creature is painted, textured, and lit, Rayce will show how to render it out and composite it into a scene that reveals more of the story behind the character.
Topics include:
Sketching silhouette in Photoshop
Refining your character
Using ZSpheres to create basic anatomy
Adding to the anatomy with Dynamesh
Adding eyes, horns, fingers, and clothes
Coloring, shadowing, and texturing the model
Using the Transform tools
Lighting and rendering the creature
Compositing in Photoshop
Color correcting and adding noise to the scene

Table of Contents

Introduction
Welcome 48s
What you should know before watching this course 49s
Using the exercise files 33s
1. Character Discovery
Introduction to character discovery 27s
The story behind the character 1m 49s
Searching for originality 2m 9s
How to use inspirational images and references 4m 20s
2. Sketch It Out
Introduction to sketching it out 34s
Sketching silhouettes in Photoshop 4m 19s
Light painting 2 m 44s
Adding intriguing details 3m 26s
Refining your final character choice 4m 10s
3. Sculpting with Dynamesh
Introduction to sculpting with Dynamesh 31s
Using ZSpheres to create basic anatomy 4m 3s
Adding to the anatomy with Dynamesh 5m 43s
Prioritizing forms and detail 5m 7s
Working with gravity and movement 4m 20s
Adding eyes, horns, and fingers 4m 41s
Adding wardrobe and accessories 5m 10s
4. Detail Refinement
Introduction to detail refinement 39s
Remeshing the sculpture 4m 13s
Subdividing the mesh 2 m 44s
Creating the basic surface skin texture 2m 58s
Adding wrinkles, creases, and additional textures 4m 17s
Incorporating asymmetry and ultra-refinement 3m 50s
5. Coloring Techniques
Introduction to coloring techniques 31s
Using PolyPaint for the base coat and materials 3m 10s
Cavity painting 4m 12s Adding basic texture 4m 6s
Adding basic shadowing 3m 47s
Using images in Spotlight 2 m 44s
Adding asymmetric details 3m 36s
6. Using Transform Tools
Introduction to using transform tools 36s
Introducing the Transpose Master 2m 2s
Masking and adding gizmos 4m 24s
Finishing touches 2m 54s
7. Lights and Rendering
Introduction to lights and rendering 26s
Preparing document for rendering 2 m 43s
Creating new lights 1m 49s
Lighting terminology and purpose 2m 28s
Rendering in BPR (Best Preview Render) 3m 25s
HDRI lighting 2m 8s
8. Compositing in Photoshop
Introduction to compositing in Photoshop 24s
Opening renders in Photoshop 2m 34s
Renders and blending modes 3m 46s
Adjusting layers and intensities 3m 7s
Creating a background 3m 35s
Composition and story 4m 22s
Custom painting in Photoshop 4m 4s
9. Finishing Touches
Finishing touches 29s
Digitally painting with texture 5m 38s
Adding atmosphere and extra lighting 4m 24s
Color correcting and adding noise 3m 2s
Conclusion
The final creation: Reviewing our process 42s
Next steps 1m 20s

Watch online or Download for Free

00. Introduction
01 – Welcome
02 – What you should know before watching this course
03 – Using the exercise files

01. Character Discovery
04 – Introduction to character discovery
05 – The story behind the character
06 – Searching for originality
07 – How to use inspirational images and references

02. Sketch It Out
08 – Introduction to sketching it out
09 – Sketching silhouettes in Photoshop
10 – Light painting
11 – Adding intriguing details
12 – Refining your final character choice

03. Sculpting with Dynamesh
13 – Introduction to sculpting with Dynamesh
14 – Using ZSpheres to create basic anatomy
15 – Adding to the anatomy with Dynamesh
16 – Prioritizing forms and detail
17 – Working with gravity and movement
18 – Adding eyes, horns, and fingers
19 – Adding wardrobe and accessories

04. Detail Refinement
20 – Introduction to detail refinement
21 – Remeshing the sculpture
22 – Subdividing the mesh
23 – Creating the basic surface skin texture
24 – Adding wrinkles, creases, and additional textures
25 – Incorporating asymmetry and ultra-refinement

05. Coloring Techniques
26 – Introduction to coloring techniques
27 – Using PolyPaint for the base coat and materials
28 – Cavity painting
29 – Adding basic texture
30 – Adding basic shadowing
31 – Using images in Spotlight
32 – Adding asymmetric details

06. Using Transform Tools
33 – Introduction to using transform tools
34 – Introducing the Transpose Master
35 – Masking and adding gizmos
36 – Finishing touches

07. Lights and Rendering
37 – Introduction to lights and rendering
38 – Preparing document for rendering
39 – Creating new lights
40 – Lighting terminology and purpose
41 – Rendering in BPR (Best Preview Render)
42 – HDRI lighting

08. Compositing in Photoshop
43 – Introduction to compositing in Photoshop
44 – Opening renders in Photoshop
45 – Renders and blending modes
46 – Adjusting layers and intensities
47 – Creating a background
48 – Composition and story
49 – Custom painting in Photoshop

09. Finishing Touches
50 – Finishing touches
51 – Digitally painting with texture
52 – Adding atmosphere and extra lighting
53 – Color correcting and adding noise

10. Conclusion
54 – The final creation – Reviewing our process
55 – Next steps

CONTENT.md
Ex_Files_Sculpt_ZBrush.7z
info.txt


Join us on
  Channel    and      Group

  • Facebook
  • Twitter
  • Google+
  • Linkedin
  • Pinterest

Leave a Comment

Your email address will not be published. Required fields are marked *