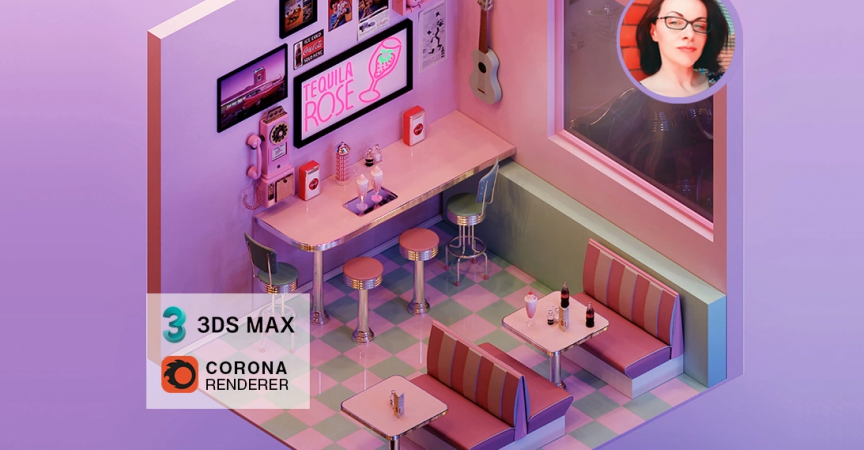
Render an Isometric Retro Diner in 3ds Max and Corona Renderer by Elena V Miller
Release date:2021, June 8
Author:Elena V Miller
Skill level:Beginner
Language:English
Exercise files:Yes
Welcome to my retro diner! In this course we focus on rendering in a high-performance (un)biased physical renderer which is Corona renderer. We will cover the basics for this render engine starting from its toolbar.
This is a practical, project-based course combining follow along lessons with visual-based explanation. You will work on this isometric retro diner scene available to download when you subscribe to my course.
The course contains 6 sections, each focused on a specific feature.
In Section 1 we’ll start by introducing Corona Renderer – which is a physical-based render engine. We will go through the Corona render toolbar and explain what each tool does. Next we will have a glimpse of our LightMix feature, set it up and see its potential! You will be able to change the lighting and atmosphere in your scene and tell different stories!
Section 2 it’s about getting inspiration. We will create two different moodboards for our diner and show you user-friendly project management tools in order to keep organised.
Section 3 is focused on Corona Materials and texturing using different workflows in 3ds max material editor.
Section 4 is dedicated to in-depth lighting. We will set-up HDR images for our environment lighting, then we learn about the basics of Corona Lights and how to use directionality, maps and ‘.ies’ files to give depth and interest to our scene.
In Section 5 we come back to the LightMix feature focusing more on setting it up and practicing. This is a practice-based section where we’ll use lighting to create different moods for our scene in order to bring forward our storytelling skills.
And finally in Section 6, we’ll tackle camera and rendering set-up. We’ll learn the exact settings to create a high res final render. Our purpose is to create a production-ready image straight from our 3d file but we’ll also save our render elements which gives us the flexibility to choose different post-processing tools. Here though, we are not using external tools such as photoshop, but only the in-built tools we have in Corona render.
At the end of this course I will give you a practical demonstration of how to apply what you learned in your own work and enhance your portfolio. And please don’t forget to write a review, your opinion is highly appreciated!



 Channel

hey please add course https://www.wingfox.com/c/8389
pleeeeeeeeeeeeeeeeeeeeeeeeeeeeeeeeeeeeeeeeeeeeeeeeeeeeeeease add
https://www.rebelway.net/advanced-arnold-shading-course?utm_medium=description&utm_source=youtube
i realy need it thanks all of your courses you guys are awesome
thank you
Can you post Foundation Patreon – Form Language: Vehicle Design and Iteration with Charles Lin? Link below. Thank you for everything you do!
https://gumroad.com/foundation_patreon?query=Charles%20Lin&sort=newest#VAxTG
Greetings Admins. As the 24th of June approaches, I am once again asking, for you to upload this course as soon and as possible as you can. This course being uploaded can change not only the whole landscape but the entire world as well. I hope you guys also manage to upload the complete edition. Thank you guys so much <3
https://medsmap.mykajabi.com/landing-page
“Basic, $270, Just the Essentials”
Let’s start a new massive donations compaign))