


Blender for Beginners – Creating Your Very First Project

Release date:2021, June 2
Skill level:Beginner
Language:English
Exercise files:Yes
Course URL:https://www.skillshare.com/classes/Blender-for-Beginners-Creating-Your-Very-First-Project/1880059971
Hey everyone! My name is Derek and welcome to Blender for Beginners – Creating Your Very First Project!
Being a blender user for over 10 years now, I remember how creating my first project was…scary! There is so much that goes into creating the final result and I want to share some tips and tricks I’ve learned throughout the years with you.
In this class, we’re going to be starting from ground zero and creating an animation project from start to finish. During this journey, we’re going to cover all the steps of a normal computer graphics pipeline which includes, modeling, animation, lighting, some light compositing, and finally rendering out the final piece. That’s right, we’re doing it all!
For the class project, You’ll be creating a 5-10 second isometric animation that demonstrates all aspects that a 3D artist needs in their skillset.
This class is for anyone who has an interest in Blender and would like to learn as much as possible about the different areas of computer graphics. Prior basic knowledge of Blender is recommended but not required. I’ll be narrating and displaying my every keypress so you can follow along step by step.
Let’s get started!
Course roadmap:
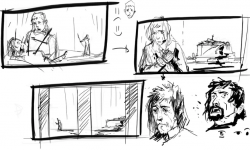
)A quick note about storyboarding:
We’ll start by understanding the importance of storyboard and how it can help us not get discouraged while working on our projects.
2)Setting up the scene
Next, we’ll do some initial prep to the default scene to help us later in the course.
3)Modeling part 1
We’ll start creating our scene by introducing and practicing some simple modeling techniques.
4)Modeling part 2
We’ll continue from section 1, and complete the modeling.
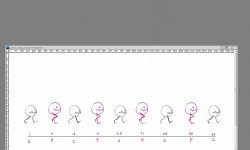
5)Animation
We’ll discover the basic idea of animation, how keyframes work, and some simple but effective tricks that can help your animation really come together.
6)Lighting and materials part 1
Employing some simple lighting, we’ll get a nice modern look to our animation while exploring our node’s work.
7)Lighting and materials part 2
We’ll finish our lighting from section 1 and get reading for compositing.
8)Compositing
We’ll explore how compositing can be used to influence certain aspects of the scene while keeping others separate.
9)Rendering and exporting
Finally, we’ll render out our final project and recombine the completed animation in the video sequence editor.
01-welcome
02-the_importance_of_storyboarding
03-setting_up_our_scene
04-modeling_part_1
05-modeling_part_2
06-animation
07-lightingmaterials_part_1
08-lightingmaterials_part_2
09-compositing
10-rendering_and_exporting
11-thank_you
Your Very First Project – Learning Assets.7z
[Skillshare] Blender for Beginners – Creating Your Very First Project_Subtitles.7z
[Skillshare] Blender for Beginners – Creating Your Very First Project_Subtitles_1.7z


Where to watch online? There’s only a download option.
works great for me. What is your browser?
There is in the media file cloud near the download