Project Beyond – Character in Cinema 4D, Marvelous, Quixel and Arnold
Release date:2021
Author:Romain Chauliac
Skill level:Beginner
Language:English
Exercise files:Yes
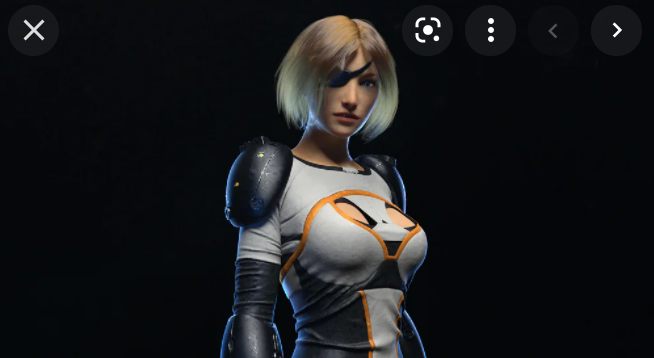
In this Gumroad I’ll show you about 28Hrs of work on how to create an entire character image in Cinema4D, Marvelous, Quixel 2.0, Arnold Render and Nuke.
1 – C4D Custom Tool – 2Hrs
Before to start we will take time to custom C4D from scratch. Upgrade some tools using COFFEE scripts etc in order to be more efficient on our work especially for Hard-surface modeling.
2 – Modeling – 5Hrs
All the modeling is done in Cinema4D. Here we don’t model the character, only all the armors part. I’ll show you my workflow for model Hard Surface stuff in C4D based on my Maya knowledge. We will model 3 pieces (arm, shoulder and visor) using various tools and techniques like knife, boolean, retopo, pen tool…
3 – Marvelous – 5Hrs
The biggest part of this project is the cloth stuff with the suit of the girl. It’s a SF style cloth, which is different than “classic” clothes you can see on other Marvelous Tutorial and I use a specific techniques to make this one.
We will also cover how to conform with animation our clothes to the final character pose.
4 – UVs – 2Hrs
For UVs I choose to unfold than in Maya, because Bodypaint is too old. Don’t be afraid, if you don’t know Maya at all it’s really simple you can use the Maya Free Educational version and use it only for your UVs stuff. I also chose Maya for UVs this time because I already cover UVLayout in the HulkBuster tutorial. This way, as C4D user you could choose your prefer tool!
5 – Quixel Texturing – 3Hrs
For texturing I choose this time to use Quixel 2.0, because I already cover Substance Painter in the previous HulkBuster Tutorial. We will make an introduction to Quixel 2.0 for beginner than texture our hard surface pieces and clothes.
6 – Arnold Shadind and Lighting- 8Hrs
Arnold Render C4DtoA is the renderer I choose for this project. Because it’s so powerful for VFX stuff, handle so well texture, work nice with SSS, hairs etc…
Note that we will use AlShaders and the awesome alHair!
That part cover all the rendering process, included set up a lookdev lighting studio, create shader using Quixel export map, create a SSS Skin shader, deal with Hair shader….
7 – Nuke Compositing – 1Hr
Finally a bit of compositing with Nuke to add final touch to the render. How to compose my .Exr MultiPass, subtle detail like Glow, CC, Denoise Glossy, Grain…



 Channel