Release date:2018, July 25
Duration:08 h 10 m
Author:George Maestri
Skill level:Beginner
Language:English
Exercise files:Yes
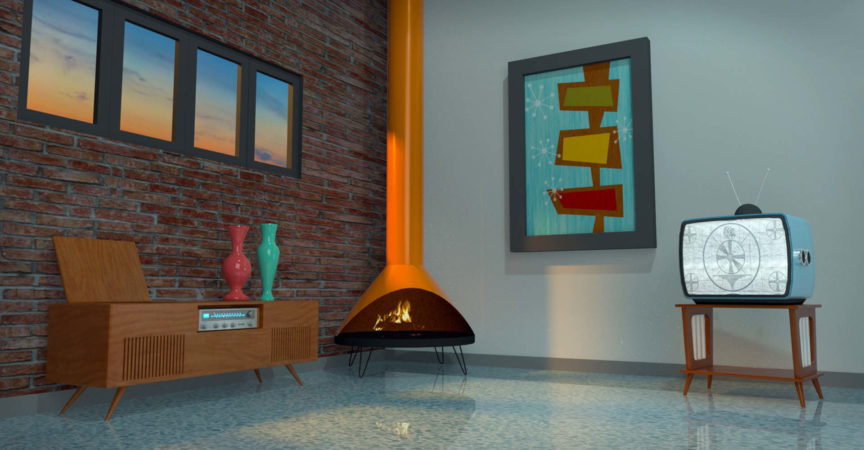
Learn to create high-quality 3D models and animations in Maya 2018. This course covers the core Maya skills—modeling, texturing, rendering, and animation—within a real-world, project-based workflow. The techniques you’ll learn here translate equally well to film, motion graphics, game design, and animation.
First explore the basics of the Maya interface, including selecting and manipulating objects, organizing scenes, and customizing the interface. Next, learn about polygonal modeling, creating and refining meshes, sculpting, and working with NURBS surfaces. Once you understand modeling, discover how to create and apply materials—adding color, texture, and reflectivity to your creations. Then integrate cameras, lighting, and effects into the rendering process, and leverage the new Arnold for Maya renderer. Last but not least, instructor George Maestri show how to add movement and life to your work with Maya’s animation tools.
Topics include:
Getting familiar with the Maya interface
Configuring viewports and workspaces
Selecting and manipulating objects
Creating hierarchies and layers in scenes
Creating polygonal models
Modeling and refining polygonal meshes
Working with subdivision surfaces
Sculpting a basic landscape
NURBs modeling
Creating and applying materials and textures
Adding lights and cameras to a scene
Rendering in Arnold
Animating in Maya
Table of Contents
Introduction
Welcome 49s
System requirements 29s
How to use the exercise files 42s
1. The Maya Interface
Overview of the Maya interface 5m 39s
Work with files and Maya projects 2 m 43s
Navigating in Maya 2m1Ss
Configuring viewports 4m 57s
Using the hotbox and marking menus 4m 9s
Customizing the interface 4m 8s
Using Maya workspaces 2m 21s
2. Select and Manipulate Objects
Select objects 4m 32s
Use the Move tool 8m 43s
Rotate and scale 4m 21s
Manipulate pivots 3m 8s
Understanding the Channel Box 3m 29s
Work with the Attribute Editor 4m 28s
Reset and freeze transformations 2m 59s
Snap objects 3m 8s Duplicate objects 3m 49s
3. Organize Maya Scenes
Work with the Outliner 8m 1s
Create hierarchies 6m 4s
Group objects 4m 23s
Understanding the Hypergraph 5m 59s
Hide and show objects 4m 30s
Create layers 5m 34s
Work with selection masks 2m 27s
4. Create Polygonal Models
Differences between NURBS and polygons 2m 10s
Create polygonal objects 6m 16s
Select polygonal components 4m 50s
Using Soft Selection and Symmetry 4m 45s
Combine and separate 4m 21s
Boolean tools 3m 23s
Using brush tools to sculpt meshes 3m 38s
5. Model Polygonal Meshes
Set up reference 7m 59s
Model against reference 5m 27s
Work with edge loops 3m 6s
Use the Extrude tool 6m 32s
Mirror and merge components 5m 55s
Use the Bevel tool 4m 34s
Extrude along a path 1m 56s
Use the Polygon Bridge tool 1m 56s
Understanding Quad Draw 4m 47s
6. Refine Polygonal Meshes
Use the Modeling Toolkit 2m 6s
Smooth models and manage detail 3m 42s
Work with subdivision surfaces 5m 9s
Create creases in smooth surfaces 2m 23s
Use Edge Flow to smooth geometry 3m 52s
Manage object history 4m 39s
7. NURBS Modeling Techniques
Understanding NURBS components 4m 52s
NURBS primitives 6m 19s
Use the NURBS curve tools 8m 25s
Create radial surfaces with Revolve 5m 8s
Use the NURBS Loft tool 3m 10s
Open and close curves and surfaces 4m 33s
Create shapes with the NURBS Planar action 3m 16s
Use the NURBS Extrude tool 2 m 56s
8. Refine NURBS Models
Use isoparms to refine NURBS surfaces 4m 41s
Extract NURBS curves from surfaces 4m 7s
Create curves on a surface 4m 49s
Project curves on surfaces 3m 30s
Trim NURBS surfaces 3m 8s
Convert NURBS to polygons 4m 39s
9. Create Materials
Overview of Maya renderering 2m 48s
Understanding the basic shader types 8m 48s
Work with Arnold materials 8m 44s
Opacity and refraction in Arnold 4m 45s
Create and apply maps 7m 14s
Use bitmaps as texture 5m 36s
Work with the Hypershade window 5m 41s
Create materials in Hypershade 4m 54s
10. Apply Materials and Textures
Apply multiple materials to objects 3m 49s
UV map polygonal objects 7m 59s
Understanding the UV Editor 5m 14s
Project textures on NURBS surfaces 5m 59s
3D painting 5m 49s
UV mapping complex objects 10m 18s
Maintain UV scale 3m 41s
11. Render in Maya
Render Settings menu 4m 13s
Use Render View 3m 33s
Maya lights and lighting types 7m 27s
Understanding cameras 8m 22s
Use the Light Editor 2 m 43s
Batch render animation 2m 25s
Understanding Render Setup 4m 2s
Use overrides in Render Setup 8m 44s
12. Render in Arnold
Arnold render settings 3m 41s
Arnold Render View 3m 25s
Using Maya lights in Arnold 5m 55s
Use Arnold area lights 3m 56s
Use objects as lights 3m 19s
Image-based lighting and skydomes 4m 33s
Add depth of field in Arnold 3m 49s
Create motion blur in Arnold 3m 16s
Render animation in Arnold 2m 26s
13. Animate in Maya
Understanding the animation interface 6m 25s
Animate objects using Set Key 6m 52s
Modify keys in the Graph Editor 7m 5s
Modify keys in the Dope Sheet 2m 54s
Create breakdown keys 2m 32s
Animate objects along spline paths 4m 24s
Visualize animation 4m 18s
Use the Grease Pencil tool 3m 23s
Create animation cycles 5m 46s
Animation playback using Playblast 2m 59s
Work with the Time Editor 5m 49s
Create animations clips 9m 20s
Conclusion
Next steps 20s
Watch online or Download for Free


 Channel


The videos have subtitles, but I can’t find the download link for the subtitles