How To Use DaVinci Resolve’s Color Match In ACES
Release date:2017, February 8
Duration:00 h 11 m
Author:Patrick Inhofer
Skill level:Intermediate
Language:English
Exercise files:Yes
Part 2: What Are the Proper Source and Target Settings in an ACES Workflow?
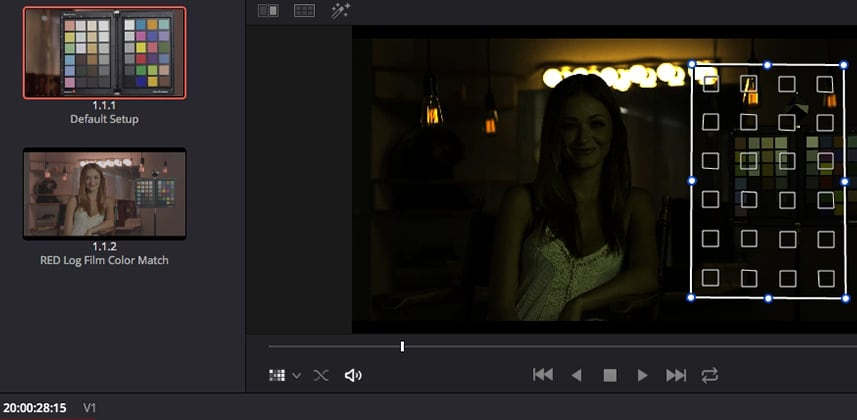
In truth, setting up Color Match in ACES pipelines is remarkably simple and straightforward. Even the theory is rather simple. It’s knowing how to set up Color Match in non-ACES workflows that gets complicated. And if you don’t understand ACES then Robbie’s multi-part series is a great place to start. The simplicity of setting up Color Match in ACES mirrors the purpose of that workflow.
You’ll learn how putting Resolve into ACES effects your choices in RAW settings
Some of our RAW settings just aren’t needed in ACES… and the ones that are most important to us are still available.
You’ll also figure out how to know if you’ve properly set your Black and White Chips
As I talked about in Part 1 of this mini-series, for Color Match to work properly you need to set your grayscale values properly. You want Color Match to effect brightness as little as possible for it to do the best job possible. But each of the color charts supported in Color Match has different expectations of where the Black and White chips should be set.
And the very little time I’ve spent hunting down this information has not been fruitful. Those values seem to be tougher to find than I expected (and if you know them for a color chart, please post them in the Comments and I’ll start appending this post with those values).
But you don’t need to know the Black and White Chip values! Resolve help you figure that out on its own
As you learn in this Insight, using the Color Match interface you can figure this out yourself—but sometimes it takes a little experimentation.


 Channel


