Dreadnought Texturing Volume 1
Release date:2018
Duration:01 h 19 m
Author:Stephen Wells
Skill level:Intermediate
Language:English
Exercise files:Not Provided
Dreadnought Texturing Series
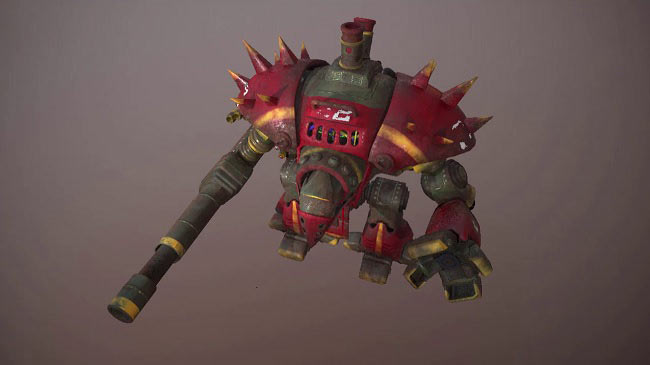
After creating a mesh, in this case a mechanical Dreadnought, it’s not enough to simple have a greyscale model…now comes texturing! Texturing models can be a daunting task because there are so many tools/programs geared towards creating texturing that are stylized or physically based, it can be confusing. Photoshop, a standard in texturing, is the simplest, most direct method to create first a colour base and then add details, via masks, to the colours for better realism. Once the model has a base diffuse/albedo, we can then still use Photoshop to create the glossiness and metal maps to support PBR workflows without requiring any third party (or more expensive) program to create acceptable end results. One need only understand the PBR basics to understand how using simple Photoshop filters and masks can help create the needed details to make our model look dirty/rusty and worn as nothing looks faker or more phoney than perfect colours on a Dreadnought mechanical robot that has seen many battles. So, we’ll be able to first create a base diffuse/albedo so we have the colour scheme for the mech and then we’ll focus on creating the detailing/dirt/grime needed to help give the diffuse/albedo a more ‘lived in’ quality. Masking is an integral part of Photoshop’s suite of tools and we’ll be using it to help with our coluors as well as our metals.After we established our colour palette, it’ll then be deciding which parts of the mech are metallic, which are rubber and which are plastic so we can use Photoshop to help create the different textures needed for the PBR pipeline.



 Channel