Design of Moving 3D Characters (Spanish, Multisub)
Release date:2022
Author:Jaime Alvarez Sobreviela
Skill level:Beginner
Language:Spanish
Exercise files:Yes
Learn to easily create unique and fun characters with Cinema 4D
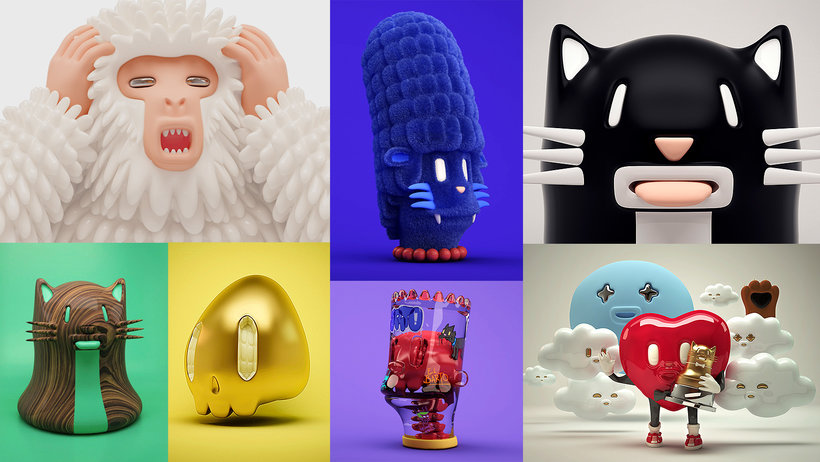
Modeling a character in 3D and animating it can come to feel like creating an alter ego, a small part of you that comes alive inside a screen. Jaime Álvarez Sobreviela, creator of “Mr. Kat & Friends”, knows about this, a universe of tender and refined characters led by the homonymous Mr. Kat, a funny black and white cat very fond of sleeping and playing.
In this course, Jaime will show you his process to create characters in Cinema 4D, touching all the important steps like polygonal modeling, splines, rendering engine, UV Map, texturing, motion capture animation and postproduction to generate ready pieces to show the world.
What will you learn in this online course?
You will begin by getting to know the work and influences of Mr. Kat, who will tell you how his universe of “Mr. Kat & Friends” characters was born and how he has applied his skills to the needs of his clients.
Before starting to model your character, you will learn to streamline your work process by customizing the Cinema 4D interface. You will see the workspace of Jaime and adapt yours to your needs.
You will analyze two projects of Mr. Kat & Friends: the classic skull and his Vanilla X-Ray project.
Then you will start to create your own designs, starting with the 3D modeling of Mr. Kat’s skull, to then move to the skeleton and everything that goes inside it.
You will learn to render your projects through a V-Ray scenario that Mr. Kat will help you get on the internet, and then export your image to Adobe Photoshop, where you will give the final touches of color and you will get an image that you can share wherever you want. .
Then you will learn to create a robot in Cinema 4D using basic techniques. Through UV Mapping you will give texture and a special personality.
As in the previous lesson, you will go from the head to the body, to which you will also add texture with the same processes.
Using the technique of capture of movements and thanks to a variety of predetermined movements, you will animate your character.
Once again, the final step will be to render your project and export it to Adobe After Effects to retouch the color and add effects before generating a final file.
What is this course’s project?
You will create your own 3D character with UV Map stickers and give it life through the motion capture technique.
Who is this online course for?
To beginner and intermediate level designers who want to specialize in 3D character design.
Requirements and materials
You will need a computer or computer with Cinema 4D, V-Ray, Adobe After Effects and Adobe Photoshop installed. Photoshop and After Effects will serve to adjust the color and bring your project to light.



 Channel