Ad Clicks : Ad Views : Ad Clicks : Ad Views : Ad Clicks : Ad Views : Ad Clicks : Ad Views :
Oh Snap!

It looks like you're using an adblocker. Adblockers make us sad. We use ads to keep our content happy and free. If you like what we are doing please consider supporting us by whitelisting our website. You can report badly-behaved ads by clicking/tapping the nearby 'Advertisement' X text.

Multi Layered Destruction in Houdini

/

Release date:2022, December

Duration:11 h 45 m

Author:Mark Spevick

Skill level:Beginner

Language:English

Exercise files:Yes

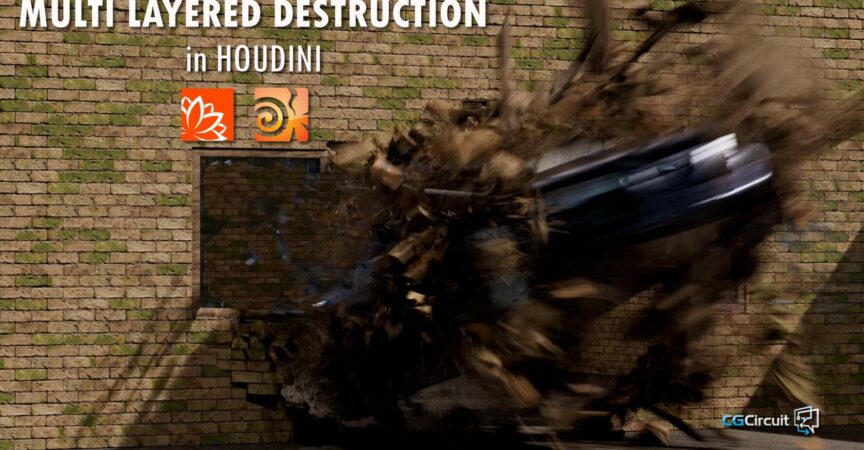
In this course, we will learn how to create a detailed simulation of a car driving through a wall.

Designed for beginner and intermediate students, we will specifically look at how to install Quixel’s bridge in order to use a Megascans asset to build our wall. We will also look at a couple of ways to implement ACES in Houdini for professional color management control.
We will look at creating a reusable digital asset to make a brick wall complete with UV’s and surface detail. We will then take this asset and make a set complete, with windows and a door.
We will fracture everything and then set up the simulation with sophisticated use of constraints.
Next, we will add multiple different layers of details by utilizing various techniques.
These will be particle simulations, Pyro simulations for airfields and dust and we will also look at emitting RBD’s to add additional small pieces.
We will then look at USD and SOLARIS in order to set up the scene for rendering.
We will then look at using materialX and the new XPU pyro shader so that we can utilize the new (beta) XPU feature of KARMA which greatly accelerates rendering time.
Main Takeaways
  • How to set up ACES in Houdini
  • How to use COPS to convert textures in ACES colour space
  • How to install Quixel bridge into Houdini to use mega scans assets
  • How to make a digital asset
  • How to fracture different material types such as glass, wood and concrete.
  • How to setup sophisticated constraint networks to control the fracture of different material types.
  • How to make accurate collision objects for the simulation.
  • How to implement other passses to add further levels of detail to the shot.
  • How to use debris source node
  • How to use POP grains
  • How to use Pyro solver
  • How to create an air field to improve interaction between elements.
  • How to make custom pyro emitters
  • How to make a dust pass using pyro tools.
  • How to optimizematerials the simulation for caching
  • How to bring Houdini scene in SOLARIS
  • How to convert shaders into materialX
  • How to implement KARMA XPU
Watch online or Download for Free
01 – Setting up ACES in Houdini

1. Setting Up Aces in Houdini
2. ACES in Houdini using SideFX labs

02 – Install MEGASCANS bridge

1. Megascan asset install
2. Converting the textures into ACES

03 – Build Wall asset for simulation

1. Prepare the brick asset
2. Layout brick asset
3. Make HDA
4. Door and window frames
5. Door and the window glass
6. Clean up and prepare for simulation

04 – Setting up car collision for the simulation

1. Set Up Car Collider

05 – Wall Simulation

1. Setting up the wall for the simulation
2. Refining the wall simulation

06 – Complete the wall simulation

1. Setting up the window and door frames
2. Constraining the frames to the wall
3. Fracturing and adding the door to the simulation
4. Fracturing and adding the windows
5. Refining and finishing the wall simulation

07 – Create Mid scale debris pass by emitting RBD objects

1. Setting up Mid scale debris pass
2. Refining the simulation

08 – Create Air Field

1. Setting up the air field simulation
2. Fixing the boundary issues

09 – Clumpy debris pass using POP grains

1. Set up the source
2. Setting up the simulation
3. Adding attributes to control the clumpiness and the colliders

10 – Fine dust pass

1. Setting up the fine dust pass

11 – Smokey dust pass

1. Setting up the source for the pyro solver
2. Creating custom source trails
3. Adding in the Air Field
4. Optimizing the simulation for caching

12 – Rendering in SOLARIS using KARMA XPU

1. Import in the car and creating MaterialX shaders
2. Adding lights and Karma node
3. Adding in the floor
4. Importing the wall into Solaris and making MaterialX shaders
5. Importing the Mid scale Debris pass
6. chap12 6 importing the fine dust pass
7. Importing the fine dust pass
8. Adding more lights and final render

[CGCircuit] Multi Layered Destruction in Houdini.7z.rar
[CGCircuit] Multi Layered Destruction in Houdini_Subtitles.7z


Join us on
  Channel    and      Group

  • Facebook
  • Twitter
  • Google+
  • Linkedin
  • Pinterest

2 Comments

Leave a Comment

Your email address will not be published. Required fields are marked *