


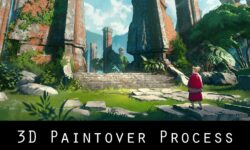
Stylised Illustration – Blender to Photoshop Process with Gavin O’Donnell

Release date:2021
Skill level:Beginner
Language:English
Exercise files:Yes
Course URL:https://www.wingfox.com
Hi guys,
I’ve added 3 more videos into the Blender Lighting section, I give a demo on setting up a sunset and moonlight option. In the third video I cover using HDRIs for lighting, I go over a darker/spooky scene and sunrise option.
Create a Winter Wonderland in Blender and Photoshop!
In this tutorial, I will show you how I translate my ideas from 3D to 2D in a beginner friendly way. I will also discuss lighting, framing and setting up a strong base to paint over in Photoshop. I’ve gone about this whole tutorial in a way that it’s all the keys areas broken down into 45 videos spanning 5 – 30 mins.
Chapter 01 – Introduction and Reference
Part 00 – Trailer
Part 01 – Introduction
Part 02 – Blender Scene
Chapter 02 – Getting Started in Blender
Part 03 – Blender Setup
Part 04 – More Trees and Quickshape
Part 04a – QuickShape Alternative
Chapter 03 – Making More Pieces for Our Scene
Part 05 – The Cliff
Part 06 – Making the House
Chapter 04 – Scattering and Vertex Painting to Save Tim
Part 07 – Scattering
Part 08 – Vertex Painting
Chapter 05 – Organising Our Scene with the Camera and Layout
Part 09 – Setting up the Camera
Part 10 – Arranging the Scene
Chapter 06 – Using Quixel for Importing Assets and Textures
Part 11 – Quixel Importing Assets
Part 11a – Free Part of Quixel
Part 12 – Adding Quixel Textures
Chapter 07 – Lighting Our Blender Scene
Part 13 – The Lights!
Part 13a – Sunset Lighting
Part 13b – Moonlight
Part 13c – HDRIs for Lighting
Chapter 08 – Cloud Maps and Rendering
Part 14 – Cloud Map
Part 15 – Rendering
Part 15a – Graphic Compositions (Extra)
Chapter 09 – Setting Up Our Render for Painting
Part 16 – Photoshop Setup
Part 17 – Organising the Layers
Chapter 10 – Working On the Background
Part 18 – The Sky and Clouds
Part 19 – Tackling the Background
Part 20 – More Progress
Part 21 – Wrapping up the Background
Chapter 11 – Painting and Designing the Trees and Bushes
Part 22 – Designing a Tree
Part 23 – The Large Tree
Part 24 – The Bushes
Part 25 – The Chunky Tree
Part 26 – Polishing the Chunky Tree
Part 27 – Problem Solving Shapes
Chapter 12 – Adding an Asset Later
Part 28 – Adding an Asset Later
Part 29 – The Post Box!
Chapter 13 – The Winter Trees and Rock
Part 30 – Winter Trees
Part 31 – Thoughts on Adding Details
Part 32 – The Rock
Part 33 – Creating Overlap
Chapter 14 – The Foreground
Part 34 – The Foreground
Part 35 – More Foreground
Chapter 15 – The Pathway
Part 36 – Stone Slabs
Part 37 – Adding Snow to the Slabs
Part 38 – Small Changes
Chapter 16 – The Final Boss
Part 39 – The Final Boss
Part 40 – Beams
Part 41 – Windows and Door
Part 42 – The Roof
Part 43 – Adding Snowy Goodness
Part 44 – Final Adjustments
Part 45 – The Colour Juicifier


Do you have Definitely EEVEE: Definitive Interiors for Blender 2.8 course: https://gumroad.com/l/EEVEE
Wingfox course Yaaaa ! Thank you so much ( i hope i will be able to see “The Lost Soldier- Environment Concept Design” as well 😀 ) Have a great day !
Thanks a loooooooot