Ad Clicks : Ad Views : Ad Clicks : Ad Views : Ad Clicks : Ad Views : Ad Clicks : Ad Views :
Oh Snap!

It looks like you're using an adblocker. Adblockers make us sad. We use ads to keep our content happy and free. If you like what we are doing please consider supporting us by whitelisting our website. You can report badly-behaved ads by clicking/tapping the nearby 'Advertisement' X text.

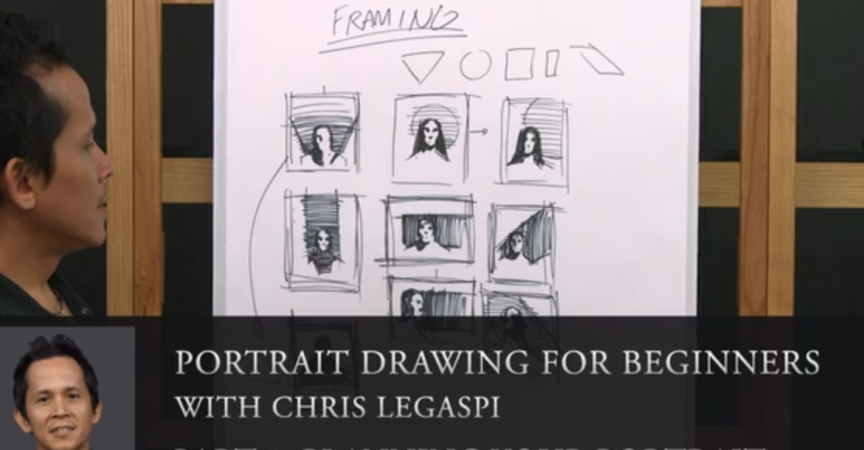
Portrait Drawing for Beginners with Chris Legaspi (Part 1-3)

/

Release date:2020

Author:Chris Legaspi

Skill level:Beginner

Language:English

Exercise files:Not Provided

Part 1: Planning Your Portrait
In this first lesson of the series, Chris goes over the steps to take in the planning phase of your portrait drawings. He will begin with a thorough lecture that covers the first two steps in his process: Observation and Placement. Chris will demonstrate these steps by analyzing a variety of different model references throughout. Following the lecture, you will have an assignment that will give you a chance to put these concepts into practice. The lesson will conclude with Chris’s version of the same assignment, allowing you to compare your work with his.

Part 2: The Lay-In
In this second lesson of the series, Chris covers the lay-in process. He will begin with a thorough lecture, introducing you to his steps for creating a portrait lay-in. Following the lecture, you will have an assignment that will give you a chance to put what you’ve learned into practice. The lesson will conclude with Chris’s version of the same assignment, allowing you to compare your work with his.

Part 3: Rendering
In this final lesson of the series, Chris goes over the last step in the portrait drawing process: rendering. Chris will do several demonstrations throughout the lesson, using a variety of different materials and stylistic approaches. Following the shorter demonstrations, you will have an assignment that will give you a chance to put these concepts into practice, and then have the ability to watch Chris’s version of the same assignment. The lesson will conclude with a three-hour charcoal demonstration of a male, allowing you to take in every step of Chris’s rendering process from start to finish.

Table of Contents

1)
Sharpie Markers
Drawing Paper
Digital Tablet
2)
Sharpie Marker
Drawing Paper
Digital Tablet
General’s Charcoal Pencil – HB and 2B
Koh-I-Noor Pencil Lengthener
BIC Cristal Ballpoint Pen – Black, Medium
Willow Charcoal Stick
Kneaded Eraser
3)
Sharpie Marker
Drawing Paper
Faber-Castell 9000 Pencil – 2B
Prismacolor Verithin Colored Pencil – Black
Prismacolor Colored Pencil – Black
Ballpoint Pen – Black
Willow Charcoal – Thick and Thin Sticks
General’s Charcoal Pencil – 2B
Hogs Hair Bristle Brushes – Round, Large and Small
Kneaded Eraser
Mars Staedtler Plastic Eraser
CarbOthello Pencil – Black
Conté Charcoal Pencil – 2B

Watch online or Download for Free

Part 1 Planning Your Portrait
01. Lesson Overview
02. Introduction To Observation (Models Lillas, Julia)-1
03. Determining The Lighting (Model Jean)-1
04. Introduction To Placement (Model Kevin)-1
05. Value Composition-1
06. Determining Placement, Continued (Model Bridget)-1
07. Creating Value Thumbnails-1
08. Value Thumbnails, Continued Halftone And Gradations (Model Bridget)-1
09. Framing Choosing A Vignette-1
10. Framing Examples (Models Kevin, Lilias)-1
11. Framing Examples, Continued (Model Lillias)-1
12. Observation And Placement Assignment-1
13. Chriss Approach To The Assignment-1

Part 2 The Lay-In
01. Lesson Overview
02. Establishing the Shape, Tilt, and Yaw
03. Indicating the Features
04. Creating 2-D Graphic Shapes (Model Len)
05. Making Corrections Prior to Identifying Shadow Shapes
06. Determining Areas of Shadow
07. Lay-In Demonstration 1 (Models Jeff, Bridget)
08. Lay-in Demonstration 2 (Model Lilias)
09. Lay-in Demonstration 3 (Models Lilias, Monika)
10. Lay-In Demonstration 4 (Models Monika, Rajiv)
11. Lay-in Demonstration 5 (Model Taryn)
12. Lay-In Demonstration 6 (Charcoal, Model Jeff)
13. Lay-In Demonstration 7 (Charcoal, Model Monika)
14. Lay-In Demonstration 8 (Charcoal, Model Rajiv)
15. Lay-In Demonstration 9 (Charcoal, Models Chris, Mitchell)
16. Lay-In Demo 10 (Willow Charcoal and Ballpoint Pen, Models Lilias, Bridget)
17. Lay-In Demonstration 11 (Ballpoint Pen, Model Len)
18. LightShadow Demonstration 1 (Ballpoint Pen, Model Mitchell)
19. LightShadow Demonstration 2 (Black Pencil, Model Bridget)
20. Timed Lay-In Assignment
21. Chriss Approach to the Assignment

Part 3 Rendering
01. Lesson Overview
02. Introduction to Rendering (Model Angelique)
03. Line vs. Tone and Materials
04. Line-Focused Demonstration (Model Taryn)
05. Tonal Demonstration in Charcoal (Model Len)
06. Sketchy Demonstration with Pastel Pencil
07. Toned Paper Sketchbook Demonstration (Model Maude)
08. Timed Assignment
09. Chriss Approach to the Assignment (Part 1)
10. Chriss Approach to the Assignment (Part 2)
11. Beginning of Long Demonstration General Lay-in
12. Determining Zones of Interest
13. Adding Highlights Using an Eraser
14. Adding Highlights, continued
15. Adding Accents
16. Finishing Touches


Join us on
  Channel    and      Group

  • Facebook
  • Twitter
  • Google+
  • Linkedin
  • Pinterest

4 Comments

  1. Thanks for all your hard work. If possible could you please add this course”lucid a fantasy character illustration tutorial”. Thanks in advance

Leave a Comment

Your email address will not be published. Required fields are marked *