Ad Clicks : Ad Views : Ad Clicks : Ad Views : Ad Clicks : Ad Views : Ad Clicks : Ad Views :
Oh Snap!

It looks like you're using an adblocker. Adblockers make us sad. We use ads to keep our content happy and free. If you like what we are doing please consider supporting us by whitelisting our website. You can report badly-behaved ads by clicking/tapping the nearby 'Advertisement' X text.

Creating 3D Environments in Blender (old and 2.81) (SUB ES, PT, IT) (720p)

/

Release date:2019

Author: Rob Tuytel, Erik Selin

Skill level:Beginner

Language:English

Exercise files:Yes

What Will I Learn?
Creating stunning unique environments
Organize your workflow to make large environment scenes
More than 250 unique 2K / 4K textures
Lots of medieval reference photos
E-book: Old Masters Unveiled ( 250 pages)
All scene assets, including buildings, rocks, grass, trees and more
6 Characters to fill up your scene
Full course documentation for the Blender basics chapter
Baking your models and importing in Unity 3D

Requirements
Blender version 2.81 or above
Computer ( min 16GB ram)

Description
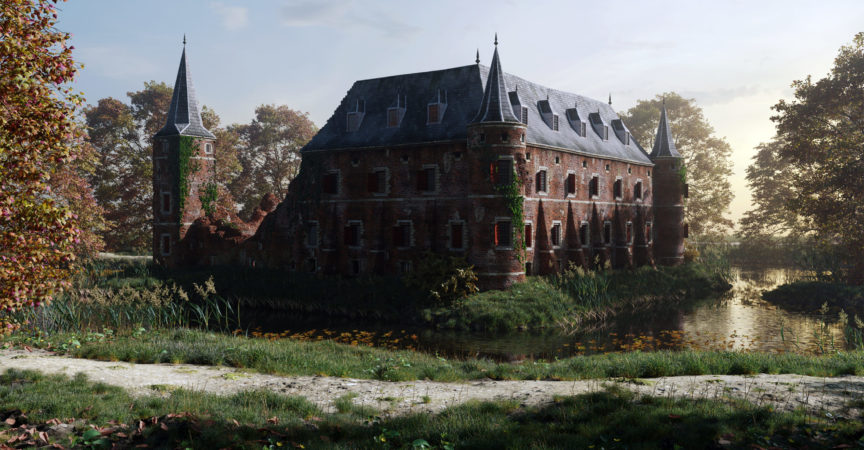
Creating 3D environments in Blender

After four years, the creating 3D environments course, is now finally here for Blender 2.81. Thousands of students participated in the first version of this course and there were a lot of requests for a follow-up course. Prepare for a new chapter in the world of 3D environments!

The profession continues
For centuries, making environments has been something that many artists do to impress other people. Since the advent of computer graphics there is a new wave of designers studying this lovely profession. This course reveals some fundamental lessons from the old painting masters. Use the course to get the max out Blender and learn to create high quality 3D environments.

Starting from scratch
The complexity of many scenes is often holding people back from creating environmental scenes in 3D. Most designers drop-out halfway and are then facing their unfinished work because it takes a lot of time and work to create scenes with architecture and nature. I faced this many times, but because I was so inspired by medieval architecture, I took the time to learn how to create 3D environments in a way in which I could express myself. During this process I struggled hard and made many unnecessary choices that slowed down my progression. The power of this course is that it shows you exactly what you need to design 3D environments and which details you might want to avoid or postpone in order to make the most out of your own progression.

The road to perfection
We all want to create beautiful scenes, but making these scenes can be a big challenge. This course is not only a technical education, it also covers topics like focus, inspiration and organization. I believe that a well-organized focused designer, with the right inspiration, will be able to make every 3D dream come to life. This course is well documented and guides you through the process of creating 3D scenes in Blender 2.81.

From ruin to castle
This course will guide you through the new Blender 2.81 interface. Together we make our first steps in Blender. Slowly we start building objects and after one chapter you will be able to make a small dice scene. This warming-up is needed to get used to the workflow and make you comfortable with Blender and the things that will come. Shortly after that, we will jump into the node editor. We will start mixing textures, just like the old painting masters, to get decent looking results. We will apply the material on a ruin and build the first environment scene. Then we will start building a farmhouse in a medieval style. We will use the workbench for modeling, Eevee for the texture work and Cycles to render the scenes to get the max out of it. After finishing the farmhouse, we merge the building with a nature environment. We will create the trees with the sapling add-on, so you will not need any external plugins. There is a full chapter about creating nature assets and in the final castle scene we will merge everything together to make a wonderful environmental scene. All content and textures come from Texture/HDRI Haven and are included in the course.

Who is the target audience?
This course is meant for artists who like to grow in their workflow
Beginners
Environment artists
Game level artists

Watch online or Download for Free

01 Chapter 01 – Before we start (2.81)
001 Lekture 01 – Course overview
002 Lecture 02 – Udemy Dashboard
003 Lecture 3 – Techniques from the old masters (2.81)
004 Lecture 4 – Motivation and inspiration
005 Lecture 5 – Workflow and organization

02 Chapter 02 – Getting in touch with Blender (2.81)
006 Lecture 01 – introduction
007 Lecture 02 – Download and installing Blender 2.81
008 Lecture 03 – Getting in touch with the blender viewport
009 Lecture 04 – The Blender 3D interface
010 Lecture 05 – Collections
011 Lecture 06 – Eevee and Cycles
012 Lecture 07 – The workbench
013 Lecture 08 – Creating a simple object
014 Lecture 09 – Making a dice
015 Lecture 10 – Adding dice holes
016 Lecture 11 – Adding a material
017 Lecture 12 – Improving dice material
018 Lecture 13 – Making a scene render

03 Chapter 03 – Working with materials (2.81)
019 Lecture 01 – Introduction to materials (2.81)
020 Lecture 02 – Materials in the real world
021 Lecture 03 – Materials in 3D scenes
022 Lecture 04 – Building a material setup sphere
023 Lecture 05 – Making colors with color ramp node
024 Lecture 06 – Mixing image textures
025 Lecture 7 – Mix plaster on the bricks
026 Lecture 08 – Add sandstone border
027 Lecture 09 – Add displacement and weight layer
028 Lecture 10 – Optimizing node tree in groups
029 Lecture 11 – Adding background images
030 Lecture 12 – Building the wall
031 Lecture 13 – Using the boolean modifier
032 Lecture 14 – Remesh the wall
033 Lecture 15 – Adding wall material
034 Lecture 16 – Adding displacement map
035 Lecture 17 – Adding weight layer sandstone
036 Lecture 18 – Making a render
037 Lecture 19 – recap

04 Chapter 04 – Making a grass landscape (2.81)
038 Lecture 01 – Introduction
039 Lecture 02 – Making a scene template
040 Lecture 03 – deform the landscape
041 Lecture 04 – Importing the wall model
042 Lecture 05 – Adding landscape material
043 Lecture 06 – Adding landscape displacement
044 Lecture 07 – Importing HDRI map
045 Lecture 08 – Adding grass strand backplate
046 Lecture 09 – Model a grass strand
047 Lecture 10 – Adding strand details
048 Lecture 11 – Adding strand texture
049 Lecture 12 – Making strand variations
050 Lecture 13 – making a grass clump
051 Lecture 14 – making clump variations
052 Lecture 15 – Convert grass clump
053 Lecture 16 – Adding grass material
054 Lecture 17 – adding terrain displacement
055 Lecture 18 – Adding grass particle system
056 Lecture 19 – improving grass looks
057 Lecture 20 – adding particle texture
058 Lecture 21 – grass color variation
059 Lecture 22 – Modeling small reed
060 Lecture 23 – modeling reed variation models
061 Lecture 24 – Adding reed particle system
062 Lecture 25 – Adding fog
063 Lecture 26 – Mixing grass length
064 Lecture 27 – Adding grass on the ruin
065 Lecture 28 – Making scene improvements
066 Lecture 29 – Recap

05 Chapter 05 – Making a farm house landscape (2.81)
067 Introduction Lecture
068 Lecture 01- Making a scene template
069 Lecture 02 – making a scene blockout
070 Lecture 03 – Starting with the farmhouse
071 Lecture 04 – Adding roofs
072 Lecture 05 – Extending roof
073 Lecture 06 – adding holes
074 Lecture 07 – Adding bevels
075 Lecture 08 – Making wooden bars
076 Lecture 09 – Placing wooden bars
077 Lecture 10 – adding roof and brick texture
078 Lecture 11 – Adding texture variation
079 Lecture 12 – Adding leaking texture
080 Lecture 13 – Adding more leaking
081 Lecture 14 – Making a window
082 Lecture 15 – Adding texture and frame
083 Lecture 16 – Merging window frames
084 Lecture 17 – making window frame variations
085 Lecture 18 – Merging windows with house
086 Lecture 19 – making a door
087 Lecture 20 – adding roof sealings
088 Lecture 21 – Adding roof slates
089 Lecture 22 – Adding roof slates on small roofs
090 Lecture 23 – Creating a door hook
091 Lecture 24 – Improving texture details
092 Lecture 25 – improving building materials
093 Lecture 26 – Importing house in scene
094 Lecture 27 – Adding grass weight layer
095 Lecture 28 – Importing grass
096 Lecture 29 – Modeling dead leaves
097 Lecture 30 – Adding dead leaves material
098 Lecture 31 – adding dead leave particle layer
099 Lecture 32 – making a tree with the sapling tool
100 Lecture 33 – generating a birch tree
101 Lecture 34 – Adjusting the root
102 Lecture 35 – Adding weight layer branches
103 Lecture 36 – Modeling birch leaves
104 Lecture 37 – Merging leaves on twig
105 Lecture 38 – Adding twigs on tree
106 Lecture 39 – Updating twig material
107 Lecture 40 – Making more birch trees
108 Lecture 41 – fixing the root
109 Lecture 42 – Importing the trees
110 Lecture 43 – Adjusting the twig material
111 Lecture 44 – Adding scene fog
112 Lecture 45 – Adding grass variation
113 Lecture 46 – Modeling reed
114 Lecture 47 – making the reed curvy
115 Lecture 48 – merging leaves on the stem
116 Lecture 49 – Adding reed particles
117 Lecture 50 – Adding small reed
118 Lecture 51 – Adding path on terrain
119 Lecture 52 – Making scene adjustments
120 Lecture 53 – Scene compositing
121 Final Lecture – Recap

06 Chapter 06 – Creating nature assets (2.81)
122 Lecture 01 – Introduction
123 Lecture 02 – Importing assets from previous scenes
124 Lecture 03 – Importing trees
125 Lecture 04 – Modeling nettle leaves
126 Lecture 05 – Modeling more nettle leaves
127 Lecture 06 – Adding nettle texture
128 Lecture 07 – Curvy leaves and modeling a nettle stem
129 Lecture 08 – merging leaves with nettle stem
130 Lecture 09 – making nettle variation
131 Lecture 10 – Modeling celandine plant
132 Lecture 11 – Curve the celandine
133 Lecture 12 – Modeling celandine flower
134 Lecture 13 – Merging the leaves and the stem on the flower
135 Lecture 14 – Improving celandine flower
136 Lecture 15 – Modeling plant leave
137 Lecture 16 – Modeling plant stem and merging leaves
138 Lecture 17 – Improving plant material
139 Lecture 18 – making dry grass
140 Lecture 19 – Modeling Ivy leave
141 Lecture 20 – Building Ivy Branch
142 Lecture 21 – Improving Ivy material
143 Lecture 22 – Modeling field maple leave
144 Lecture 23 – Making leaves curvy
145 Lecture 24 – Modeling field maple twig
146 Lecture 25 – making twig variations
147 Lecture 26 – Generating field maple tree
148 Lecture 27 – Adding trunk texture
149 Lecture 28 – Adding twigs on tree
150 Lecture 29 – Organizing trees
151 Lecture 30 – recap

07 Chapter 07 – Making a castle scene (2.81)
152 Lecture 01 – Introduction
153 Lecture 02 – Organizing scene template
154 Lecture 3 – deforming the terrain
155 Lecture 04 – Modeling castle blockout
156 Lecture 05 – Modeling castle tower
157 Lecture 06 – Adding holes and remesh
158 Lecture 07 – Improving the towers
159 Lecture 08 – Optimizing towers and improving materials
160 Lecture 09 – Adding more texture layers
161 Lecture 10 – Mixing texture layer towers
162 Lecture 11 – Adding sandstone borders
163 Lecture 12 – Adding roofing texture
164 Lecture 13 – Improving roof texture
165 Lecture 14 – modeling a window frame
166 Lecture 15 – Making window variations
167 lecture 16 – Modeling a sandstone window frame
168 Lecture 17 – Merging windows with towers
169 Lecture 18 – Modeling sandstone border for the tower
170 Lecture 19 – Modeling the main structure base
171 Lecture 20 – Modeling the broken walls
172 Lecture 21 – Adding gun holes
173 Lecture 22 – Addin g more gun holes
174 Lecture 23 – Improving textures
175 Lecture 24 – Adding holes in the main structure
176 Lecture 25 – remesh the main structure
177 Lecture 26 – Adding sandstone texture window layers
178 Lecture 27 – Adding sandstone door texture layer
179 Lecture 28 – Importing window frames
180 Lecture 29 – Adding metal frames
181 Lecture 30 – Modeling wall borders
182 Lecture 31 – Adding extra walls
183 Lecture 32 – Adding roof texture
184 Lecture 33 – Modeling roof slates
185 Lecture 34 – Modeling roof bars
186 Lecture 35 – Modeling a small roof
187 Lecture 36 – Making a roof sealing
188 Lecture 37 – Modeling a hatch
189 Lecture 38 – Merging hatches with the building
190 Lecture 39 – Adding wall displacement
191 Lecture 40 – Improving main structure
192 Lecture 41 – Adding terrain displacement
193 Lecture 42 – Adding path vertex layer
194 Lecture 43 – Improving terrain
195 Lecture 44 – Adding grass particle system
196 Lecture 45 – Importing nature assets
197 Lecture 46 – Adding small plants
198 Lecture 47 – Adding small reed
199 Lecture 48 – Importing trees
200 Lecture 49 – Improving grass and importing hdri sky
201 Lecture 50 – Adding weight layer towers
202 Lecture 51 – Adding ivy branches
203 Lecture 52 – Adding tall reed and water leaves
204 Lecture 53 – Finalize scene
205 Lecture 54 – Recap

08 Chapter 1 – Before we start
206 Course overview
207 Udemy dashboard information
208 Techniques from the old masters
209 Motivation and inspiration
210 Workflow and organization

09 Chapter 2 – Introduction to Blender and Setup
211 Chapter_2_introduction
212 Installing Blender
213 Getting in touch with Blender
214 The Blender 3D interface
215 Creating a simple object
216 Blender quick tools
217 Creating a chair
218 UV Coordinates
219 Advance UV coordinates
220 Modifiers
221 Modifiers part 2
222 Making a fence
223 Making a viewport render
224 Chapter_2_recap

10 Chapter 3 – Materials
225 Chapter_3_introduction
226 Materials in the real world
227 Materials in 3d scenes
228 Building a test scene
229 Making a material with nodes
230 Mixing Shaders
231 Principled shader
232 Advance material design
233 Advance material design (2)
234 Advance material design (3)
235 The node wrangler
236 Translucency
237 Making a leave material
238 Pointiness
239 Updating the fence
240 Updatring the fence (2)
241 Updating the fence (3)
242 Chapter_3_recap

11 Chapter 4 – Create a simple building
243 Introduction_chapter_4
244 Making a base
245 Optimizing base
246 Adding window holes
247 Making a window frame
248 UV unwrap window frame
249 Front framework
250 Front framework (2)
251 Extending the roof
252 Base texture
253 Base material setup
254 Adding windows
255 Making a door
256 Door ornaments
257 Making a hatch
258 Adding doorhatches
259 Adding hatcheswindows
260 Window ornaments
261 Roof texture
262 Roof ornament
263 Making a chimney
264 Roof improvements
265 Improving materials
266 Make a render
267 Plaster material ( bonus optional )
268 Low poly model ( bonusoptional )
269 Baking texture maps ( bonusoptional )
270 Baking texture maps 2 ( bonus optional)
271 Blender to Unity 3D ( bonus optional)
272 Recap_chapter_4

12 Chapter 5 – Create advance buildings
273 Chapter_5_introduction
274 File organization
275 Making the base
276 Adding holes
277 Adding bevel lines on the edges
278 Building the front frame
279 Creating ornaments
280 Making an advance door
281 Adding door and ornaments
282 Adding hatches
283 Adding windows
284 Improving window ornaments
285 Adding middle framework
286 Adding more windows
287 Making top roof sealing
288 Adding roof tilles
289 Adding texture for the rear of the building
290 Improving textures
291 Advance plaster material
292 Improving textures
293 Adding roof sealing
294 Side ornaments and sealings
295 Updating all the materials
296 Final details
297 Append and improve the chimney
298 Making a low poly model (Optional)
299 Baking texture maps (optional)
300 Import building into unity 3D (optional)
301 Making a new advance building design
302 Making a side roof
303 Adding roof tiles and sealing
304 Adding roof in library files
305 Creating base for new building design
306 Creating hole shapes for the window and doors
307 Adding bevel lines and optimization
308 Adding textures
309 Concrete window frames
310 Mixing plaster
311 Sandstone corners and sealings
312 Adding brick arches
313 Improving the side texture
314 Adding roof tiles
315 Adding windows
316 Making a top roof
317 Improving the roof tiles
318 Updating the materials
319 Chapter_5_recap
320 Making a church – modeling the base
321 Making a church – Improving the block model
322 Making a church Side portals and roofing
323 Making a church – Adding holes in the tower
324 Making a church – improving the front tower
325 Making a church – Adding side windows
326 Making a church – Adding the rear windows
327 Making a church – Working on the window texture
328 Making a church – Arch modeling
329 Making a church – improving the wall texture
330 Making a church – Adding more detail top tower
331 Making a church – Adding side window textures
332 Making a church – Adding rear windows textures
333 Making a church – Improving the side portal
334 Making a church – Border and roof textures
335 Making a church – making a church pillar
336 Making a church – Sandstone details pillar
337 Making a church – Improving pillars by adding detail
338 Making a church – Duplicating church pillars
339 Making a church – Creating a wall border
340 Making a church – Creating tower ornaments
341 Making a church – Making tower pillar ornaments
342 Making a church – Adding small planks in tower
343 Making a church – Making small pinnacles
344 Making a church – Adding an extra side portal
345 Making a church – Side portal part 2
346 Making a church – Adding final details

13 Chapter 6 – Nature
347 Chapter_6_introduction
348 Taking a closer look at grass
349 Introduction to grass modeling strands
350 Joining the grass strands
351 Grass material settings
352 Grass variation Creating weeds
353 Grass variation Adding flowers
354 Making a grass field
355 Collors of the forrest
356 Creating a RockBoulder
357 Adding a texture to the rocks
358 Adding the rocks on the grass field
359 Getting_outside_Trees
360 Creating a tree
361 Trees Creating a twig
362 Trees Improving the twigs
363 Trees Generating the tree with The grove 3D
364 Adding the tree to the grass field
365 Extra Animations
366 Chapter_6_recap

14 Chapter 7 – Road and paths
367 Chapter_7_introduction
368 Getting_outside_paths
369 Creating a path in your scene
370 Change the color of the path
371 Adding puddles on your path
372 Creating a cobblestone road
373 Adding pebbles on the sand path
374 Chapter_7_recap

15 Chapter 8 – Light and atmosphere
375 Chapter_8_introduction
376 Basics of light
377 Using sunlight
378 Working with environment textures
379 Volumetric mistatmosphere
380 Extra snow scene
381 Chapter_8_recap

16 Chapter 9 – Creating a scene from scratch
382 Chapter_9_introduction
383 Scene introduction
384 Making a scene base
385 Adding textures
386 Making a canal border
387 Appending the building assets
388 Making a Gate [A]
389 Making a gate [B]
390 Adding the cobblestone path
391 Adding grass and making a small structure
392 Adding environment texture
393 Adding street props
394 Making trees [A]
395 Making trees [B]
396 Improving function of buildings in the scene
397 Adding ivy.es.srt
397 Adding ivy
398 Improving the gate [A]
399 Change a building [B]
400 Making a canal fence
401 Improving the canal
402 Adding street_props [A]
403 Adding street props [B]
404 Improving scene objects [A]
405 Improving scene objects [B]
406 Add leaves and flowers on the path [A]
407 Add leaves and flowers on the path [B]
408 Apply leaves and flowers on the path
409 Making a render and use the compositor
410 Improving the scene by making changes in the scene
411 Chapter_9_recap

17 Chapter 10 – Final review tips tricks [Bonus]
412 Chapter_10_part_1
413 Chapter_10_part_2
414 Chapter_10_part_3
415 Chapter_10_part_4
416 Chapter_10_part_5
417 Chapter_10_part_6
418 Chapter_10_part_7

Creating 3D Environments in blender – ES-PT-IT Subtitles.7z
Creating 3D Environments in blender – FILES.7z.001
Creating 3D Environments in blender – FILES.7z.002
Creating 3D Environments in blender – FILES.7z.003
Creating 3D Environments in blender – FILES.7z.004
Creating 3D Environments in blender – FILES.7z.005
Creating 3D Environments in blender – FILES.7z.006
Creating 3D Environments in blender – FILES.7z.007
Creating 3D Environments in blender – FILES.7z.008
Creating 3D Environments in blender – FILES.7z.009


Join us on
  Channel    and      Group

  • Facebook
  • Twitter
  • Google+
  • Linkedin
  • Pinterest

6 Comments

  1. Thanks for including the older version. There’s still valuable information to be gleaned from the 2.71 section and it’s not that hard to transfer the information over once you know 2.81s methods.

    • Thanks for this information, I was get confused about what to download. I will download both!
      Thanks again.!

  2. Sir please upload this course:

    https://blendermarket.com/products/course-massive-physics-simulations-in-blender

  3. Where are all the resources files of chapter 4 – making a grass landscape. It is difficult for me to find it. Please help me out.

  4. Oh boy this is so many, are there any tricks to download this in bulk? If not its okay its free anyways! Thanks

  5. Sir files make separate file for textures as textures are on of the important part of whole course please.

Leave a Comment

Your email address will not be published. Required fields are marked *