Ad Clicks : Ad Views : Ad Clicks : Ad Views : Ad Clicks : Ad Views : Ad Clicks : Ad Views :
Oh Snap!

It looks like you're using an adblocker. Adblockers make us sad. We use ads to keep our content happy and free. If you like what we are doing please consider supporting us by whitelisting our website. You can report badly-behaved ads by clicking/tapping the nearby 'Advertisement' X text.

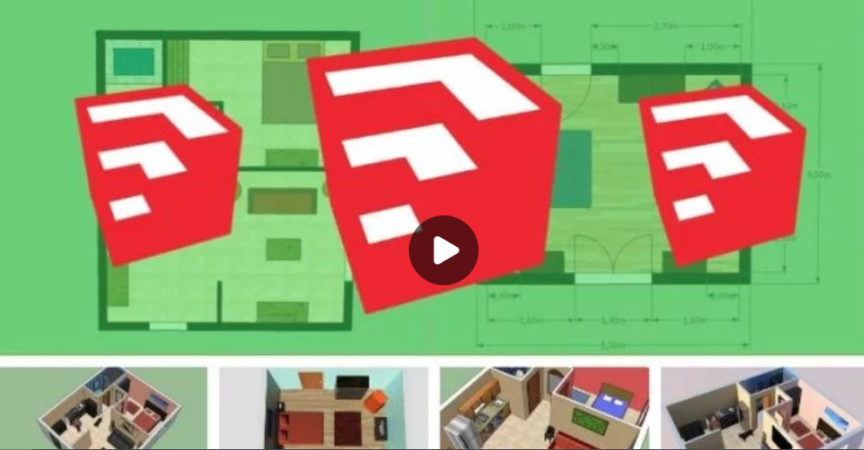
Sketchup for interior design

Release date:2018

Duration:08 h 13 m

Author: Nicolas Forgue

Skill level:Beginner

Language:English

Exercise files:Yes

SketchUp is an intuitive 3D modeling software that allows you to create and edit 2D and 3D models including the push and pull tool that allows designers to extrude any flat surface into 3D shapes. It is a program used for a wide range of 3D modeling projects such as architecture, interior design, landscape architecture, and object design for the industry, to name just a few. some of its uses. The program includes drawing layout functionality, surface rendering and supports third party plugins. There is also access to a huge library of 3D objects that can be imported directly into the design project.
The great advantage of the software, apart from its ergonomics, is that you have a totally free version that allows you to do quality work!
In this course we will work on the free version, so I will show you the scope of Sketchup’s possibilities for Interior Design modeling.

The advantages of Sketchup
– SketchUp is a simple, fast and intuitive software compared to other 3D modeling software.
– You can already make simple models after only a few hours of learning.
– SketchUp makes it possible to produce models consisting of few faces and therefore very light.
– Because of its non-parametric modeling principle, SketchUp is suitable for many uses.
– It has an extensive collection of free components with the 3D Warehouse
– The free version already offers a large number of possibilities
– There are a large number of plugins, many of which are free like Twilight Render to create realistic renderings

The training program
In this training you will start with Sketchup by first discovering the working interface. Then we go all the bases of Sketchup with the shape design tools, how to create components, how to integrate color or textures, how to use the 3D Warehouse to import images.

Then we will specialize in interior design. For this creation of two projects:
– Design of a room
– Design of an apartment
Each time, we will create a 2D plan to scale with quotation, and coloring of its 2D plan. Then we will model the 3D rendering plan with integration of elements of the 3D Warehouse. We will also see how to create furniture yourself using the different tools. Finally for a final rendering of the project, using the free plugin Twilight Render, we will make a more realistic rendering closer to reality. To beautify your design and offer a more qualitative work.

Table of Contents

1. Introduction interior design 3:17
2. Place the toolbox 5:36
3. Move on your document 2:49
4. The three axes 1:08
5. Start and open document 1:19
6. Save and export 2:22
7. Difference between edge and face 1:59
8. The views 3:20
9. The shadows 4:14
10. Rectangle tool 4:07
11. Rotated rectangle tool 1:52
12. Circle tool 1:40
13. Freehand tool 1:36
14. Arc tool 4:19
15. Line tool 3:31
16. Follow me tool 4:26
17. Push pull tool 4:14
18. Offset tool 2:40
19. Tape measure tool 6:54
20. Scale tool 3:46
21. Dimension tool 4:49
22. Eraser tool 3:14
23. Move tool 2:58
24. Text tool 6:39
25. Insert color and material 7:21
26. Insert texture 6:59
27. Add component 9:21
28. Explode component 3:42
29. Edit component from 3D Warehouse 2:27
30. The groups 5:42
31. Make unique component 2:23
32. 3D warehouse 10:36
33. Add sections 4:41
34. Create scenes 8:20
35. Shelf design 10:06
36. Shelf design add color 2:19
37. Sofa design 10:28
38. Sofa design add color 3:16
39. Bed design 20:49
40. Bed design add color 7:38
41. Room plan 2D 19:44
42. Room plan 2D dimension 3:24
43. Room plan 2D color 8:59
44. Room add furnitures part 1 22:37
45. Room add furnitures part 2 16:39
46. Room add wall window door 9:15
47. Room texture on wall 5:04
48. Install Twilight Render toolbox 1:14
49. Room Twilight edit material 9:50
50. Room Twilight environment 2:45
51. Room Twilight render 12:01
52. Room Twilight final with wall 2:09
53. Appartment plan 2D 23:37
54. Appartment plan 2D add color 7:40
55. Appartment plan 2D dimension 4:04
56. Appartment plan 2D export 0:52
57. Appartment add wall 9:07
58. Appartment add doors and windows 13:04
59. Appartment create the room 22:56
60. Appartment create the bathroom 13:55
61. Appartment create the kitchen 10:56
62. Appartment create the living room 17:35
63. Appartment finishing part 1 15:00
64. Appartment finishing part 2 9:03
65. Appartment save and export 1:23
66. Appartment Twilight edit texture part 1 10:55
67. Appartment Twilight edit texture part 2 13:02
68. Appartment Twilight environment 1:45
69. Appartment Twilight Render 4:59

Watch online or Download for Free

00-Introduction interior design
01-Place the toolbox
02-Move on your document
03-The three axes
04-Start and open document
05-Save and export
06-Difference between edge and face
07-The views
08-The shadows
09-Rectangle tool
10-Rotated rectangle tool
11-Circle tool
12-Freehand tool
13-Arc tool
14-Line tool
15-Follow me tool
16-Push pull tool
17-Offset tool
18-Tape measure tool
19-Scale tool
20-Dimension tool
21-Eraser tool
22-Move tool
23-Text tool
24-Insert color and material
25-Insert texture
26-Add component
27-Explode component
28-Edit component from 3D Warehouse
29-The groups
30-Make unique component
31-3D warehouse
32-Add sections
33-Create scenes
34-Shelf design
35-Shelf design add color
36-Sofa design
37-Sofa design add color
38-Bed design
39-Bed design add color
40-Room plan 2D
41-Room plan 2D dimension
42-Room plan 2D color
43-Room add furnitures part 1
44-Room add furnitures part 2
45-Room add wall window door
46-Room texture on wall
47-Install Twilight Render toolbox
48-Room Twilight edit material
49-Room Twilight environment
50-Room Twilight render
51-Room Twilight final with wall
52-Appartment plan 2D
53-Appartment plan 2D add color
54-Appartment plan 2D dimension
55-Appartment plan 2D export
56-Appartment add wall
57-Appartment add doors and windows
58-Appartment create the room
59-Appartment create the bathroom
60-Appartment create the kitchen
61-Appartment create the living room
62-Appartment finishing part 1
63-Appartment finishing part 2
64-Appartment save and export
65-Appartment Twilight edit texture part 1
66-Appartment Twilight edit texture part 2
67-Appartment Twilight environment
68-Appartment Twilight Render


Join us on
  Channel    and      Group

  • Facebook
  • Twitter
  • Google+
  • Linkedin
  • Pinterest

Leave a Comment

Your email address will not be published. Required fields are marked *