Scene Referred Color Management Finds A Home In Resolve 12
Release date:2015, August 8
Duration:00 h 13 m
Author:Robbie Carman
Skill level:Intermediate
Language:English
Exercise files:Yes
Scene Referred Color Management Finds A Home In Resolve 12
Color management, color pipelines, or whatever catchphrase you want to use are a hot topic in the world of postproduction, color, and finishing in general.
In this DaVinci Resolve 12 First Look Insight, I want to explore what I think is one of the top features in version 12 – Resolve Color Management (RCM)
Before jumping into the movie, I first want to take a look at the differences between Display Referred (what you’re probably using now) and Scene Referred Color Management, discuss how RCM and ACES are similar in their approaches to the same problem, compare RCM to LUT workflows, and finally how I’ve been using RCM in my own projects.
There is a lot to cover so let’s jump right in.
Display vs. Scene Referred Color Management
One of the first things you need to understand about color management with Resolve 12, or color management in general for that matter, is the difference between scene and display referred color management.
Let’s start first with Display Referred Color Management.
Up until, and including Resolve 12, Display Referred Color Management has been the law of the land and how many (if not most) colorists work day to day.
Essentially, Display Referred Color Management (DRC) means that color accuracy is totally dependent on the calibration of your monitor and YOU, the colorist, to judge if the colors (information) being shown on the display are correct.
Display Referred Color Managment is how Resolve (and most color grading applications) have always worked.
In other words, in a Display Referred system, an application like Resolve has no idea of what footage ‘should’ look like. It processes that footage, and you, with your grading & the calibration of the monitor determine what the shot ‘should’ look like.
So what does Scene Referred Color (SRC) Management mean?
Unlike Display Referred Color Managment, the application you’re using to grade (Resolve 12) is actively involved in the color management of footage, timelines and output.
Essentially, you can define the color profile of media in your project, define the working color space of a timeline, and also define the output color space.
In Resolve 12 all this under the hood processing is known as DaVinci YRGB Color Managed or Resolve Color Managment (RCM) for short.
You can switch a project from the default DaVinci YRGB color science to YRGB Color Managed. Or if you’d like you can also switch into two other color management schemes ACES 1.0 & ACES 1.0 LOG (more on those in a moment).
Just keep in mind, you’re under no obligation to use RCM.
If you like the way that Resolve has always worked, continue to use it that way, but as I’ll show in the video and explain more below, there are some compelling reasons to work with RCM.
What About ACES?
One of the first questions I asked when RCM was announced with Resolve 12 was “What’s the difference between RCM and ACES (Academy Color Encoding System)?”
While I know some of the technical differences – IDTs, for example, are provided by camera manufacturers while RCM Input processing is provided by BlackMagic – the end goals are really the same.
Scene Referred instead of Display Referred Color Management.
If those in your pipeline are in an ACES workflow, then by all means, use ACES color science.
If you’re an editor or colorist just looking for a little more control over color management, but have no overwhelming reason to go to ACES, then in my opinion, RCM provides a slightly easier and more predictable path.
Don’t get me wrong – ACES (and ACES Log) is a great system. However, since I’m mainly a broadcast colorist when I mention ACES and IDTs, ODTs, etc., I get a lot of blank stares from others in my pipeline!
With that said, I’m not sure I’m 100% sold on RCM either, but from an implementation point of view, and predictability of the math transforms RCM seems more predictable and giving me better results than ACES.
Different From A LUT?
Above I said the RCM usings mathematical transforms to process footage and that Scene Referred Color Management essentially is an active approach for defining the color in a shot, timeline, or output
Doesn’t a LUT do those things?
Absolutely!
A Look Up Table is also a way of transforming clips, an entire sequence or an output.
But LUTs, because they’re simply a table of hard-coded plot points, tend to do things like clip image detail, or be somewhat destructive in the way they transform a shot.
You’ve no doubt seen this and it’s the reason why Patrick, Dan and I for years have preached that a LUT is not a ‘magic bullet’ solution.
You’ll often have to do pre-LUT adjustments and post-LUT adjustments to work around the ridged nature of a LUT.
RCM (and ACES too for that matter) use quite sophisticated math that always allows images to be transformed with the most latitude and preservation of information possible allowing you the colorist to avoid much of the 2 (or more) steps it takes to properly process footage in a LUT workflow.
Of course, that doesn’t mean that you can’t use LUTs, or that you can’t use LUTs in a color managed workflow – of course you can!
However, in a color managed workflow, in my opinion, LUTs are much more useful for dialing in a creative look vs. technical transforms.
Input, Timeline & Output Color Spaces
To enable Resolve Color Management (RCM) all you need to do is open up your project preferences (cog icon in the lower right hand corner of the UI).
On the Master Project Settings Tab and with the Color Science pull down, you can choose between standard DaVinci YRGB processing, ACES & ACES LOG 1.0 processing and the brand new YRGB Color Managed Option.
I want to make one thing really clear – there is no right or wrong with your choice – what you choose is all about workflow, and to a certain degree your preference about how you like Resolve’s various grading controls to work and ‘feel’ with the different color science options.
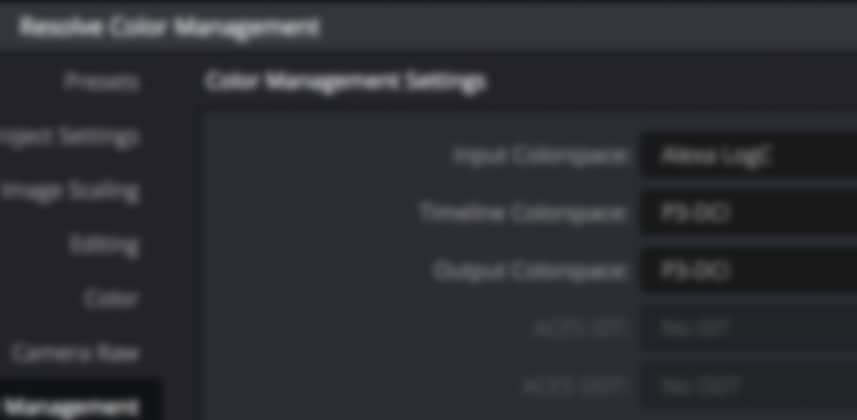
After choosing YRGB Color Managed, you can jump over to the Color Management Tab.
In this new Pane (previously called Look Up Tables) there is a new section at the top for Color Mangement settings.
When using RCM you can choose color processing for Input (media in your media pool), the Timeline, and for your Output.
All three of these options default to REC 709 Gamma 2.4, but a quick click in one of the pull downs reveals a plethora of options.
It’s important to note that Input choice is especially important. While you can manually assign an Input Colorspace in the media pool or on the color page this option governs the default behavior of new media added to a project – which if you don’t realize that’s happening can be a bit confusing.
Additionally, Output Color space will change how your viewer & renders look.
Practical Color Managment
So RCM sounds good but in practical use what purpose does it really serve?
As this is a ‘First Look’ Insight I reserve the right to continue to develop my thoughts on RCM, but I think have some good uses of it now:
Log Conversion – normalization of LOG footage is something we all do – either with a LUT or manually. Well, with RCM you can avoid both of those things, potentially streamlining your workflow. By assigning say Arri Log C as the input color space for a bunch of Log Alexa footage, your footage is normalized automatically and without having to use a LUT.
Work In A ‘Comfortable’ Space – Many folks will stop right with Input conversion and continue to work in REC 709 2.4 Gamma (timeline default), but you’re free at any time to switch your timeline color space to whatever you prefer. Why do that? For me, the reason is mainly feel, and the way that many of the grading controls ‘feel’ different in different color spaces. For example moving the color balance controls around with a timeline set to REC 709/sRGB the results are vastly different than setting the timeline to DCI XYZ (try it, it’s fun!).
Output Visualization – After getting a combination of Input/Timeline Colorspace set the way you’d like the next thing is Output color space. The option not only governs your output to an external monitor, but also the viewer and final renders. So let’s say you’ve converted LOG C media on input using the Log C input option, you’re working at REC 709 for timeline processing & output because the project is going to TV, but then you find out it also needs to go to the theater. Well you could do trim pass on the project by switching over to DCI P3 for your output color management, creating a new version of each shot and then finessing the project for P3 as needed.
Sure you could do this type of things with LUTs, but I think many will find this workflow easier.
What’s really cool about scene referred color management is that it help you better understand (visually) what projects will look like.
For example, maybe you only grade corporate projects destined for the web (sRGB). Even though REC 709 is almost the same as sRGB why risk it? Change all of your color management settings to sRGB and now you have an end to end sRGB web color pipeline!


 Channel


