


Poster Design Textures and Halftones for Screen Printing

Release date:2019
Skill level:Beginner
Language:English
Exercise files:Yes
Course URL:https://www.skillshare.com/classes/Poster-Design-Textures-and-Halftones-for-Screen-Printing/1232514354
Bring your artwork to life! This class is for designers who want turn their work into a screen printed poster. We’ll teach you how to convert your digital design to screen-printable color separations. You’ll learn how to create realistic textures and use halftones to maintain the details in your work.
This class is a great follow up from our first Skillshare class, Rock Poster Design: From Concept Development to Execution.
If you don’t have a design that you’re prepared to use for the project, don’t worry. We’ll provide the working files for one of our original designs. You’ll be able to download and work with these files as we take you step by step through our process of converting that same design into print ready files.
If you do have an original design that you’d like to use for your class project, more power to you! You’ll also be able to apply the same steps and techniques to your own artwork. (Note: we recommend using a basic design for the project as artwork with multiple colors or photorealism will increase the degree of difficulty.)
What You’ll Learn
Basic Principles. Considerations in the screen printing process.
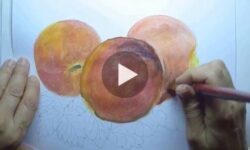
Halftone Textures. Create halftone textures from an original photo or scan.
Consideration of Color. Separate full color artwork into individual color separations.
Trapping. “Trap” your artwork hide errors in the printing process.
Final Touches. Techniques and settings to use to create halftoned files for printing.
Testing. Test your file to easily predict results on paper.
What You’ll Do
Work from existing DKNG artwork or use your own artwork to add texture and create print separations that are ready for screen printing. You’ll have the opportunity to share your progress with your classmates and follow along step by step as you prepare professional quality print separations.
00 Trailer
01 Introduction A Screen Printers Perspective
02 Textures Part 1 of 3
03 Textures Part 2 of 3
04 Textures Part 3 of 3
05 Separations Part 1 of 5 Pathfinder Method
06 Separations Part 2 of 5 Pathfinder Method
07 Separations Part 3 of 5 Manual Method
08 Separations Part 4 of 5 Manual Method
09 Separations Part 5 of 5 Manual Method
10 Pro Tip Know Your Colors
11 Pro Tip Overprinting
12 Pro Tip Trapping Defined
13 Trapping Part 1 of 2 Pathfinder Method
14 Trapping Part 2 of 2 Manual Method
15 Halftones Part 1 of 3
16 Halftones Part 2 of 3
17 Halftones Part 3 of 3
18 Pro Tip Bitmap for Predictable Results
19 Pro Tip Halftone Considerations
20 Explore Design on Skillshare
source_imagery.7z


i m not crying, you r crying <3