In Action – Working with Alpha Channels Part 1
Release date:2017, May 22
Duration:00 h 13 m
Author:Patrick Inhofer
Skill level:Intermediate
Language:English
Exercise files:Yes
Working with key signals in DaVinci Resolve doesn’t have to be complicated – but it’s not intuitive either. And once you get the basics down, you start to realize how Resolve’s handling of key signals allows for some sophisticated secondary corrections.
If you’re new to working with external mattes then you’ll want some quick definitions of the terms I’m using in this 2-part Insight:
External Matte – These are video clips of rotoscoped elements generated (usually) from another software package, such as After Effects or Mocha Pro. They are usually rendered as pure grayscale video images (although there are other workflows).
A folder of external mattes for a car commercial
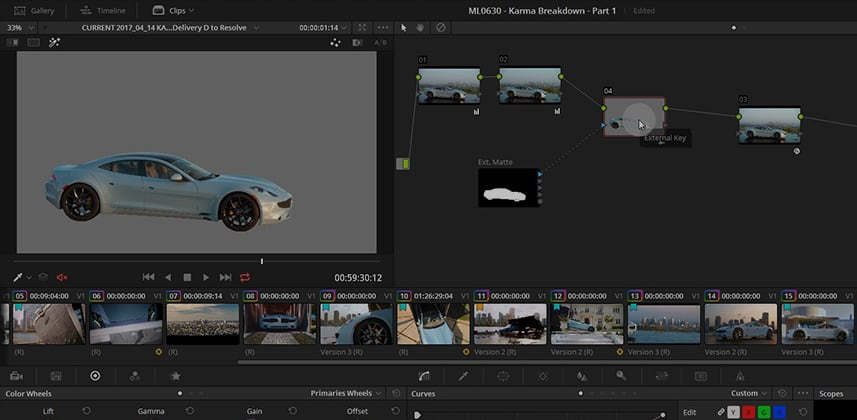
Key Signal / Matte Channel – The Key Output of a node is what I interchangeably call a Key Signal or the Matte Channel. In DaVinci Resolve, to quickly see the Key Output of a node, just put yourself into Highlight mode. What you see in the Black & White Highlight mode is precisely the Key Output of a node.
An external matte feeding multiple Key Inputs.
Alpha Output – In DaVinci Resolve, the Alpha Output usually refers to the output of the Node Editor. If you have multiple video tracks, you add an Alpha Output to see lower video tracks below it.
An Alpha Output has been added on this Node Graph
Part 1: Exploring Multiple Uses of Key Signals in DaVinci Resolve
In this Insight I’m breaking down one shot in a car commercial, specifically looking at how I managed these different types of key signals. My goal is for you to start thinking about the different ways of using key signals beyond just ‘punching a hole’.
In Part 2 we explore how to combine key signals to build custom matte channels directly within the Node Editor.


 Channel


