Ad Clicks : Ad Views : Ad Clicks : Ad Views : Ad Clicks : Ad Views : Ad Clicks : Ad Views :
Oh Snap!

It looks like you're using an adblocker. Adblockers make us sad. We use ads to keep our content happy and free. If you like what we are doing please consider supporting us by whitelisting our website. You can report badly-behaved ads by clicking/tapping the nearby 'Advertisement' X text.

The Complete guide to ZIVA Dynamics

/

Release date:2022, March

Author:ALAOUCHICHE Abdelhamid

Skill level:Beginner

Language:English

Exercise files:Yes

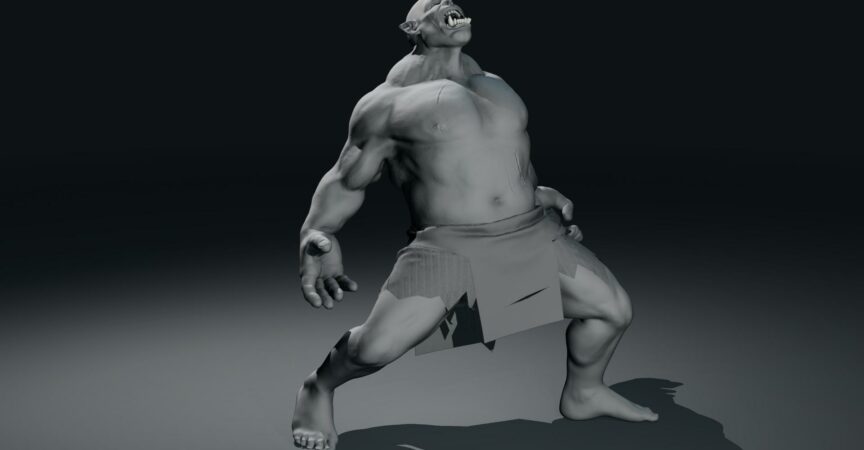
Ziva Dynamics is a plugin that was used in many Hollywood and Marvel movies such as Venom, Captain Marvel, Spider-man, Godzilla, Jumanji,

Ziva was recently adapted in games such “Hellblade 2 Senua’s Saga” and will be used more after being acquired by Unity3D company.

The Ziva pipeline can be daunting because everything in it is related to each other, from Modeling to Animation.

I put this course together for my students to clarify all the ambiguities concerning the Ziva pipeline in a single crash course that is carefully structured and starts from a character in the scene to a final shot.

The course is divided into multiple chapters, and most lectures are under 12 minutes long (The most extended address is 15 minutes) to make it easier for the students to follow and go back to any particular topic at any time if needed.

Students will start the course with the necessary knowledge concerning preparing the character for the Ziva plugin.

Chapter 01 Modeling
Students will learn how to place the bones and muscles and quickly create the fascia and inner mesh to create a water-tight mesh. Even though you won’t be modeling in a studio, you need this knowledge to guide the modeler to deliver compatible modeling for the Ziva.

Chapter 02 Rigging
The longest chapter and the heart of Ziva because all the muscles and their deformations are going to ride on top of our rig, So we make sure to teach the students how to rig a character using a couple of methods anatomically, we even provided two solutions for the problematic elements, one is simple, and the other is advanced.

Chapter 03 MOCAP
Ziva is a plugin based on absolute deformation equations; students will explore the advantage of the rig created previously and how easily the rig is set up to accept MOCAP of any kind. Also, the animator can introduce manual tweaking using our friendly rig.

Chapter 04 Ziva
Students will start learning the Ziva plugins with a practical approach, hands-on; in each lecture, they explore a feature of Ziva while building their Ziva rig until the end.

We wrap up this chapter by learning how to merge the skinned mesh and the ziva simulation to get the animation of the fingers and the head and more explanation about fixing problems from the simulation.

Watch online or Download for Free
01 – Ziva Essential

01. Working files walk through
02. Welcome
03. Why Not Ziva Anatomy Transfer
04. The importance of Scale
05. Prepare the head for facial rigging for the future
06. Prepare the Character for the Ziva Plugin
07. Ziva General Workflow
08. Ziva General Workflow extra

02 – Modeling The biped Skeleton

01. Prepare the Human Skeleton
02. Bones Placement Part 01
03. Bones Placement Part 02
04. Bones Placement Part 03
05. Mirror and Clean the Human Skeleton for the Ziva

03 – Important Note

01. If I werent recording !

04 – Modeling the Muscles

01. Prepare the human muscles
02. Muscles placement – Pectoralis Upperarm
03. Muscles placement – Forearm
04. Muscles placement – Torso
05. Muscles placement – Legs
06. Mirror and Clean the Muscles for the Ziva
07. Quick note – Extra modification

05 – Modeling the Fascia

01. How to quickly model the Fasciausing Zbrush
02. Combine the InnerOuter Layers of the Fascia
03. Keep track of the Inner layer

06 – Rigging

01. Breakdown the rigging phase for the Ziva Characters
02. Start Creating the Skeleton Driver Rig
03. Driver Skeleton – Legs Arms
04. Driver skeleton – Root Feet Hands
05. Finish and Mirror the Driver Skeleton
06. Human skeleton (HSK) – Leg IK
07. Human skeleton (HSK) Mirroring Leg IK
08. Human skeleton – Reverse Foot
09. Human skeleton – Reverse Foot Attributes
10. Understanding the IK system to reverse engineer it
11. Map the HSK to the Driver Skeleton Right Leg
12. Map the HSK to the Driver Skeleton Left Leg (Extra)
13. Create the Arm IKFK switch
14. Map the HSK to the Driver Skeleton – IK Arm
15. Map the HSK to the Driver Skeleton – FK Arm
16. Connect the IKFK to the Driver Skeleton Left Arm
17. Connect the IKFK to the Driver Skeleton Right Arm
18. Rig the forearm Radius bone
19. Rig the forearm Ulna bone
20. How to Mirror the forearm rig
21. Another approach to rig the forearm – Extra
22. Create the Scapula and Clavicle Joints
23. Scapula Simple approach
24. Scapula advanced approach – part 01
25. Scapula advanced approach – part 02
26. How to Mirror the Scapula rig
27. Reparent the arm to the New clavicle
28. Spine simple setup
29. Spine advanced setup – part 01
30. Spine advanced setup – part 02
31. Rig the Neck Pelvis
32. Rig the Fingers
33. Connect the different parts of the HSK
34. Connect the knee PV
35. Connect the Driver Skeleton to the remaining parts
36. Connect the Driver Skeleton to the Fingers
37. Plan the Mesh (Character) rig
38. Lower arm twist – Method 1
39. Upper arm twist – Method 2
40. Partial joints
41. Cleanup the scene and create Sets

07 – Skinning

01. Skinning overview
02. Skinning the leg
03. Skinning the feet Adding the partial joints
04. Skinning the upper leg
05. Skinning the torso
06. Torso Neck Arm Weight blocking
07. Smooth between Weight blocks
08. Arms skinning
09. Copy the skin weight

08 – Clean the Rig

01. Finish the rig for the animator

09 – Mocap

01. Rotation order review
02. Map the Driver Skeleton to the human IK for Mocap
03. Merge mocaps from Mixamo

10 – Export the Animation

01. Prepare the time line and export the animation
02. Create a one line script to Map the Zbones

11 – Ziva Muscles

01. Ziva overview
02. Ziva attachements Bicep Brochalis
03. Ziva lunch panel scene playing with attachaments
04. The Triceps
05. The Deltoid

12 – Ziva Fibers

01. Fire the muscles – method 01 using LOA
02. Fire the muscles – method 01 using Nodes
03. How to fix the excess of jiggling using the ZSolver
04. Multiple layers of fibers tissue for the Deltoid
05. Pectoralis fibers strength

13 – Ziva EnDis Areas for quick performance

01. Enable disable muscle simulation for quick performance

14 – Trapizius Muscle

01. Trapizius

15 – Ziva Mirroring

01. Ziva Miirroring with or without the LOA

16 – Ziva – Finish the Torso Muscles

01. Trapizius fibers
02. Abs Oblic and Serratus Muscles
03. Multiple Materials for more jiggling
04. Abs Oblics and Serratus -fibers
05. latissimus dorsi – Limit the stretch using fibers
06. Neck muscles
07. Teres Spenatus Muscles
08. Forearm Muscles

17 – Ziva Simulation

01. Simulation tweaking – Upper torso
02. Simulation of the upper torso – Fix the Colisions

18 – Lower Body Muscles

01. Thigh Muscles part 01
02. Thigh Muscles part 02
03. Cafs Muscles

19 – Ziva Export the Simulation

01. Export the muscles simulation

20 – Ziva Fascia Simulation

01. Prepare the scene for Fascia Fat simulation
02. Ziva Attachements – direction matters
03. Fascia fat part 01
04. Fascia fat part 02
05. Outerskin fix attachement
06. Innerskin attachements
07. Fascia simulation

21 – Combine the Meshes

01. Combine the ziva sim with the raw skinning alembic
02. Hide the seems of the connection
03. Reduce the effect using the skinned mesh

22 – Shot Sculpting for Fine Tweaking

01. Shot sculpting using maya
02. Shot sculpting using mush3d software
03. Shotscuplting walkthrough

23 – Final – ClothViewport Render

01. Cloth using Marvelous Designer
02. Viewport Render

24 – Extras

01. Riggng helper script
02. How to simply Create an align script
03. Displacement in viewport 2.0

[CGCircuit] The Complete guide to ZIVA Dynamics.7z.rar

[CGCircuit] The Complete guide to ZIVA Dynamics_Subtitles.7z


Join us on
  Channel    and      Group

  • Facebook
  • Twitter
  • Google+
  • Linkedin
  • Pinterest

1 Comments

Leave a Comment

Your email address will not be published. Required fields are marked *