3D Portraits with Paper Layers (Spanish, Multisub)
Release date:2022
Author: Ale Rambar
Skill level:Beginner
Language:Spanish
Exercise files:Yes
Learn to use paper to create three-dimensional compositions with topographical techniques
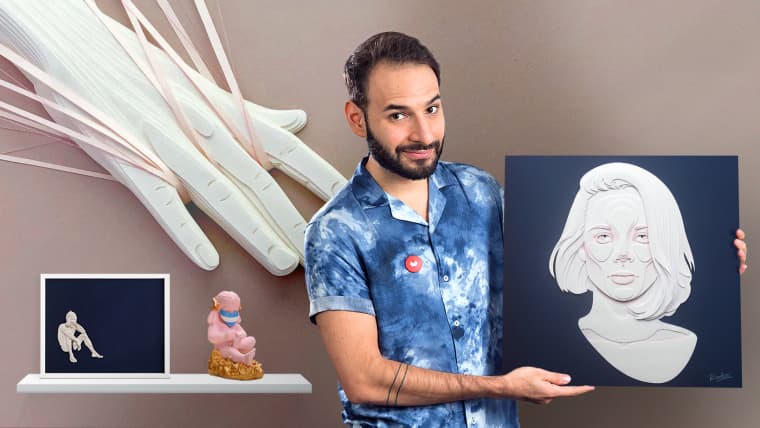
What would human bodies be like if we gave them the same treatment as a topographic map? Costa Rican architect and visual artist Ale Rambar discovered in the topographic technique his source of inspiration, creating sculptures with layers of paper such as portraits and human bodies to talk about gender equality, tolerance and respect for the environment. His work accompanied the Costa Rican Olympic team at the 2016 Rio de Janeiro Olympics, designed the European Union’s Gender Equality Award in Costa Rica and was also selected to represent Costa Rica at the International Art Biennale of Beijing
In this course you will learn to create a portrait with volume from layers of paper. You will see how to calculate each layer, cut it, assemble it and paint it to result in a work with relief. Through this technique you can create models, lettering , illustrations and works of art in the third dimension using paper as the main material.
About this course
You will know the artistic concept of Ale Rambar and how he found inspiration to develop his work from topographic maps (mainly used in architecture), transferring the technical treatment that is given to a terrain to the human body. You will see his most representative works and their referents, among designers, architects and artists.
Before you begin, Ale will explain the materials and tools you will need to create your three-dimensional work on paper. First, the ideal types of paper to perform the works and all about the grammages and the most desired characteristics of each. Then you will be presented with cutting and pasting tools, in addition to the paintings, which in this case will be watercolor.
Then you will start creating your piece. From a photograph, you will draw on it the curves on transparent paper, which you will then transfer to the final paper of your three-dimensional portrait.
Next, you will cut the curves one by one with a cutter, and assemble them using double-contact tape. As a last step, but not least, you will add watercolor details to give more personality and life to your paper sculpture.
Once you have finished the production stage you will start to frame your work. You will see what is the ideal type of framing and how to transform a normal frame into one with depth, using pen cardboard and other basic elements.
To finish the course, Rambar will show you tips to preserve your work, which apply both to paper works and watercolors, and some conservation techniques that will be very useful.
What is this course’s project?
You will plan, design and make, step by step, a three-dimensional composition of 45 x 45 cm of 10 layers of paper cut and painted by hand.
Who is it for?
To artists, designers, illustrators, architects and anyone interested in creating works from paper layers
What you need
It is not necessary to have previous knowledge, only patience and desire to learn. If you have knowledge of serial drawings or Adobe Illustrator, it will be easier for you to complete the course, however it is not essential to learn the technique.
On the materials, you will need as a base watercolor paper, parchment paper and cardboard, graphite pencils, colored pencils, colored pens, markers, brushes, watercolor, scalpels, scissors and a cutter, and double-sided adhesive tape of foam or glues of different types.



 Channel

where are the subs 🙁