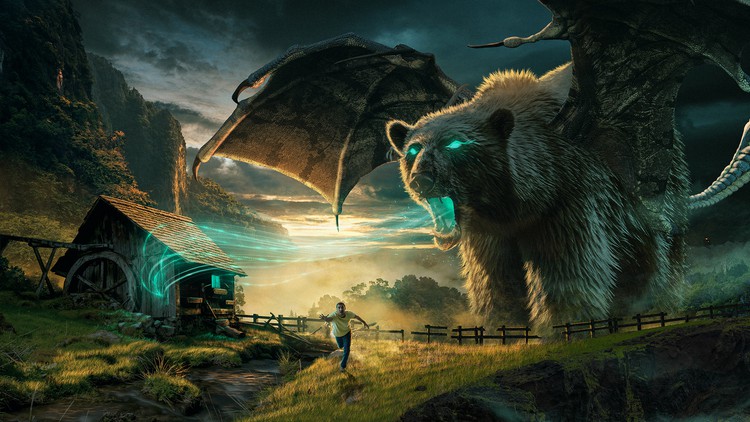
Epic Photo Manipulation using Adobe Photoshop by Nour Design
Release date:2023, April 20
Duration:04 h 56 m
Author:Nour Desig
Skill level:Beginner
Language:English
Exercise files:Yes
Welcome to the Photo Manipulation Design course using Adobe Photoshop! I’m thrilled to guide you through this class and share my knowledge and techniques to help you enhance your photo manipulation skills.
Throughout this workshop, we will focus on creating engaging photo manipulation designs with an emphasis on working with type. I will walk you through each step, providing detailed instructions and sharing best practices that I have personally used in my own work.
Here’s an overview of the steps we will follow:
- Generating the Idea: We will start by brainstorming and developing a concept for our photo manipulation design.
- Getting Started with the Background: We’ll begin building our design by working on the background elements, setting the foundation for the overall composition.
- Preparing Foreground Elements: We’ll focus on gathering and preparing the elements that will be placed in the foreground of our design.
- Preparing Midground: This step involves preparing the elements that will be placed between the foreground and background to add depth and dimension to the composition.
- Creating the Monster: We will learn techniques for creating a visually compelling and impactful monster character for our design.
- Adjusting Lightness Values: This step covers adjusting the lightness values to ensure a harmonious balance within the design.
- Adjusting Saturation: We’ll explore techniques for adjusting the saturation of different elements to enhance their visual impact.
- Adjusting the Colors: We’ll focus on adjusting and refining the colors used in our design to create a cohesive and visually pleasing composition.
- Drawing Light and Shadow: This step involves adding light and shadow elements to create depth and realism within the design.
- Drawing Ambient Lights: We’ll explore techniques for adding ambient lights to further enhance the atmosphere of our composition.
- Adding Fog Effect: We’ll learn how to incorporate a fog effect to add mood and depth to our design.
- Final Effects and Grading: In this final step, we’ll apply additional effects and grading adjustments to polish our design and give it a professional finish.
Throughout the course, it’s recommended to have basic familiarity with Adobe Photoshop. This will allow you to follow along and make the most of the techniques and tools demonstrated.
As a fun challenge, I encourage you to use the same images provided in the course and create your own concept with different color modes. This will help you further develop your creativity and showcase your personal touch.
At Nour Design, our goal is to enrich online content in the field of graphic design by sharing practical knowledge and experience in an easy and illustrative way. Through our tutorials, we aim to provide insights into the specific design process and the concept ideas behind each design.
I hope you enjoy watching and learning from this course. Get ready to enhance your photo manipulation skills and create captivating designs using Adobe Photoshop. Let’s dive in and unleash your creativity!


 Channel


whats the rar password