


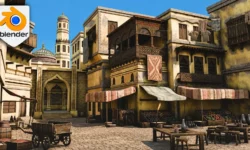
A quick way to build a realistic scene in Blender by Sime Bugarija

Duration:02:17:00
Actual Duration:2h 17m
Release date:2023, October
Skill level:Beginner
Language:English
Exercise files:Yes
Course URL:https://www.udemy.com/course/a-quick-way-to-build-a-realistic-scene-in-blender/
Generating a full CGI scene is exhilarating yet time-intensive, demanding an array of skills to achieve a realistic look. It involves modeling, texturing, lighting, post-processing, and more. But what if we have a photo or video and simply wish to expand it with additional elements?
In this tutorial, we’ll delve into precisely that – extending a photo with 3D elements using the free program Blender.
Here’s a glimpse of what we’ll cover:
- Importing an image and camera into Blender with accurate perspective.
- Adjusting lighting, shadows, and reflections to harmonize with the photo.
- Enhancing visually bland and low-resolution textures.
- Incorporating overlays to impart a more cinematic feel.
- Detailed insights into post-processing, including color grading and more.
By the conclusion of this tutorial, you’ll be equipped to expand any photo with various 3D elements, yielding more realistic renders in a significantly faster manner. This comprehensive guide includes all resources, relevant links, and the final .blend file.
No prior experience with Blender is necessary for this tutorial. It’s a step-by-step guide tailored for beginners.
Tutorial Breakdown:
- Part 1: Inspiration and preparation (7 min)
- Part 2: F-spy (14 min)
- Part 3: Blender, camera, and character import (7 min)
- Part 4: Combining background image and render (5 min)
- Part 5: Gas station modeling (15 min)
- Part 6: Crafting lighting and shadows (15 min)
- Part 7: UV Project modifier (6 min)
- Part 8: Color matching (5 min)
- Part 9: Enhancing textures (6 min)
- Part 10: Generating ground reflections (12 min)
- Part 11: Detail addition (9 min)
- Part 12: Overlays (11 min)
- Part 13: Post-processing – Part 1 (9 min)
- Part 14: Post-processing – Part 2 (12 min)
Part 00 – Tutorial introduction
Part 01 – Inspiration and preparation
Part 02 – F-spy
Part 03 – Blender, camera, and character import
Part 04 – Combining background image and render
Part 05 – Gas station modeling
Part 06 – Creating lighting and shadows
Part 08 – Color matching
Part 09 – Improving textures
Part 10 – Creating reflections on the ground
Part 11 – Adding details
Part 12 – Overlays
Part 13 – Post-processing – Part 1
Part 14 – Post-processing – Part 2
[Udemy] A quick way to build a realistic scene in Blender by Sime Bugarija_Subtitles.7z


Excuse me, can you upload part 07 please?
Part 7 is missing
part 7 please